

Taking cool photos of people (and not only) often requires the use of tripod-mounted lamps. For my first lighting set (3 lamps, stands, RF controllers, etc.), I spent a total of around 250 USD and described it in an article many years ago. It was an incredibly low price for such possibilities (one good Nikon/Canon Speedlight was more expensive). Since then, a lot has changed on the market, so it’s time for a article about what I would buy today.
I will also write about constant light lamps because many people still wonder if it’s a better option than flashing. Especially since LED lighting is now available everywhere.
Table of contents:
- Flash light – advantages
- Disadvantages of speedlights
- Cheap studio lamps
- YongNuo YN–560 (III/IV)
- How many lamps do you need?
- What modifier to start with?
Octagonal or rectangular?
What size? - Sample set
- Continuous light
Fluorescent lamps
Halogen lamps
LEDs - Summary
What lamps to start with?
I would definitely buy cheap speedlights instead of studio ones to start with. Why? Because they have a great quality-to-price ratio and are incredibly versatile. They work well both in the studio and outdoors (of course, in shaded areas). They weigh almost nothing and take up very little space. You can place them where using studio lamps would be a big problem. The only issue is finding the right holder or enough adhesive tape or zip ties (except lamps and camera, these are the most important things at every photoshoot).
Advantages of flash light
To change the light color in a speedlight, all you need is a few centimeters/inches of foil instead of a large sheet. To power it, you only need 4 AA batteries instead of expensive battery packs or generators. Ikea’s LADDA rechargeable batteries are good and cheap alternative to Eneloops. It’s also very easy to make various modifiers yourself – need a narrow beam of light? Grab the nearest magazine and wrap it around the lamp. Sometimes, you don’t even need to do that because changing the zoom in the lamp settings may be enough. Need even more concentrated light? Take some drinking straws and shine the lamp through them… A tiny hair softbox? A bit of paper and possibly aluminum foil will do the trick.
All these things lose their significance when you have a complete studio setup, but they are usually very important at the beginning when you want to gain the greatest possibilities at the lowest cost.
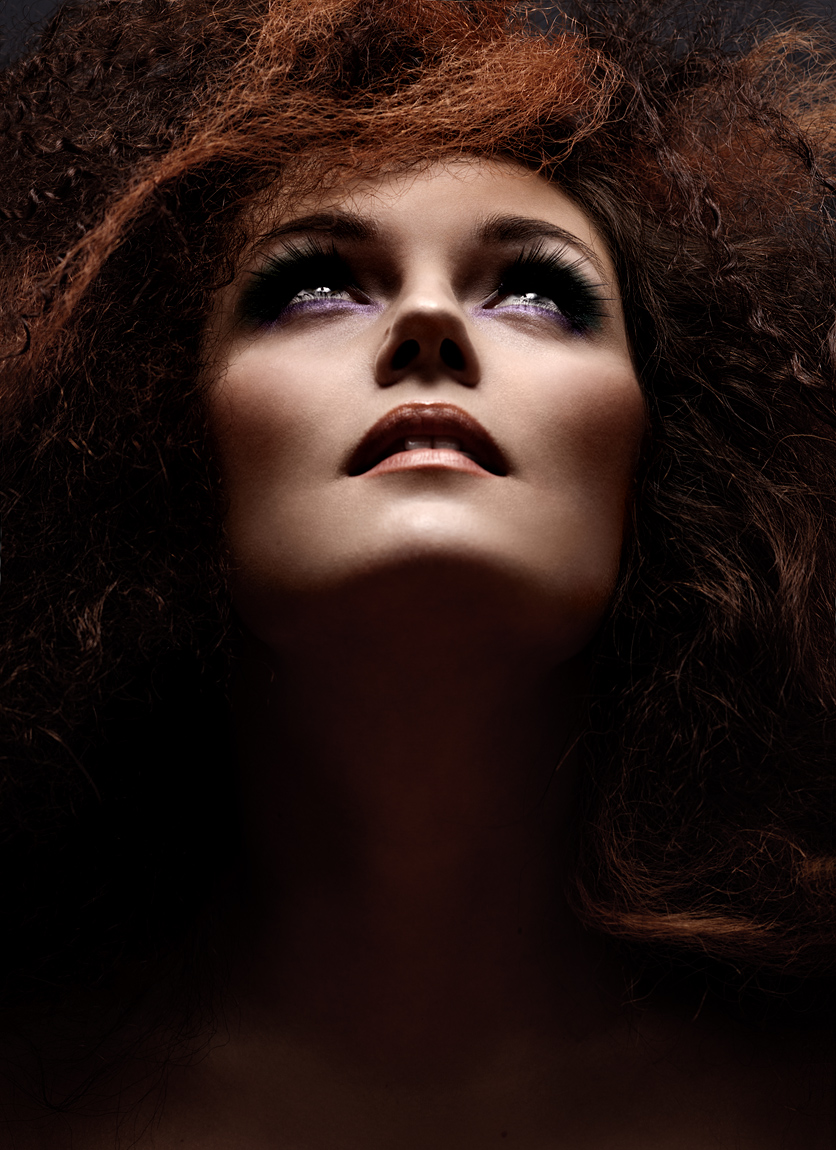
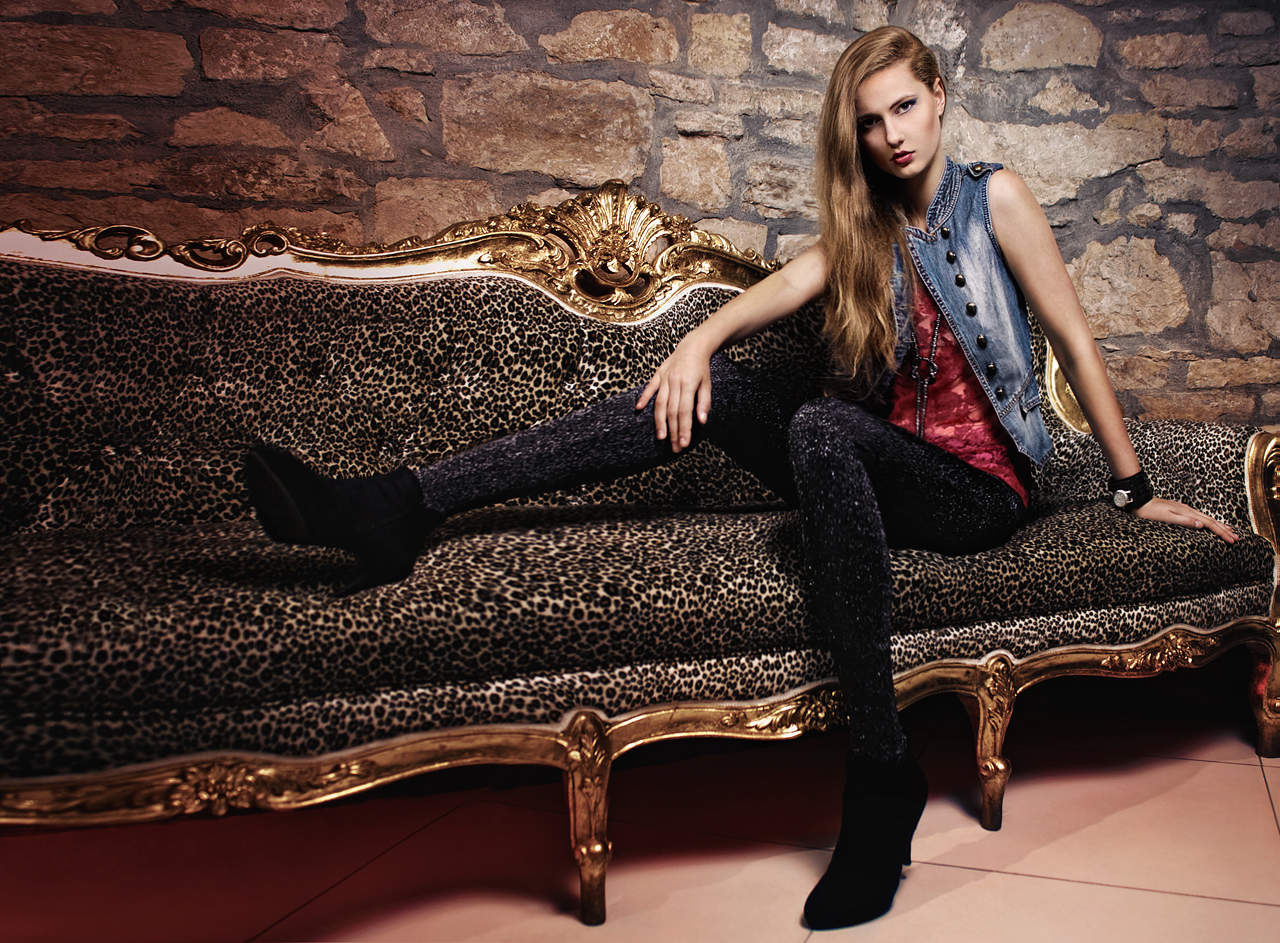
 One of many photos I took using a YongNuo speedlight at the very beginning of learning strobing
Disadvantages of speedlights
First of all, they have low power, require battery charging, and cannot take long series of photos at the maximum power – the overheating protection will turn on from time to time. However, in this type of photography, like mine, flashes are usually taken with breaks.
At the beginning, the lack of pilot light, which shines continuously, may also seem like a problem. This means that you can only see the effects after taking the photo. Well, you can see how the lamps shine, on the digital camera just take a test photo and you’re done – it will tell you much more about the lighting than pilot light. Also, you can click the test button on the flash and observe how the light spreads, which I often use.
The truth is that I don’t use pilot light to make it easier to set up the lamps, but mainly to facilitate autofocus work and change the appearance of the eyes. A lot of constant light gives small pupils and large irises, and little light gives the opposite effect. At the beginning, no one really cares about such details. And autofocus? During one of the photoshoots, I used a phone flashlight on the model’s face to stop the AF from flying back and forth. However, there were usually no complications, and the ceiling light was enough – you can’t see it in the photo anyway, and the autofocus is sufficient. There shouldn’t be any problems with autofocus in cameras from recent years.
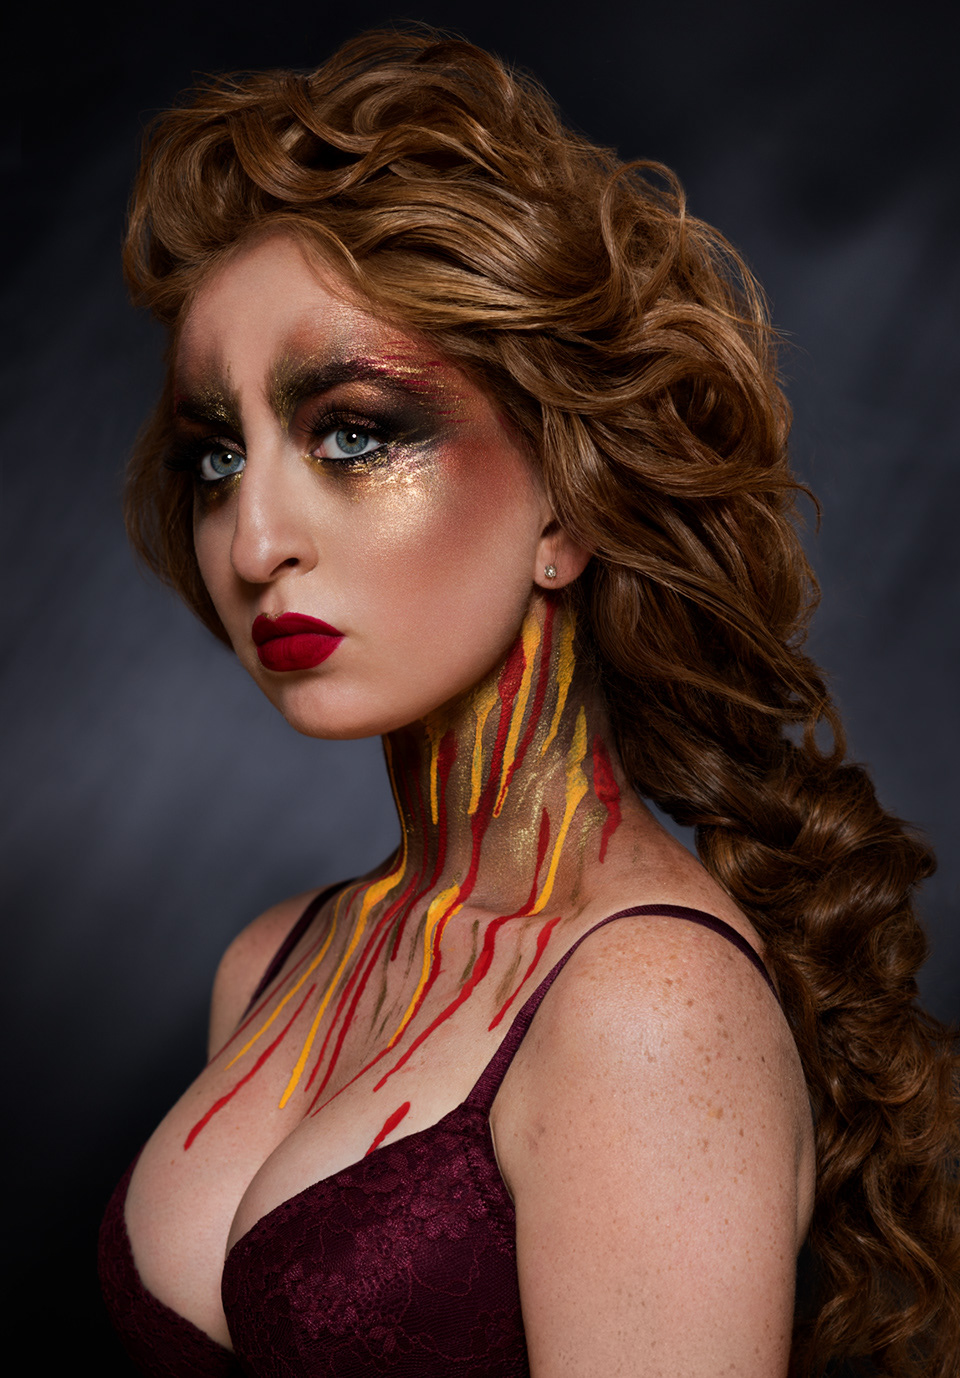
 One of many photos I took using only a speedlight
Cheap studio lamps
In theory, you could buy a very cheap studio lamp to start with, but the cheapest ones differ significantly from more expensive models. Often one flash will be stronger and of a different color than another on the same lamp. These lamps may lack active cooling, so after a series of releases, they will block for a while (just like speedlights). The pilot light in them is so weak that it might as well not be there at all, and hanging a slightly heavier modifier makes the lamp unable to maintain the set tilt angle. You can’t find good power regulation in them either. So, cheap studio lamps are far from “real lamps.” On the other hand, cheap speedlights work incredibly well and lack only automation, which is unnecessary in strobing. They also lack the HSS mode, which I don’t use either.
YongNuo YN–560 III or IV
Now let’s move on to what I would buy today to start with. YongNuo YN–560 III and YN–560 IV are my favorite lamps. I’ve had them for many years, and before that, I used a much simpler YN–460 II model for several years. In some ways, it was better – lighter weight, smaller size, incredibly easy to use. However, this was due to much smaller possibilities. Today, I wouldn’t buy that model because the new one is much better (which I certainly wouldn’t say about YN-560 in revisions I and II, only III and IV made a revolution).
The power of YN–560 III/IV is similar to good Nikon/Canon speedlights models (the guide number at ISO 100 is 58). There is often a question of how it compares to studio lamps. It is impossible to compare these powers because they are completely different constructions. Studio lamps flash with a much wider angle, so they will behave differently in different modifiers, especially in a beauty dish. But we can safely assume that every studio lamp will be stronger than a reportage lamp. Even if it has only 100 Ws. This is not great, but it is enough to start with, and later it will be an excellent addition to stronger studio lamps. Moreover, in additional lamps, such power often suffices, and speedlights are small enough that you can use two or more in some modifiers.
 One of many photos I took using only a speedlight
Another advantage of YN–560 is the zoom, meaning the lamp can flash with a narrower beam of light. This is not a big advantage because the widest angle will almost always be needed, but sometimes it may come in handy. There is also a very large power adjustment. You can go down to 1/128, and the power change is convenient and precise. You can set not only 1/64 but also |1/64+1/3| and |1/64–1/3|.
Revision III is almost no different from IV. In many countries, prices for both models are very similar (about $75-$85). Theoretically, each of these lamps is available in a version for different systems (Canon, Nikon, etc.), but they are manual lamps, so they are all the same. They only differ in the cable included in the set, which you probably won’t use anyway. Since this is a manual lamp, forget about TTL, and there is no HSS (for photographing at very short times). However, using lamps on tripods, I don’t need these things.
YongNuo lamps, besides the photocell, have built-in radio, so you don’t have to buy additional triggers, which are almost always necessary. Theoretically, the photocell alone is enough, but in practice, I hate it – I often had to fiddle to make the lamps see each other. It’s OK in rooms because the flash reflected from the walls will reach almost everywhere, but it’s worse in spacious outdoor areas. Radio solves this problem. Especially since the one built into YongNuo has a very good range and has never caused me any problems, which I can’t say about my first (and surprisingly much more expensive) triggering system.
The radio in this model (III and IV) is not only used to trigger the flash – it can also change the lamp parameters. Provided you have the appropriate trigger, which is YongNuo YN–560TX, costing $45 it is definitely worth buying. You can use a regular trigger (YongNuo RF-603), but then you lose remote power control.
 YongNuo YN–560TX
Instead of a trigger on the camera, you can mount a YongNuo YN–560 IV lamp – it has a built-in transmitter that can change the parameters of other lamps. This is what distinguishes YN–560 IV from III. In revision III, there is no transmitter, only a receiver. If you also have YN-560TX, then this function is unnecessary, and III is enough.
Using a lamp as a transmitter is inconvenient – the lamp is larger and heavier, and it allows you to control 3 groups of lamps, while the YN–560TX trigger supports up to 6. Although let’s be honest – 3 are enough for almost anyone who is just starting out. And to have a lamp on the camera, you need to have an excess of them…
For me, the ability to remotely change settings is a killer feature. Thanks to this, even without an assistant, the session goes very smoothly because you don’t have to running to the lamps all the time. Although in Nikon, I have it in the form of CLS, but firstly, it requires lamps that are many times more expensive, and secondly, it works much worse because in my model, the signal is sent by infrared, not radio (current models are better).

How many lamps do you need?
Buying the first lamp is a revolution, because suddenly you can start learning how to take photos at a completely new level. I even wrote an article about photographing with one lamp and included examples of photos from my photo sessions.
It’s enough to start with. If someone has many lamps, they can unnecessarily complicate their lighting setups. You can see this perfectly on Youtubers who often light themselves with 6 lamps there, and two could achieve a much better effect.
Of course, later it’s worth having more lamps, and some of them will remain in the camera bag on some photo sessions. I myself often use two flashlights for full-body shots and five for beauty photos. However, I believe that it is better to start with one and add more when you have mastered the basics.
 I mark all my lamps on each side with letters so that I can see from a distance which group they are controlled by.
Often, the first lamp is the main light, the second is used to light the background, and the third is the rim light, i.e., the light set from the side, behind the character (flashing from behind). At the start, a modifier is only needed for the main lamp. The number of tripods does not necessarily have to correspond to the number of lamps because the background is often illuminated by placing the lamp on the ground. For the rim light, you can try to set it up on a cabinet, and sometimes someone just held it. Ultimately, of course, it is worth having tripods for everything.
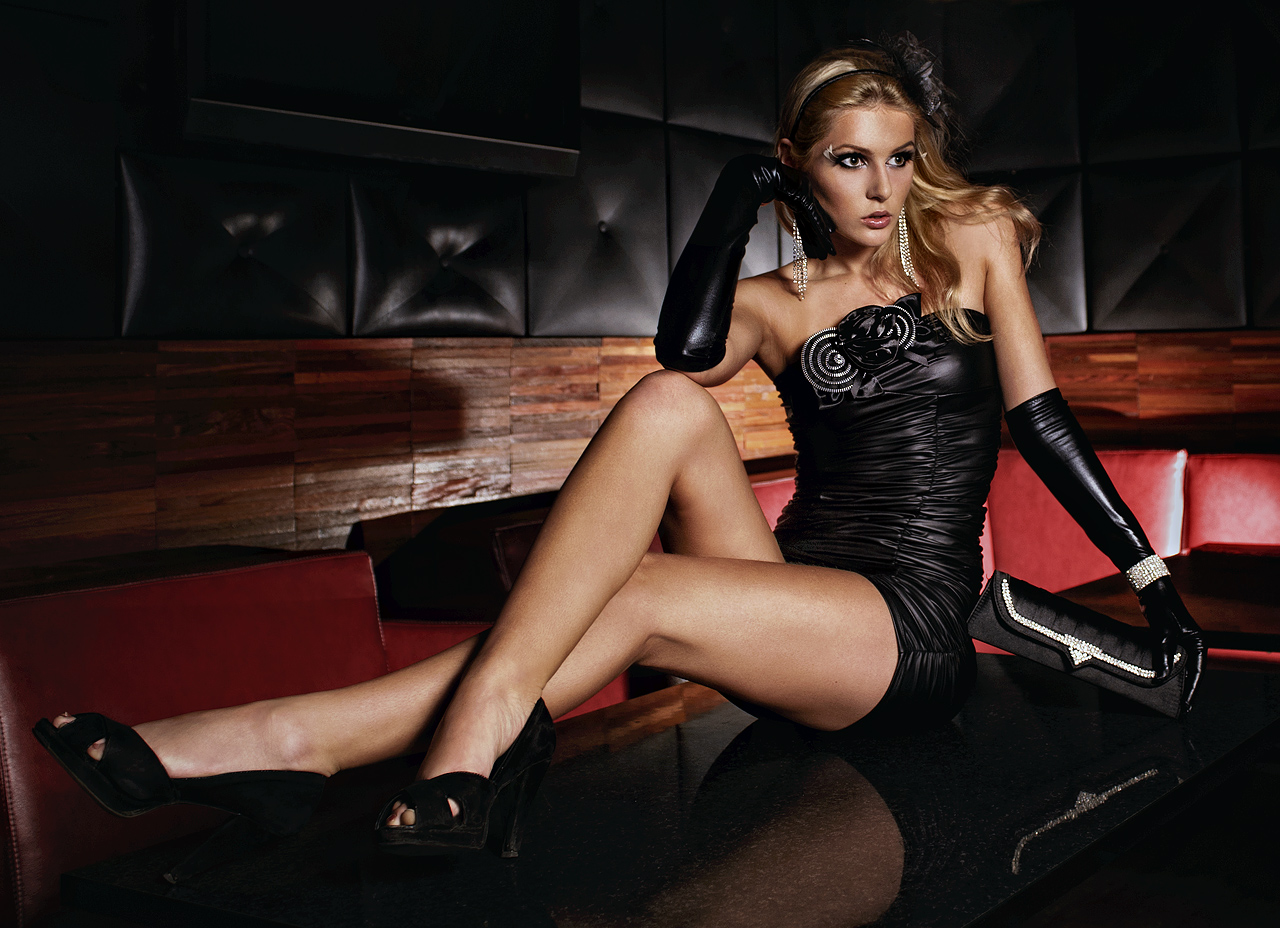
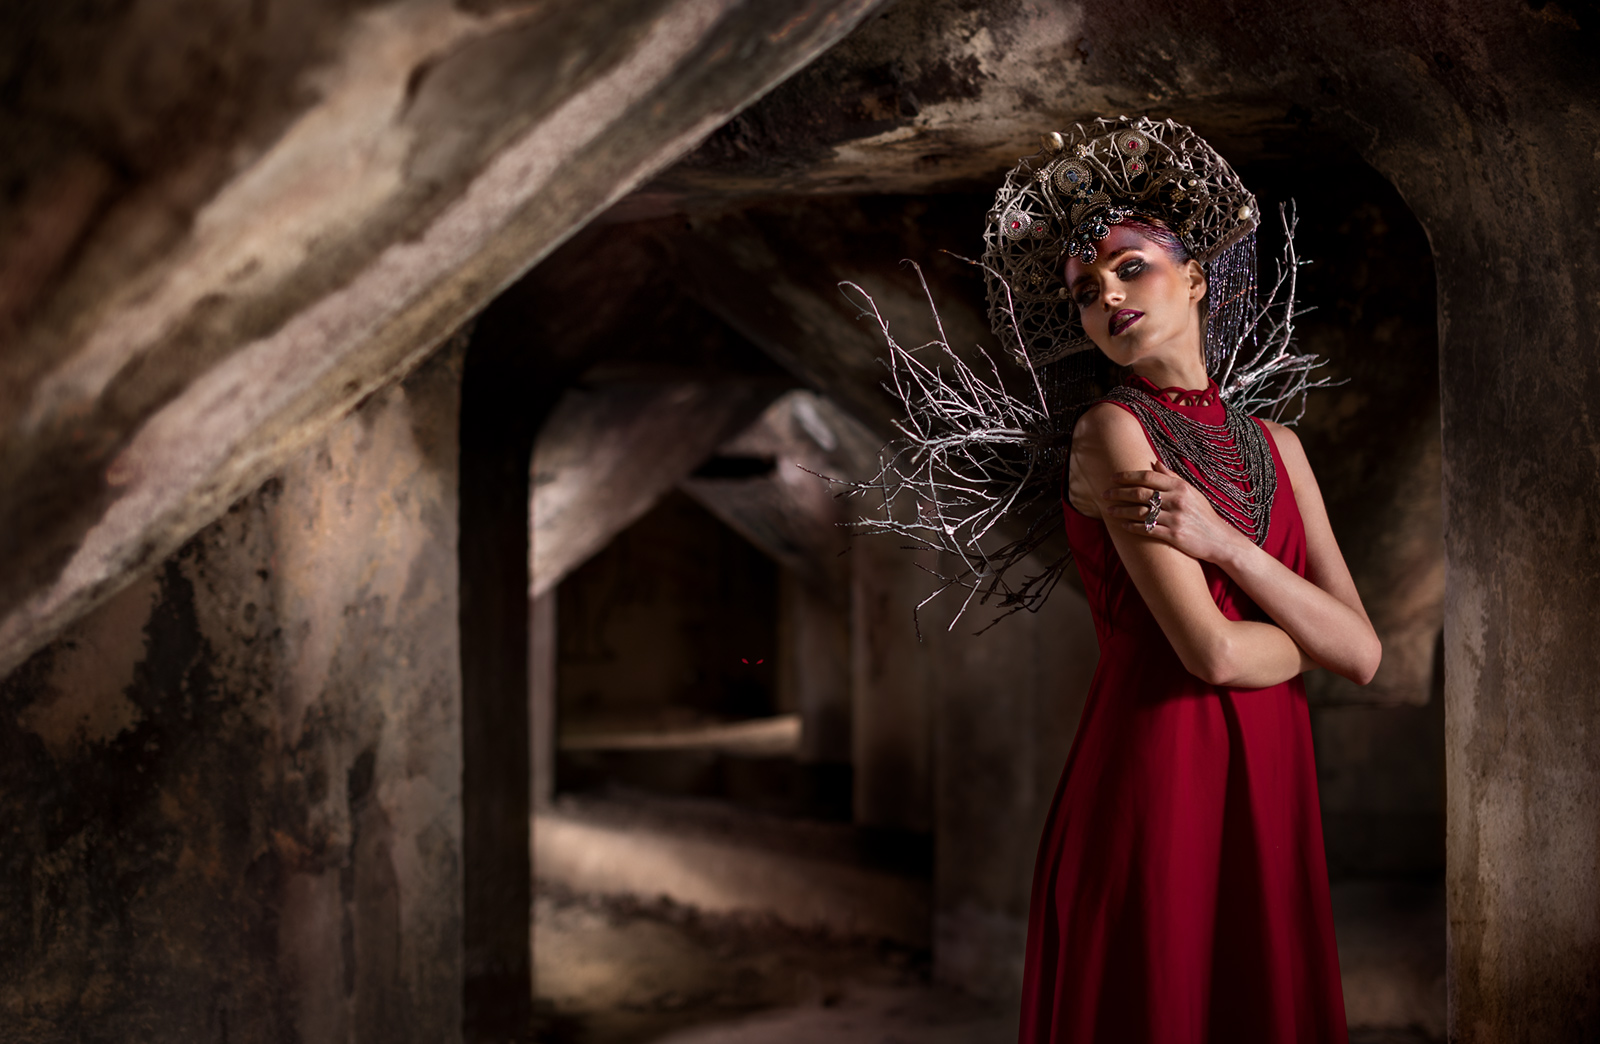
The above photo shoot was taken with a 75 cm softbox, with two speedlights inside. If I had raised the ISO, one lamp would have been enough. There was also separate light on the background. On the blog, I also described a photo session in a red dress, which was done outdoors, exclusively with YongNuo YN-560 IV lamps:
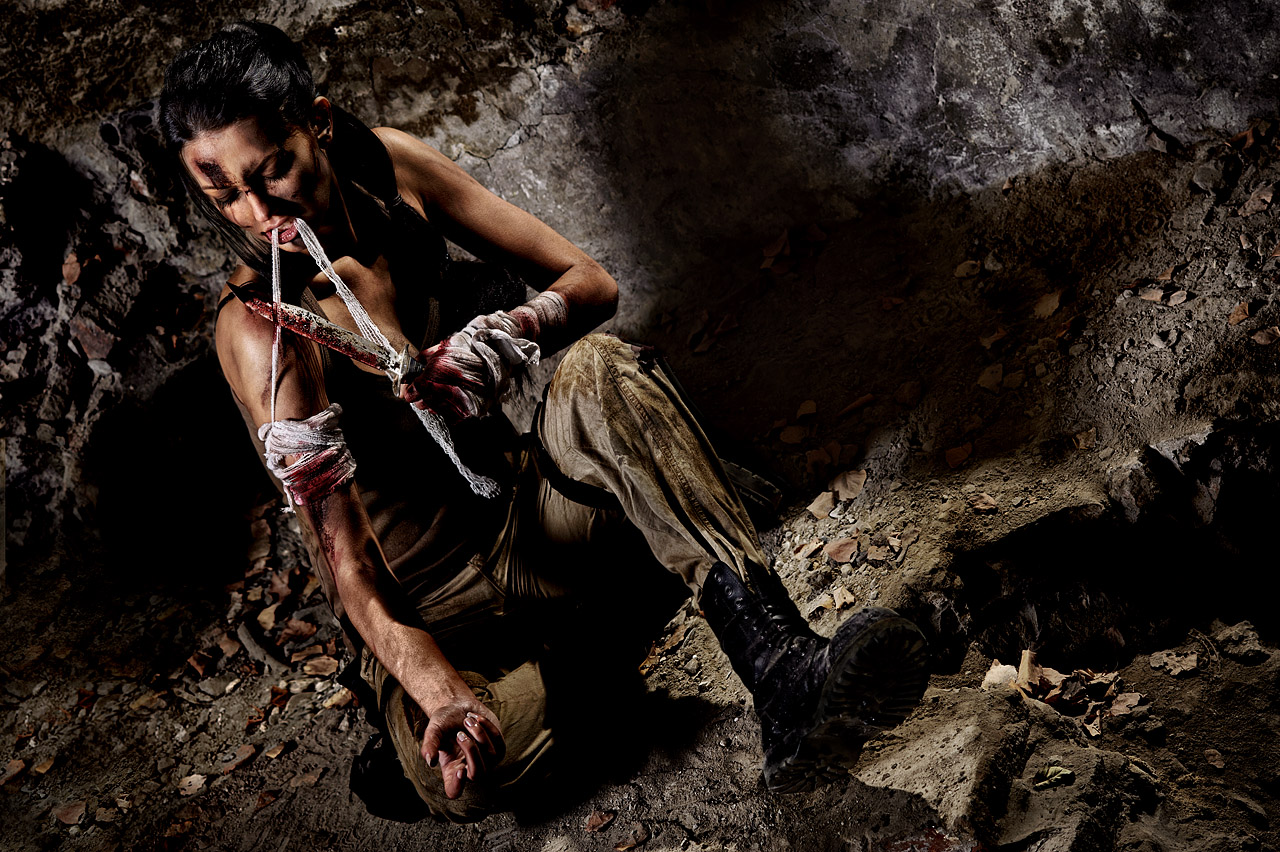
There was also a description of the Tomb Raider photo shoot, done only with speedlights…
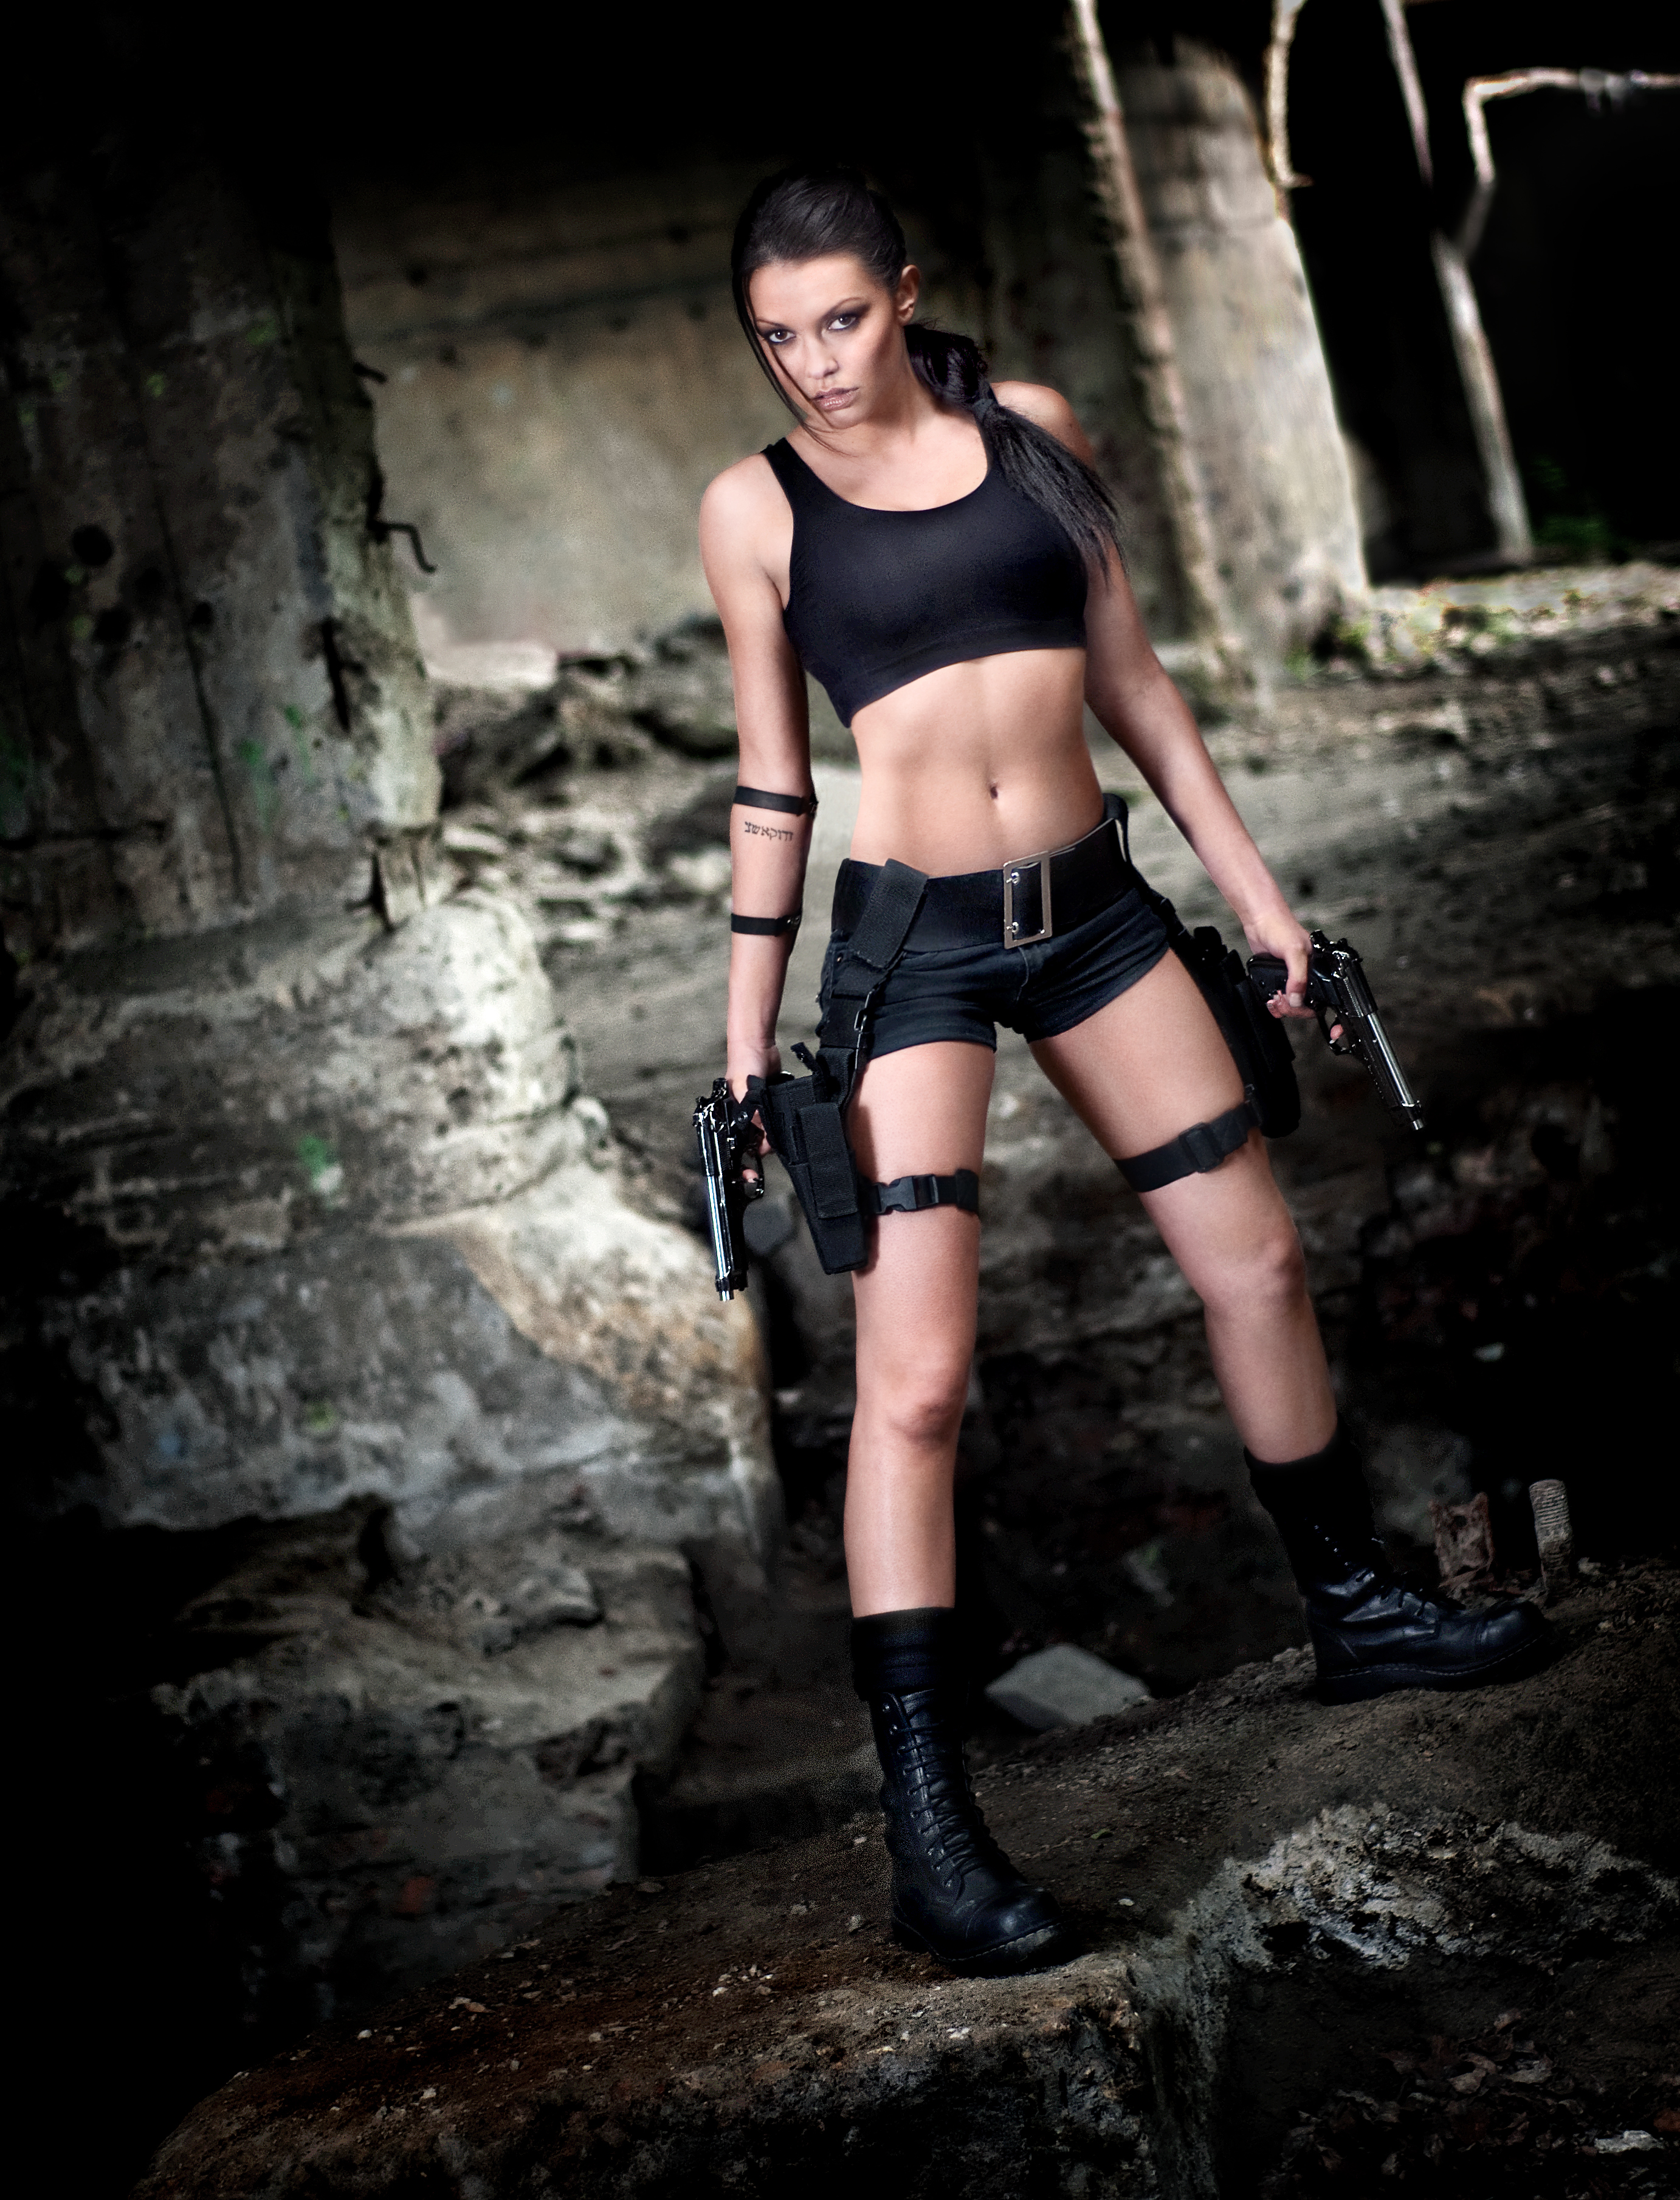
And another one, made one year later:
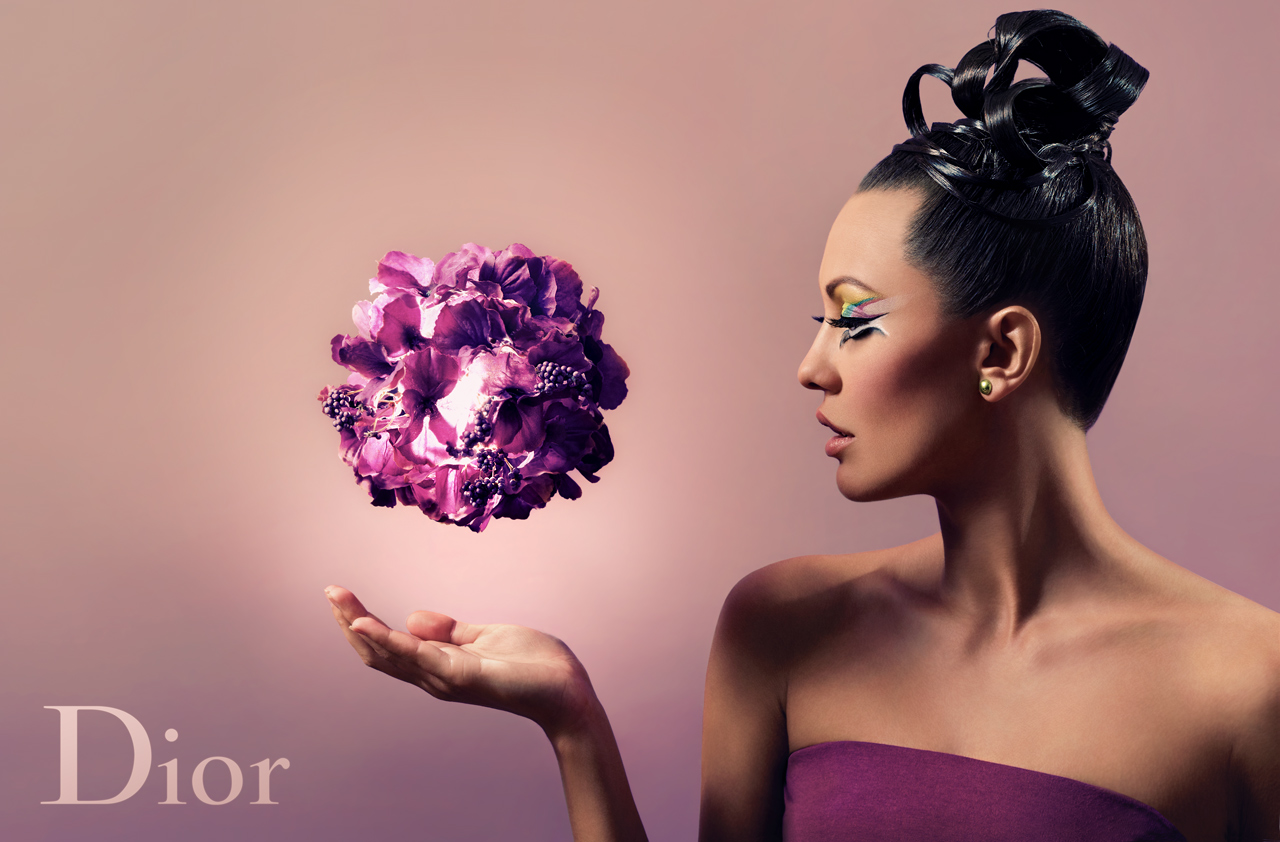
I have also done many other photo shoots exclusively with this equipment, some of which I have described on the blog, such as the Power of Dior color made with older version of YongNuo lamps (YN-460II):
What modifier to start with?
I started with a transparent umbrella. The advantage and disadvantage of it is that it flashes all around. This is a problem when the walls are close. Especially when they are colorful because they will change the hue of everything in the photo.
At the same time, when the color of the walls does not matter, it is difficult to set the light so badly with a transparent umbrella that the photo will not be suitable for anything, and at the beginning, it is important. For example, if the beauty dish with a honeycomb can be set at the wrong height and angle, the face may come out very dark, the chest will start to almost shine, the skin may start to look bad, and the whole effect that the BD was supposed to create will disappear. In addition, if the make-up is not very good, it is also difficult to take good photos with a BD. However, with a transparent umbrella, you really have to mess up the setup incredibly to get the lighting so bad that the photos will not be suitable for anything. In a photograph where there is too much light, you can save yourself with editing. However, when there was too little light, it may turn out that there is nothing to save.
So if you don’t have strongly colored walls, an transparent umbrella is not bad. However, by spending more money, you can use something like a softbox. This way, the light will still be relatively easy to set up, but reflections from colored walls will not ruin the photo. Nevertheless, it is always worth having a white umbrella, especially since it costs almost nothing. There are infinitely many uses for it.
There are also much more expensive versions of transparent umbrellas (over $25/piece), but at the beginning, I wouldn’t bother with them and buy any super-cheap model, in size 90-120 cm/35-47 in. The more expensive ones can be recognized at first glance – they are much better made and harder to break in strong wind. Although I also have the better ones, I still often use the cheapest ones. A black umbrella on the outside and a white one on the inside is a great option, and there are also models that are 2-in-1.
 One of many photos I took using a YongNuo speedlight at the very beginning of learning strobing
Octagonal or rectangular softbox?
I always use modifiers that are as round as possible as the main light, even because of the look of the reflections in the eyes. However, photo sessions with glasses reflecting light source are a slightly different topic – rectangular ones work there. They can also be better for full-body shots – then I even used large strips as the main light (and as the rim light almost always). However, for the first modifier, I would definitely choose something more round, especially for portrait shots. In addition, while in octagonal ones, speedlights do surprisingly well with spreading the light, in rectangular strips, it may be worse, but it applies rather to large modifiers, in which insufficient power would be a bigger problem anyway.
What size of softbox?
For me, more than 95 cm/37 in usually doesn’t work at all – the light then fills too much of the areas that I want to be shaded. However, the larger the softbox, the easier it is to take a “correct” photo. It will also be a better choice for full-body shots. Therefore, I would choose around 95 cm/37 in to start with.
What mounting type?
If it is to be a universal and future-proof solution, it is definitely better to buy a softbox with Bowens mounting and an adapter for the speedlight. This way, it will be possible to use it with studio lamps in the future. Moreover, modifiers dedicated to speedlights are usually more expensive and smaller.
Starter kit
Click on the selected item to display current price:
- Lamp YongNuo YN 560 III
- Lamp YongNuo YN 560 IV
- Lightweight stand
- Umbrella 2in1 (transparent and black)
- Mount for lamp and umbrella
In total, it costs less than 200 USD. You will then have two lamps – one as a lighting on a tripod, and the other as a controller mounted on the camera’s hot shoe. This way, you have radio triggering and remote control of the lamp’s parameters. If you want to experiment with two lamps, you have the opportunity to do so right away without any additional purchases. Thanks to the photocell, you can then trigger both lamps using the built-in flash in the camera (but you will lose the ability to remotely change parameters). It’s not very convenient, but it’s just right to start experimenting with more advanced lighting. Besides, you can quickly expand the set so that these problems disappear.
Next elements of the puzzle:
- Another lightweight tripod
- Another mount for lamp and umbrella
- One more YongNuo YN 560 III or YongNuo YN 560 IV
- Radio remote controller YongNuo YN560-TX
- Godox softbox with grid, 95 cm/37 in
- Bowens adapter for speedlight (this one works also with 2 lamps at the same time)
- More stable, air-cushioned light stand
You can get cheaper softbox, but Godox has good quality-price ratio.
These things cost less than $280, so on the one hand, it’s a lot, but on the other hand, the price for the whole set is still lower than for one good system lamp without any tripods, modifiers, etc. The cost is mainly increased by the softbox with the adapter. However, all these things are not things that will be thrown away or exchanged for others in the future, but still used as a complement. I would definitely buy a softbox with a grid because it greatly increases the possibilities of directing light.
Why these models?
Because for their price, they are a good choice, but you can choose something else. I have already explained the matter with lamps – YongNuo makes great cheap equipment, and the mentioned models are excellent for strobing. Lightweight tripods work great with speedlights and lightweight modifiers. Alternatively, with studio lamps without heavy modifiers. Such tripods are much more convenient to transport due to their weight, and due to the smaller leg span, they can be pushed very close to walls, which is very important when photographing in small apartments. That’s why I still often use such lightweight models today.
However, it is better to have a more stable tripod under the softbox (and later under the main studio lamp), preferably air-cushioned. Therefore, after buying a softbox, it is worth having something that will keep it without any problems, and in the future, it will even be suitable for much heavier equipment. That’s why the last light stand is different.
Softbox with Bowens mounting so that it is not thrown away later, but still used with studio lamps. Besides, those dedicated to reporter lamps are often more expensive, so it is even better to go straight to studio equipment.
The holder is just this type so that you don’t have to buy separate pins and mount the lamps first on the stands and then on the tripods. There are no such complications in the linked holder.
Of course, this is not the only way to buy, it’s just the way I would go if I started from scratch.
What else?
If you don’t have AA batteries and a charger, you will need them. Batteries don’t work, and it’s a waste of money. Eneloops work perfectly, and the best price-to-quality ratio is in the white version. It’s also best to buy a decent charger because it’s a one-time expense.
- Eneloop (4 pieces in a pack). The white version has a smaller capacity than the black one, but it is more durable;
- Ikea LADDA – cheaper alternative to Eneloops;
- Charger EverActive NC1000 (Of course, other chargers may also be used. This model just has a great ratio of capabilities to price).
-
Continuous Light
There are photos that can only be taken by combining flash and continuous light. This creates some special effects, but most people don’t take such photos at all. Besides, mainly professional, very expensive lamps are used then. However, here I focus on normal photos and lamps that are to serve as basic equipment. Then such combinations are not made, and I definitely prefer flash to continuous light. There are many reasons for this. They differ depending on the type of continuous light. Just remember that I only deal with photographing models. I don’t take, for example, product photos, where good continuous light works great. However, “good” also means a different price range than the one in this article.
Fluorescent lamps
For long time it was the most popular option. Usually, they don’t have power adjustment, and the color in this light is much worse than normal. This is due to the drastically low CRI. That’s why the skin in such light is pale and colorless. Theoretically, photographic fluorescent lamps can have a CRI (RA) of about 90, but it’s still not ideal. Especially since they have various spectra, which causes various color casts, e.g. greenish. It looks terrible on blonde hair, and sometimes even the skin. However, this already depends on the specific model (and even specimen) of the fluorescent lamp.
Besides, over time, fluorescent lamps change power. For all these reasons, they are completely unsuitable for product photography, and even in portrait/beauty photos, they can give very uninteresting effects. Therefore, even if you need, for example, only a ring light, even for making videos on YouTube, seriously consider whether it’s worth taking one based on fluorescent lamps or maybe take the LED version instead. There are fluorescent lamps with excellent parameters, but they are linear – for mounting in ceiling fixtures.
Halogen lamps
The colors in this light are just as good as in flash and daylight. They require solid power supply and unfortunately, they heat up terribly, so they need continuous light modifiers, which are much more expensive than normal ones. By the way, the make-up will run off the model if she sits in front of the softbox for too long. Using them outdoors is only possible with really solid power supply, so normally, you are tied to sockets.
Besides photographic halogen lamps, there are also construction lamps that can be bought cheaply in stores like Home Depot. Some people use them in photos, but it’s a maximum provisional and completely unprogressive solution that has nothing to do with the advantages I mentioned earlier.
LED lamps
In very cheap LEDS everything is more faded than in sunlight. There are indeed diodes with very good parameters, but they have completely different prices than normal LEDs and certainly don’t qualify for an article on cheap lighting. Fortunately, even a medium-quality LED ring light should be free of ugly color casts, which are very common in the fluorescent version. Good quality LEDs are in lamps for video, but typical LED lamps cannot be mounted in photographic modifiers, and those that are quite bright are definitely not cheap (or small), so this is another argument for choosing flash for photos.
LEDs can also be used outdoors, often without a mains power supply, there is space for inserting camera batteries. They need less energy than halogens and fluorescent lamps. They work well in YouTube videos, but for photos, I definitely prefer flash. However, if someone already has such lighting (a lot of YouTubers), they can use it in photos.
Common drawbacks of any continuous light
The disadvantage of any continuous light is that it burns the model’s eyes with its brightness, but of course, it depends on the type of photography, because in a portrait with F/2.0, it will be OK, but in beauty at ISO 50, F/14, 1/200s (for portrait lens), the model will be blinded before the photo session even begins.
In continuous light, it’s also impossible to regulate the size of the pupils – they will always be proportional to the power of the lamps. However, in speedlights, this cannot be done either (not including the use of room lighting). It’s only possible in studio lamps. And when photographing with continuous light, you have to turn off all ceiling lamps, cover windows, etc. – only then will you be able to control the lighting without using very high lamp powers. With flash, everything is much simpler.
Continuous light has an advantage wherever exposure time can be extended at will, i.e. in photos without people and any movement.
Summary
A studio lamp that has everything I would like costs many times more than a speedlight. If I used auto-mode, the matter would look different, but for me, only manual flash power settings work. Because how should automation know how bright I want the background and how intense the contrasts? After all, it will be different on every photo shoot.
Currently, I can’t imagine completely giving up studio lighting in favor of speedlights, but I also don’t see any reason why I should start with studio lights right away. Especially since I still often like to use speedlights – even the very old YongNuo YN-460II still happens to be used (mainly as a light for making blinks – then I always have it at hand, so the lack of remote control of settings doesn’t bother me that much).