Photoshop performance and responsiveness: settings and workflow

In this article, I'll try to cover all the most important settings that affect how fast Photoshop runs and how pleasant it is to use, without unnecessary stuttering, the brush lagging behind the cursor, and so on. I'll cover the points I discussed more than a year ago in a video about performance (it's in the Webinar Archive), plus a few things I left out at the time. There will be obvious points such as allocating RAM, but also some less common ones. I'll also explain how Photoshop files put on weight and how different kinds of layers affect their size.
Besides the points I'll discuss here, the version of Photoshop also matters. CS6 was incredibly fast compared with PS CS5.5 and earlier versions. The later Photoshop CC releases didn't bring changes on that scale. Performance is still improving, sometimes considerably, but current improvements tend to affect individual filters and tools rather than the whole program. For people with very slow computers, however, the opposite may be true, and newer versions may run more slowly than older ones. Even so, the advice in this article applies to everyone, especially people who work with heavy files.
I have a separate article about which computer specifications matter for Photoshop, so I'll only mention here that RAM and processor speed are very important. The number of processor cores and the graphics card are secondary.
If you're interested not only in Photoshop performance but also in configuring it for comfortable retouching, accurate perception of contrast, and so on, make sure to take my introductory course on professional retouching. It's free right now, and the very first video is about configuring Photoshop! See it here: link.
Table of contents
- TIFF vs. PSD files in Photoshop
- Bits per channel (8 or 16)
- Allocating RAM to Photoshop
- Scratch disk
- History states
- Automatic saving
- Export Clipboard
- Graphics acceleration
- Advanced graphics processor settings (drawing mode, etc.)
- Cache settings
- Interface scaling in macOS
- Clearing memory and the clipboard
- Adjustment layers vs. pixel/raster layers
- Removing unnecessary pixels from masked layers
- Moving layers instead of copying them
- Smart Objects
TIFF vs. PSD files in Photoshop
I save my documents exclusively as PSD files, and I recommend the same to anyone who uses only Photoshop after processing RAW files. Regardless of the compression used, TIFFs take up more space than compressed PSDs and take longer to save. When you open a photo from Adobe Camera RAW in Photoshop, PSD is the default save option. In Lightroom, it's worth opening Preferences and selecting PSD so that the files are handled the same way as files from ACR.
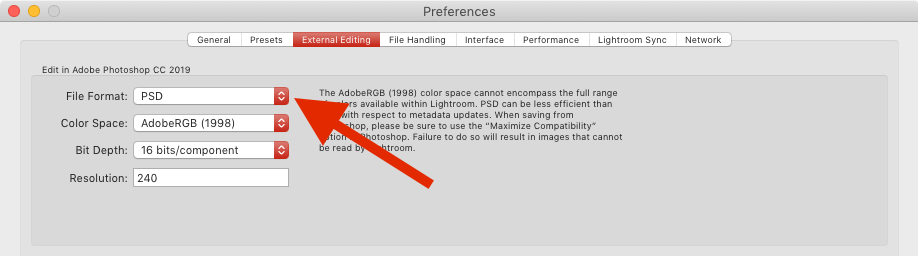
Lightroom users have to maximize PSD and PSB file compatibility, or those files won't be visible in Lightroom. The best approach is to open Photoshop Preferences > File Handling, then set the option to "Always":

When a file is larger than 2 GB, you have to use PSB instead of PSD. For TIFFs, the limit is 4 GB. Unfortunately, PSB files (which can be 4 million terabytes :)) have a drawback: Lightroom doesn't display them (absurd, right?). You then have to embed links to the actual files in a PSD (I'll probably make an action for that eventually), or accept that they won't be visible.
If you continue using photos in Lightroom after doing something to them in Photoshop, TIFFs will be more convenient because of those limits.
Bits per channel: 8-bit vs. 16-bit depth
The number of bits per channel has a huge effect on Photoshop's speed and on how much editing you can do without hurting image quality. The more complex the file, the greater the performance difference between 8 and 16 bits per channel, along with the difference in RAM use and the size of the resulting PSD or TIFF. Files at 16 bits per channel are more than twice as large.
You select the number of bits per channel before opening the photo in Photoshop, in the RAW processing program. JPG files are always 8-bit, so this point doesn't apply to them.
In Lightroom, set the number of bits per channel under Preferences > External Editing > Bit Depth:

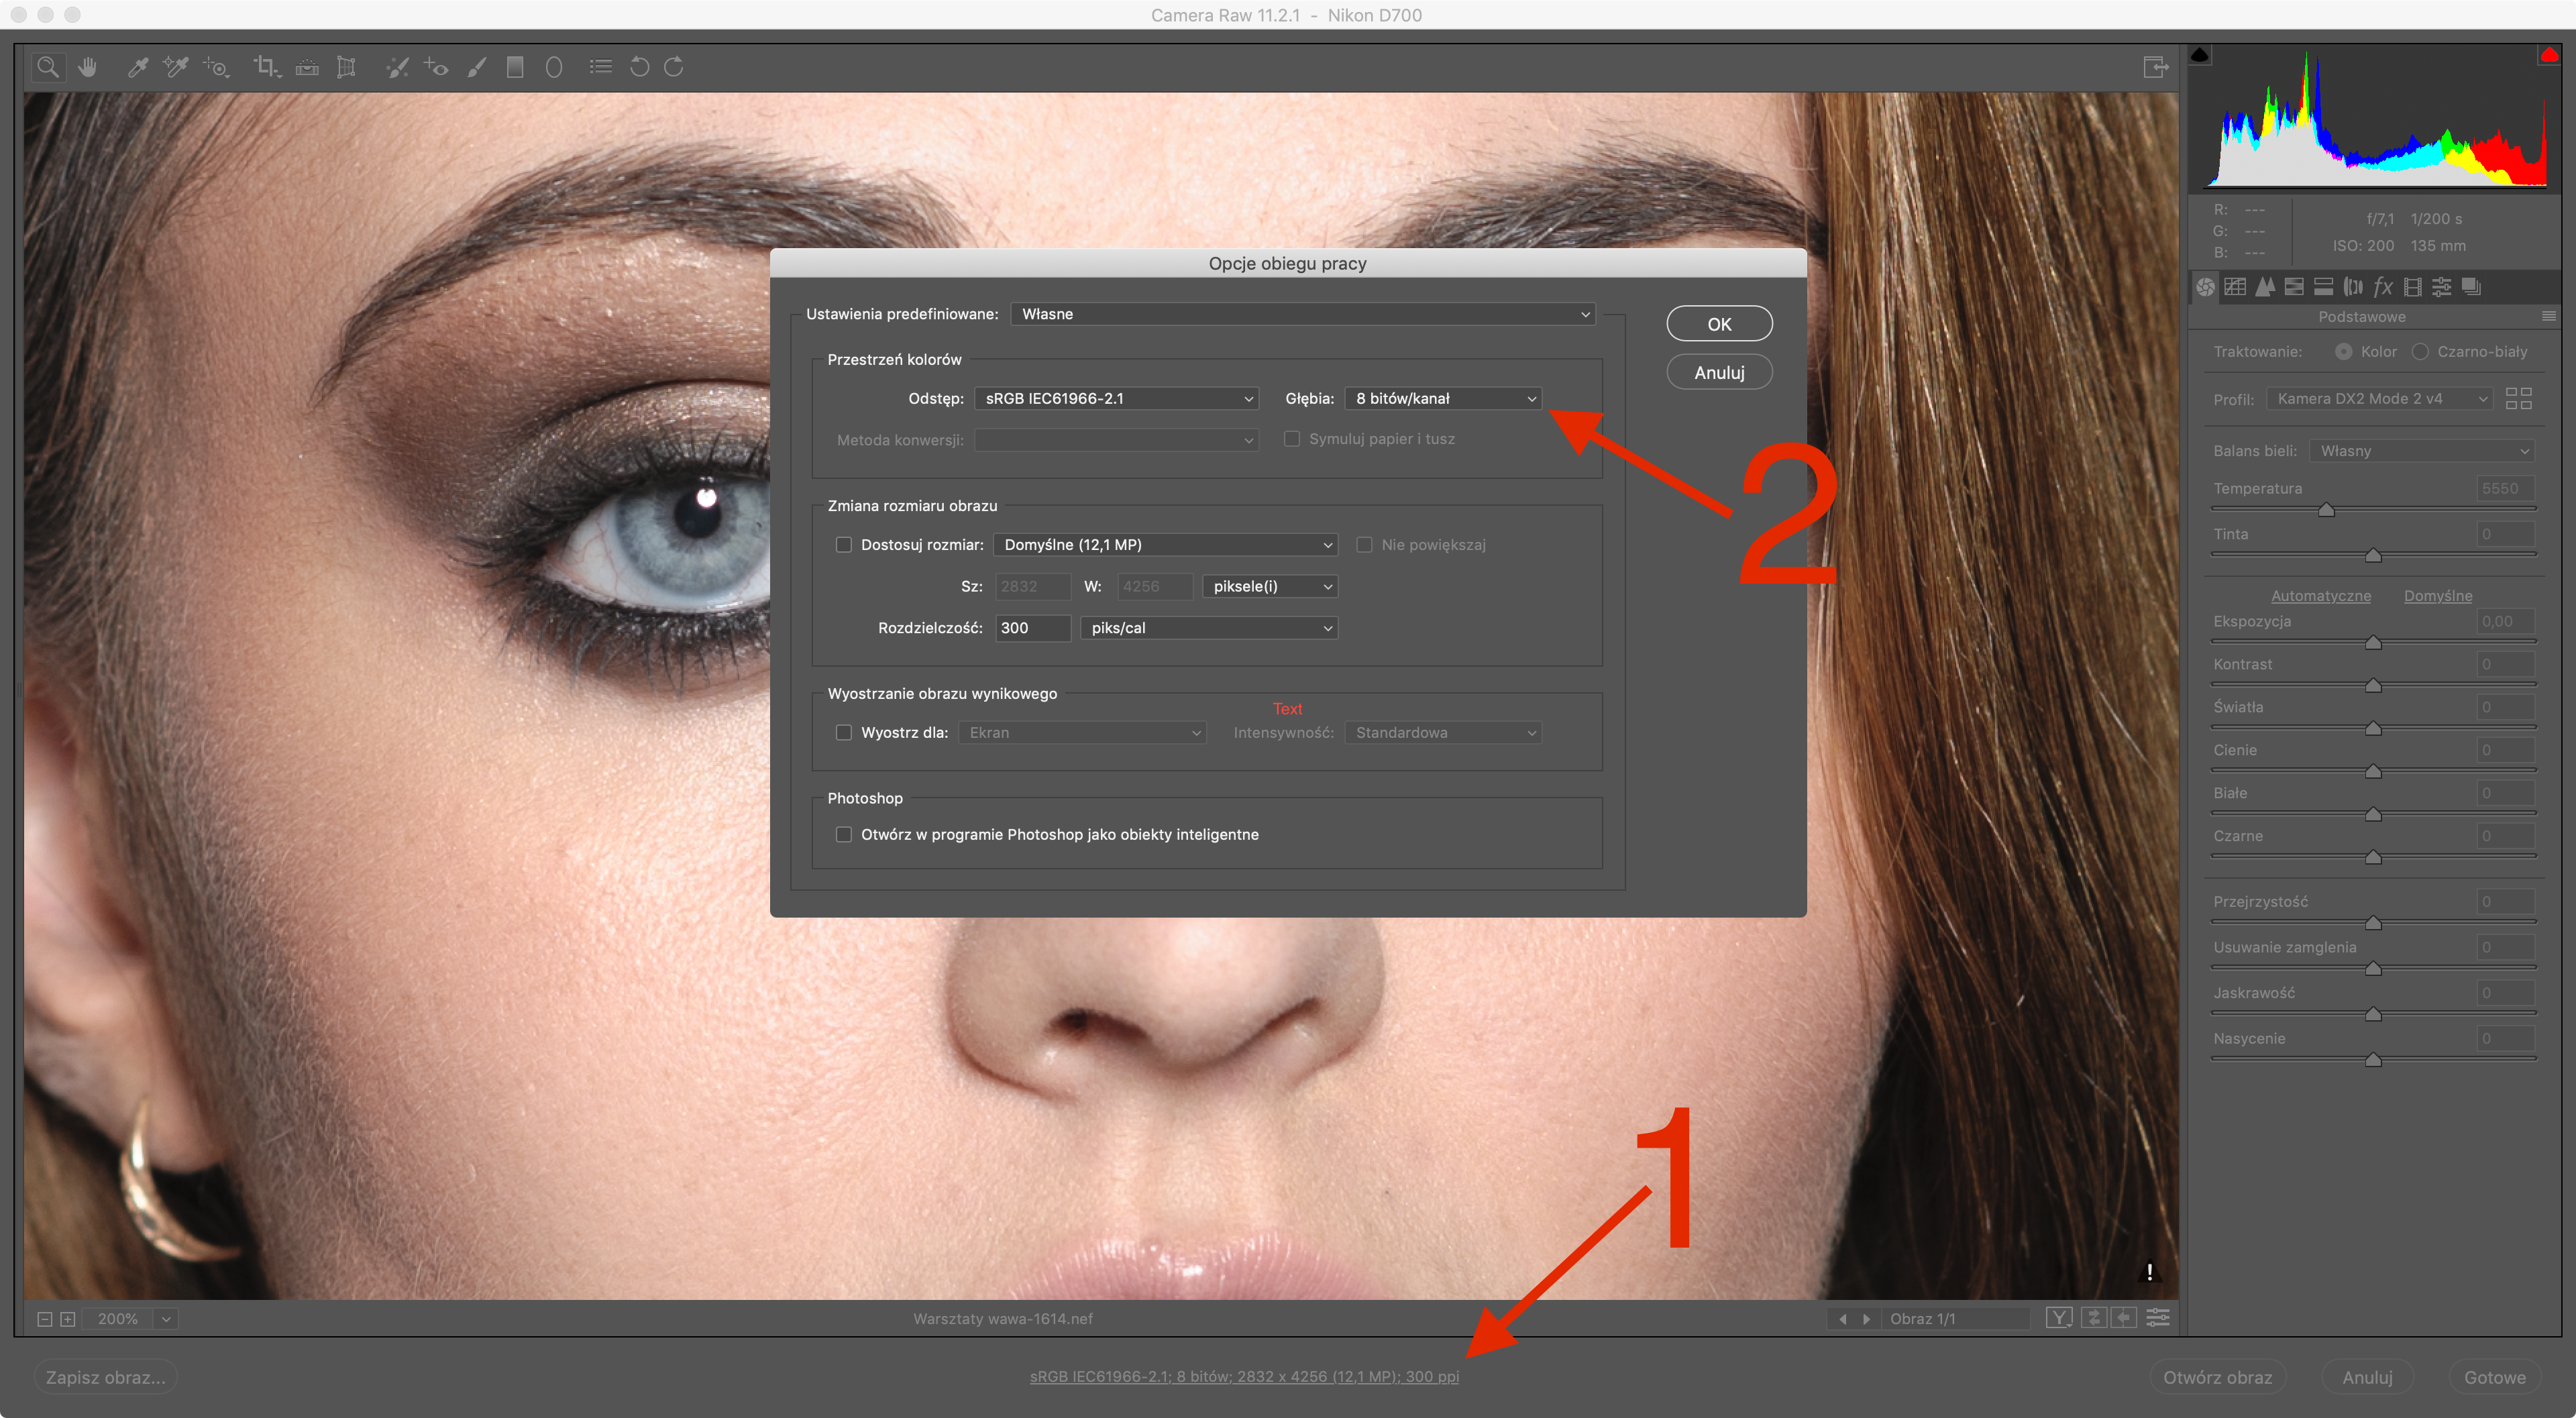
Adobe Camera RAW opens the relevant window when you click the link below the photo (1). Then select "Depth" from the drop-down menu (2):

A little theory
8 bits per channel means 24 bits per pixel (8 for red + 8 for green + 8 for blue). That gives us more than 16 million colors, which is entirely sufficient. With perfectly smooth gradients, however, banding can appear, so you'll see bands instead of smooth tonal transitions. In an exaggerated example, it would look like this:

When creating your own graphics, you can largely work around this. Photoshop has long allowed dithering in gradients:


Photos are a slightly different case from graphics because we don't create our own gradients in them. We use what the camera recorded. That adds noise, which masks potential problems in a way similar to dithering. But displaying a photo requires far less information than editing it. Post-production needs excess data in the image. That's why, when you make major changes to brightness, contrast, and so on, banding, additional noise, color blotches, and similar problems appear much sooner at 8 bits per channel than at 16.
A little practice
You can see it in the example below. It's a RAW file opened in Photoshop at 8 and 16 bits per channel in the sRGB color space. To make the problem easier to see, I then added a strip-shaped gradient and adjusted Levels for the whole file. The changes were identical in both cases, but as you can see, the final quality is very different (especially when enlarged, because I didn't want to overdo the adjustments). It's most obvious in the background and the clothing, as well as in the gradient, of course. I also added a histogram to show exactly how much information the photo contains after this adjustment:

At 16 bits per channel, the tonal transitions look as they do in the RAW file, and the file still contains enough information for enormous adjustments without worrying about color problems and so on. At 8 bits per channel, the background has picked up ugly noise, the gradient has turned into nasty bands, and the histogram makes it perfectly clear how badly the file has suffered.
A wide color space requires 16 bits per channel
If you use the ProPhoto RGB or Adobe RGB color space, you should use 16 bits per channel. In fact, you have to. Otherwise, tonal transitions can start looking bad very quickly. At 8 bits per channel, we have 256 levels for each channel (2 x 2 x 2 x 2 x 2 x 2 x 2 x 2 = 256), compared with a theoretical 65,536 at 16 bits. In practice, Photoshop uses "only" half of that (so 15 bits), but it's still a gigantic difference from 8 bits per channel. Because the differences between successive shades are much larger in wide color spaces than in sRGB, the steps between them may be visible if you use "only" 256 levels.
For many years, I've always chosen to work at 16 bits per channel, putting quality ahead of performance.
A monitor will usually display anywhere from 6 to no more than 10 bits, depending on the model. It will never display 16. That doesn't matter, though, because editing requires more information than viewing a photo.
Allocating RAM to Photoshop
This is the first thing you should set after installing Photoshop (under Preferences > Performance):


This setting determines the maximum amount of RAM Photoshop will use.
How do you know what to set it to?
I've always tried to keep plenty of RAM in my computer, so I would leave a few gigabytes for the operating system and everything else, then assign the rest to Photoshop. Even if you set it to 100%, the system will still have some free memory. Photoshop will never take all of it. People who still have only 8 GB of RAM, for example (or, God forbid, even less), need to divide it more carefully. In that case, display Photoshop's Efficiency value. You can show it in the status bar at the bottom or in the Info panel.
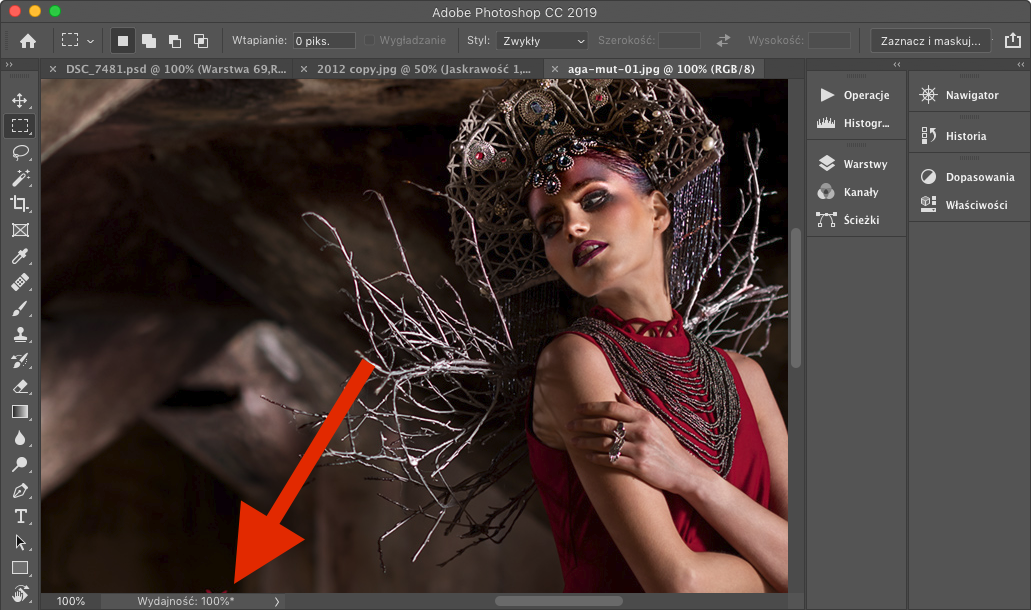

Watch this value while you work. If it falls below 90%, too little RAM has been allocated. If you've left only 2 GB for the system and everything else, assigned the rest to Photoshop, and Efficiency still regularly drops below 90%, you definitely need to buy more RAM.
The more memory PS can use, the better. Until it runs out, however, I haven't noticed any difference between having 5 GB and 10 GB temporarily free. That's the whole point of having as much RAM as possible: it should never run out. You can display memory status in the same places as Efficiency, but this time select the option called "Scratch Sizes":


Once all the available memory is used, the program slows down badly, or extremely badly, to the point where Photoshop is almost unusable. Fortunately, in the SSD era it usually isn't quite that bad anymore. Some operations consume a huge amount of memory almost instantly, such as cropping.
Scratch disk
When there isn't enough RAM, the computer starts using a much slower disk instead. It used to be a good idea to have a separate disk for the cache, but that's no longer necessary. It should be the fastest disk in the computer, just as it should be for the operating system, so it will most likely be the system disk.
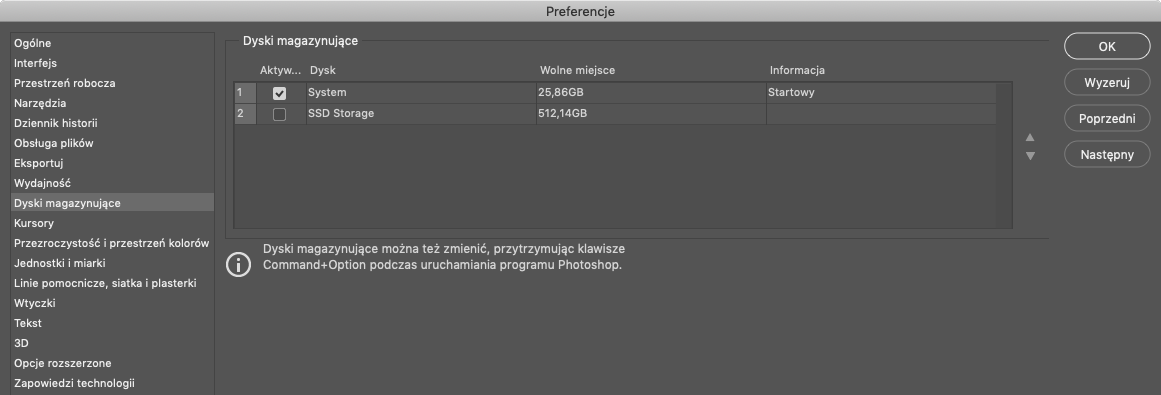

It definitely shouldn't be a hard drive (unless it's part of a proper RAID), but an SSD. The difference between them will be enormous. That SSD also shouldn't be almost completely full, because its speed will drop considerably. Don't rely on the free space reported in Photoshop's window, though. Even with more than 140 GB of free disk space, Photoshop shows me much less.
History states
If disk space really is very limited, it's worth reducing the number of History States under Performance. It's also worth doing if RAM fills up too quickly.

As with the size of the PSD file itself, layers containing pixels from the entire photo will take up the most space in History, while adjustment layers take up very little. In my opinion, hundreds of History States don't provide any real benefit in retouching. If you've gone that far down the road of ruining a photo, you can usually undo the damage by other means, such as a mask or the Eraser, and focus on the parts that actually went wrong. Twenty states are enough for me, and I treat anything above that as a bonus.
Automatic file saving
Since Photoshop CS6, it's been possible to recover data lost during a program crash, power outage, and so on. To make that possible, PS periodically saves a temporary file containing the photo and loads it automatically if needed. According to Adobe, this doesn't have much effect on performance, but my experience is a little different, especially when I use a computer with quiet cooling that can suddenly get very loud when PS saves a backup. With larger documents and slow computers, that save can take a long time. On less powerful computers, disabling this option should therefore improve performance, or more precisely, eliminate regular slowdowns. Of course, if something crashes, you'll lose all the work done since the last manual save.


On fast computers, I'd recommend keeping this option enabled with the most frequent save interval, just in case.
Export Clipboard

In theory, disabling Export Clipboard improves performance. In practice, I don't notice any difference on my computer. I still keep it unchecked because my files were often too large to transfer between applications this way, so Photoshop would throw an error (even though I had no intention of pasting anything outside PS). Now I don't have to look at those messages anymore.
Graphics acceleration
Acceleration should definitely be enabled (Preferences > Performance > Graphics Processor Settings).


Acceleration will improve the experience on any graphics card from the last few years, but Photoshop may run faster with acceleration disabled on very old, weak cards. Those are extreme cases, though, and disabling acceleration unfortunately comes with major drawbacks. Above all, smooth zooming won't be possible, and most zoom levels will look terrible, leaving you to work at fixed magnifications such as 50%, 100%, and so on. That's how we worked a dozen or so years ago because there was no other option, but today I can't imagine going back to those limitations.
There are also graphics cards on which GPU acceleration no longer works at all in PS and LR, even though it once did. Fortunately, these are only a few cards from before 2014. In that situation, I strongly recommend installing another card or even replacing the computer if it's a laptop. Working comfort will improve dramatically.
By the way, disabling acceleration will usually solve problems with an incorrectly displayed image, such as artifacts or patches left behind after using different tools. These things don't happen on a properly functioning computer with a properly functioning Photoshop installation. If they do, it's worth trying an older version of PS (CC 2018 instead of CC 2019, for example), which may cause fewer problems with that particular hardware configuration.
Advanced graphics processor settings
Open Photoshop Preferences -> Performance and click "Advanced Graphics Processor Settings" to choose from several options.
Drawing mode: Basic, Normal, and Advanced

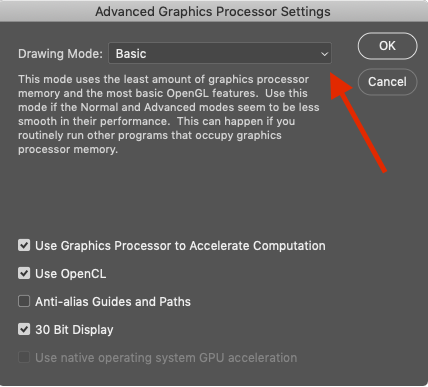
This is a very important setting for people without fast graphics cards. Among other things, it determines how comfortable dodge&burn will be: whether zooming is perfectly smooth and the brush fully keeps up with the pen, or whether image stuttering gets in the way. For newer dedicated graphics cards, which are generally fast, Advanced drawing mode will work best. With photos, however, there probably won't be much difference from Normal mode, so that will also be fine.
On slower cards and those with little memory of their own, it's worth trying the "Basic" option. It puts less load on the graphics card and uses less VRAM. This mainly applies to laptops, which usually run on integrated graphics. On my Mac Mini, which has an exceptionally slow graphics card, Basic drawing mode gives the best results. It doesn't affect display quality or the available features. It probably won't make much difference for people working with light files, but it can make a big difference with larger ones. On my computer, the difference is obvious.
Other advanced graphics processor settings
The first two options ("Use Graphics Processor to Accelerate Computation" and "Use OpenCL") speed up several filters. Hovering over each option shows the specifics, and newer versions of Photoshop will probably use them for more and more tools. There's no point listing them all here, but it's worth enabling the options.
Anti-aliasing guides and paths is purely a display option. If everything looks okay, you can leave it unchecked.
"30 Bit Display" enables support for 10-bit color. In theory, it may reduce performance, but I don't notice any difference, and because I have a monitor with a 10-bit panel, I use it. This used to require professional graphics cards rather than gaming models. Today, many different cards work, and smoother tonal transitions are visible even on monitors without a 10-bit panel, or even an 8-bit one. You can see the difference almost exclusively in perfect gradients, though, so if I disabled this option, I wouldn't even notice the difference in photos.
"Use Native Operating System GPU Acceleration": the name and description say it all. It's best to check this option, although it isn't available on integrated graphics.
Cache settings
The default settings are just right for photo editing, so there's no need to dig around in these options. If you work with photos of at least 50 Mpix, however, setting the cache level above 4 will increase the time it takes to load a photo but allow smoother work.


There's no reason to increase the cache level if you don't work with huge files. It won't bring any benefit and may actually make the program less responsive when painting, for example.
Interface scaling in macOS
People with Ultra HD monitors (3840 x 2160 pixels), 5K monitors, or small screens with a high pixel density (such as Retina displays) often use scaling. On a Mac, if the interface isn't scaled to exactly half the display's dimensions (1920 x 1080 px for UHD), performance will be lower with weak, older-generation graphics cards or when several UHD monitors are connected. The extent depends on the graphics card. Most of all, the image won't be smooth. Disabling scaling will then improve matters in Photoshop and across the system, although that doesn't always mean choosing "Default for display." Sometimes it does, but not always. It depends on the screen. On mine, it's currently the last option:

The native resolution will probably always appear at the very top of the list after you reveal the other resolutions. To do that, hold ALT while clicking "Scaled."

Clearing the clipboard and History
This option can free a lot of resources, especially if you previously did something very memory-intensive, such as cropping. It's also worth using before operations like that so you don't exceed the available RAM, which this option also clears. Afterward, you won't be able to go back to earlier History States.


Adjustment layers vs. pixel layers
Adjustment layers have a negligible effect on file size, essentially none at all, but they can affect performance.
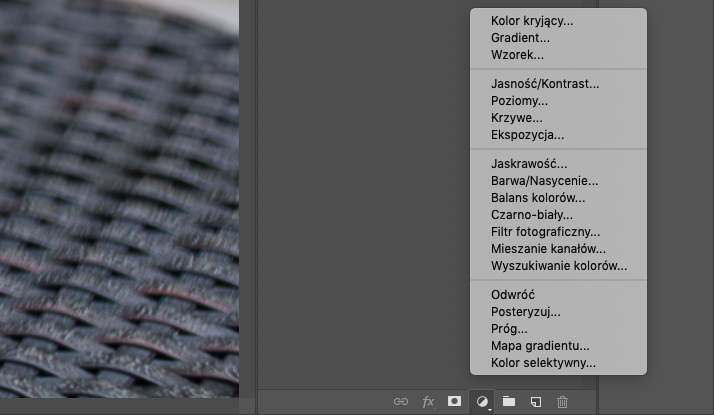
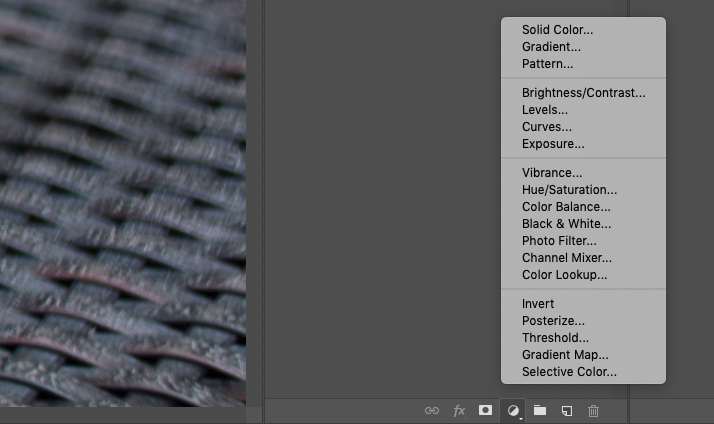
Let's say a photo has a "Hue/Saturation" layer correcting the colors, a "Brightness/Contrast" layer, and several others doing different things. Now I make a change to the photo, such as painting part of the image under those layers with the Dodge tool. Photoshop calculates in real time what that brightening will look like with the color correction from Hue/Saturation, the contrast change from Brightness/Contrast, and everything else done by the remaining adjustment layers. I'll add that, at 16 bits per channel, it has much more to calculate than at 8 bits per channel. This can cause slowdowns and problems such as the brush failing to keep up with the pen tip, even when you're painting only small areas.
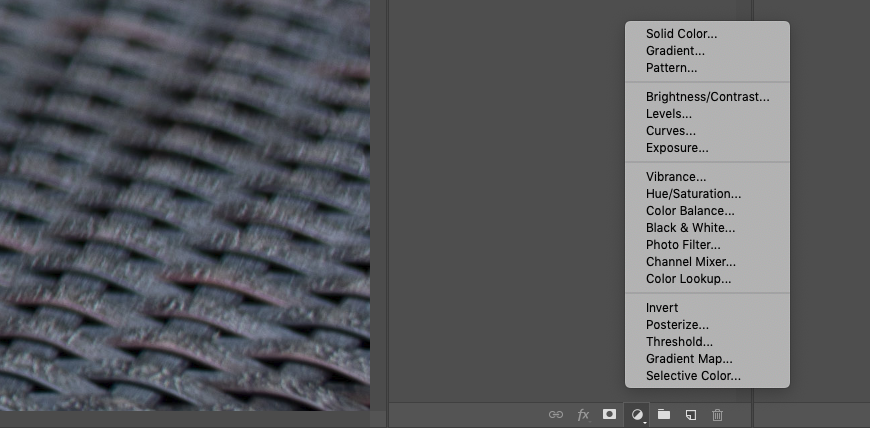
That's why, if Photoshop is bogging down because of numerous layers, it's worth putting them all in one group and temporarily disabling or even deleting it after first creating a single pixel layer (CTRL/CMD + ALT + SHIFT + E). That's exactly what I do when a file grows too much.

Anything you can do with adjustment layers can also be done with pixel layers containing the entire photo. Usually, you first create a layer with CMD/CTRL + ALT + SHITF + E (or duplicate the previous layer with CMD/CTRL + J if it already contains the entire photo). Then go to the Image > Adjustments menu.
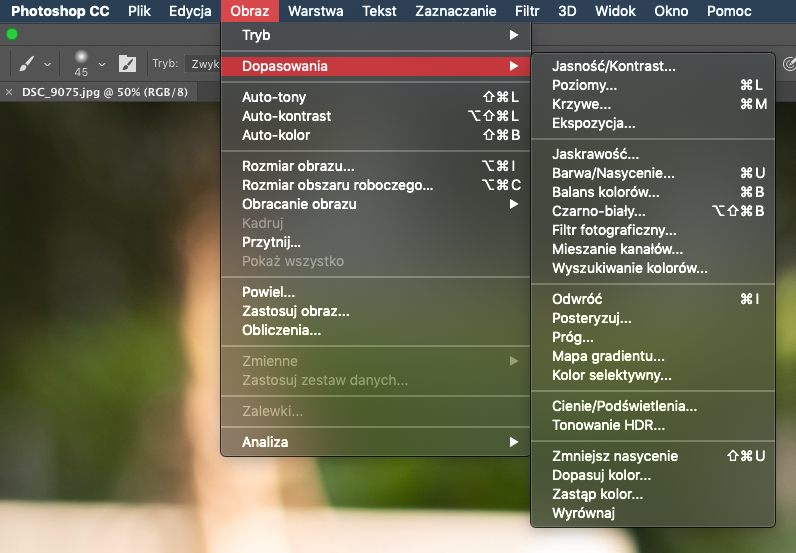
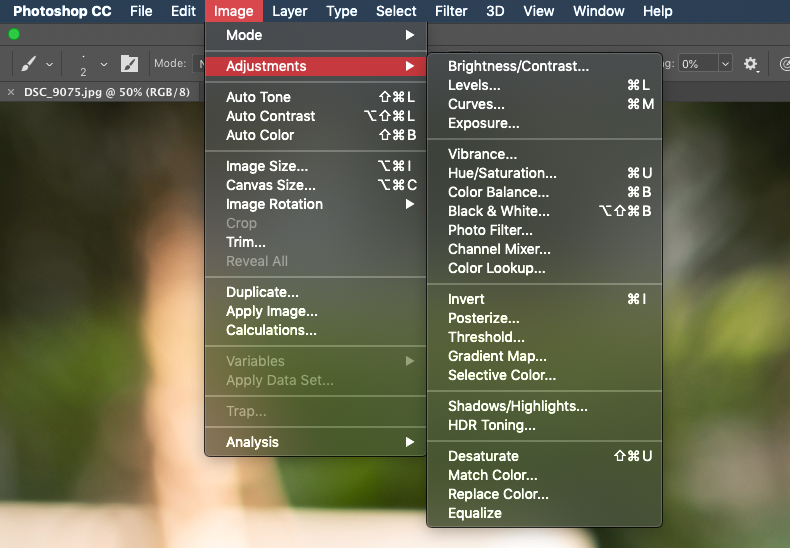
I don't like working this way because it prevents me from editing what was on the previous layers. A layer in Normal mode covers everything with its pixels. Besides, every such layer noticeably increases the file size, by roughly as many megabytes as the photo had at the very beginning. If I opened a compressed RAW file that took up 30 MB, it will take up about 100 MB when saved as a compressed PSD at 8 bits per channel, or about 200 MB at 16 bits per channel. Each additional layer that duplicates the photo layer will increase the file size by that amount.
So if I apply some changes to the base layer, then to its copy and three more duplicated layers, I'll end up with a file of about 500 or 1,000 MB, depending on the number of bits per channel. Of course, I could apply all the changes one after another to a single layer, but then I could forget about masking, using different blending modes, and so on. If the same changes are made with adjustment layers, the file size barely increases at all.
Of course, if I add an empty layer or, for example, a layer filled with black, the file size won't increase that way because it adds almost no data to the file.
What does all of this mean?
Both methods have advantages and disadvantages, and both put a load on the computer, just in different ways. Adjustment layers require more calculations. Raster layers increase the file size and consume RAM, which also reduces performance. With numerous layers, the slowdown can be enormous. The best approach is to find a balance. If you've applied changes through a huge number of adjustment layers, temporarily disable them or merge them into one pixel layer and delete the adjustment layers. When I have a lot of layers, I get rid of the ones at the very bottom.
Removing unnecessary pixels from masked layers
It's common to create a layer containing the entire photo just to apply a filter to a very small area, such as Dust & Scratches. Part of the layer is then masked out, but all its pixels still increase the file size. It's best to delete them and leave only the parts of the layer that actually matter. I created an action that does this as quickly as I can move my finger (my actions are available here). Of course, you can also do it manually, but who wants to do that over and over? The steps are:
- Hold CMD/CTRL and click the mask
- Press CMD/CTRL + SHIFT + I to invert the selection
- In the Layers panel, click the photo thumbnail instead of the currently selected mask
- Press Delete to remove the pixels
Moving layers instead of copying them
This advice is mainly for people with very weak computers, people assembling collages from original files, or anyone working with gigantic files. If you need to transfer layers from one file to another, it's better not to copy them. Grab them with the mouse and drag them onto the destination photo instead. Photoshop then bypasses the clipboard completely, so the computer doesn't have to sweat as much.
Smart Objects
As strange as it may sound, a Smart Object can speed up Photoshop but slow down your work. To create one, select a layer and choose "Convert to Smart Object" from the right-click menu. You can also do this with a whole set of raster layers that would normally consume a lot of RAM while enabled, especially when there are dozens of them.


A Smart Object reduces Photoshop slowdowns when you create it from a set of raster layers, because Photoshop displays only their final result, just as if you were using one flattened layer instead of, say, 20. Photoshop will even act as if the layers inside the Smart Object don't exist at all, and its estimated file size won't include them. Once you save the document to disk, of course, its size will reflect all the contents of the PSD and will be larger than the figure reported by PS.
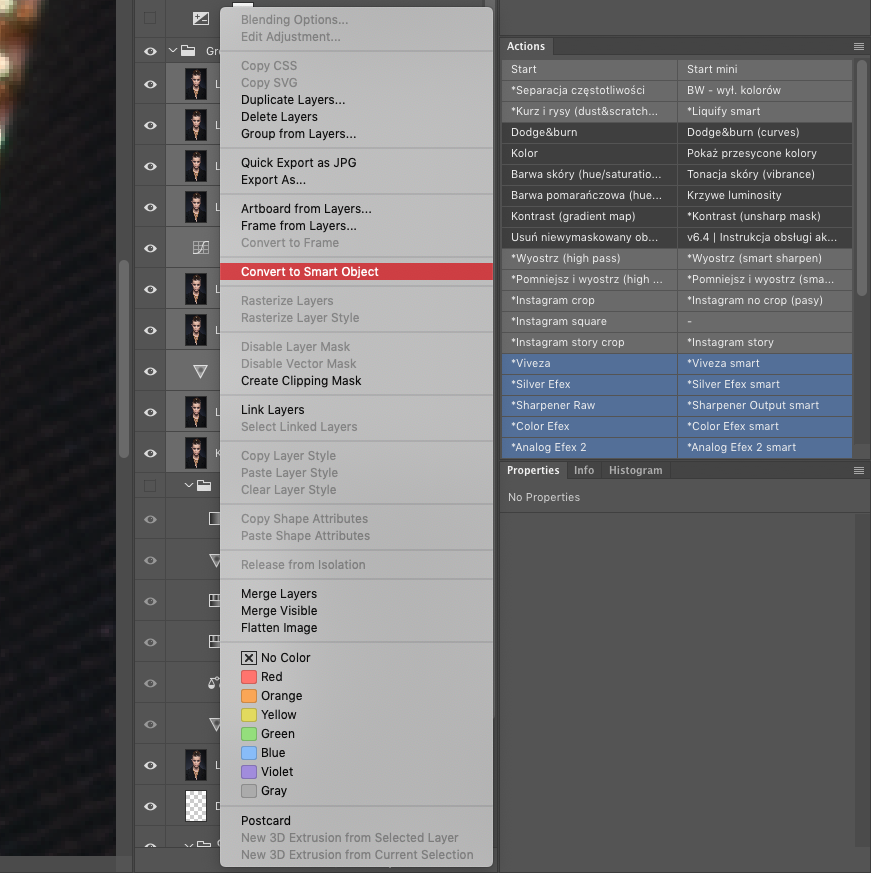
To sum it up simply, creating a Smart Object gives you an effect similar to disabling the layers and displaying a pixel layer that merges the layers inside the Smart Object. This makes the program run faster.
Why does a Smart Object slow down editing?
Creating Smart Objects takes time. Simple ones are created in an instant, but if they contain many layers, it can take several dozen seconds even on a very fast computer. When you no longer need one, you'll probably want to rasterize it to make the file much smaller, and that will take just as long again. Cropping with Delete Cropped Pixels enabled will actually leave the pixels in place, so it's best to crop before creating the Smart Object.
I do it differently
For these reasons, I don't use Smart Objects as a way to speed up Photoshop. Instead, I sometimes disable a group or even delete it completely, then display a previously created layer containing the entire image in its place (the keyboard shortcut is CTRL/CMD + ALT + SHIFT + E).
Single layers as Smart Objects
Single layers used as Smart Objects are a different matter. You create them so you can edit the changes later. I do this almost every time I use the Liquify filter, for example, and very often before using the Silver Efex plugin or even Viveza.
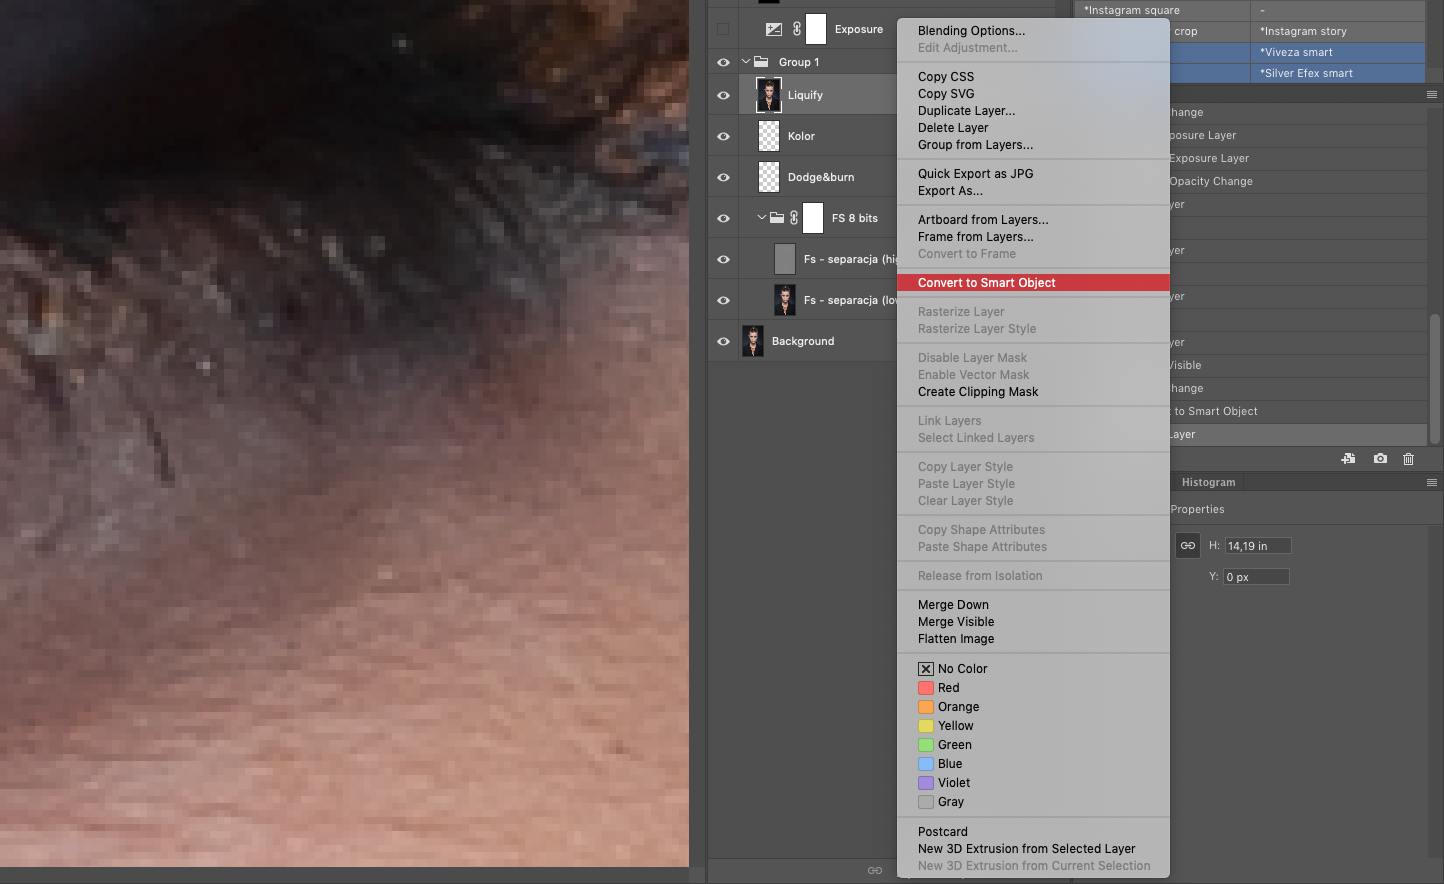
In this case, a Smart Object has no positive effect on performance. Quite the opposite. A Smart Object layer uses slightly more memory than a regular raster layer, and if you crop the image, for example, the Smart Object has to be recalculated. That happens automatically and takes time. So once I know for sure that I've finished that stage of editing and I'm moving on to other parts, I rasterize that kind of Smart Object.