Oculus Quest—modifications and essential accessories

Over the past year, I've spent quite a lot of time in virtual reality, but I can see that VR is still science fiction to many people—especially VR that doesn't require a computer, console, phone, or anything else to work. It's still a niche, even though last year was a huge step forward for virtual reality, and development hasn't slowed down in 2020. Quite the opposite. What has happened over the past year and a half makes it clear that VR will become completely commonplace, rather than a gadget for the few as it is now, but that's a topic for five hours of talking…
I probably should've put a VR headset on some naked model and shot the photos for this article that way to get clicks, but the refreshed version is launching soon, so there's no point waiting—I need to publish this today. Maybe the next time I write about VR, I'll prepare better in advance… If the leaks are correct (and there are so many that they almost certainly are), the new version will need the same modifications described below.
Table of contents:
- Oculus Quest—essential information
- Frankenquest as an alternative to several modifications
- Facial interface
- Counterweight
- Strap padding
- Additional top strap
- Audio
- Controller grips
- Nose light blocker
- Prescription lenses fitted to the headset
- Stand
- Rechargeable AA batteries for the controllers
First, I'll mention that putting a phone into something resembling a headset isn't real VR. It's only a three-axis parody that can put you off the whole thing. Real VR offers completely different possibilities, much better quality, and six degrees of freedom. In other words, you can do more than move your head in the virtual world: when you walk around the room, the same movement is reproduced in VR. And, of course, you hold dedicated controllers in your hands.
Oculus Quest—essential information
It's a VR headset that doesn't need any other device or a single cable to work—not even a power cable, because it has a built-in battery. You're in the virtual world a second after putting on the Quest. You don't even need to turn it on: a sensor detects when the device is on your head and wakes it from sleep, then automatically puts it back to sleep when you take it off. You don't need to set up any additional devices around the room, because everything required for motion tracking is built into the headset. That means you can take the Quest on a trip and, in a hotel, on a plane, or anywhere else, watch movies on a gigantic screen instead of a laptop's dozen or so inches—or a miserable 50-inch hotel TV four meters from the couch. Or play VR games, obviously. The Quest is real six-degree-of-freedom VR, not a three-axis substitute. And all of this costs just $400 plus tax. The upcoming version may be even cheaper.
That's why the Quest was a breakthrough in VR: people without powerful computers could get real six-degree-of-freedom VR. It's also why Time named the Quest the biggest innovation of 2019, and why it sold so quickly that Oculus could barely keep up with production before anyone had heard of COVID.
What's the catch? The graphics fall short of PCVR and look more like PlayStation VR. Unless you connect the Oculus to a PC with a cable or wirelessly through Virtual Desktop and play PCVR games, because that's possible too. At launch, there were many more drawbacks than weaker graphics, but almost all of them have been fixed (which is why I don't recommend watching reviews from several months ago).
Comfort, or comfort mods
One drawback can't be fixed with software: the stock headset is uncomfortable, and you need to install several extra accessories to spend long hours in the virtual world comfortably. I wrote this article so I could describe my experience with these mods instead of telling everyone individually what they should buy. So, after that rather long introduction, let's get specific. At first, after a dozen or so minutes, the Quest put so much pressure on several spots that I had to take a break. The calmer the game, the worse it was—possibly because the strap didn't move even 1 mm on my head and kept pressing the same places nonstop.

Since adding the comfort mods, I haven't once taken the headset off because it was uncomfortable. That said, I don't do 12-hour sessions; usually it's around two hours, with four hours being the maximum without a break. But judging by opinions on Reddit, people with similar modifications can spend much longer in VR without taking any breaks.
Frankenquest—one mod that replaces several others
Many people simply replace the Quest's stock strap—or whatever you want to call the part that holds the headset on your head—with the one from the HTC Vive, sold as the Deluxe Audio Strap (DAS). You can install the DAS on the Quest in a few minutes, turning it into the so-called Frankenquest.
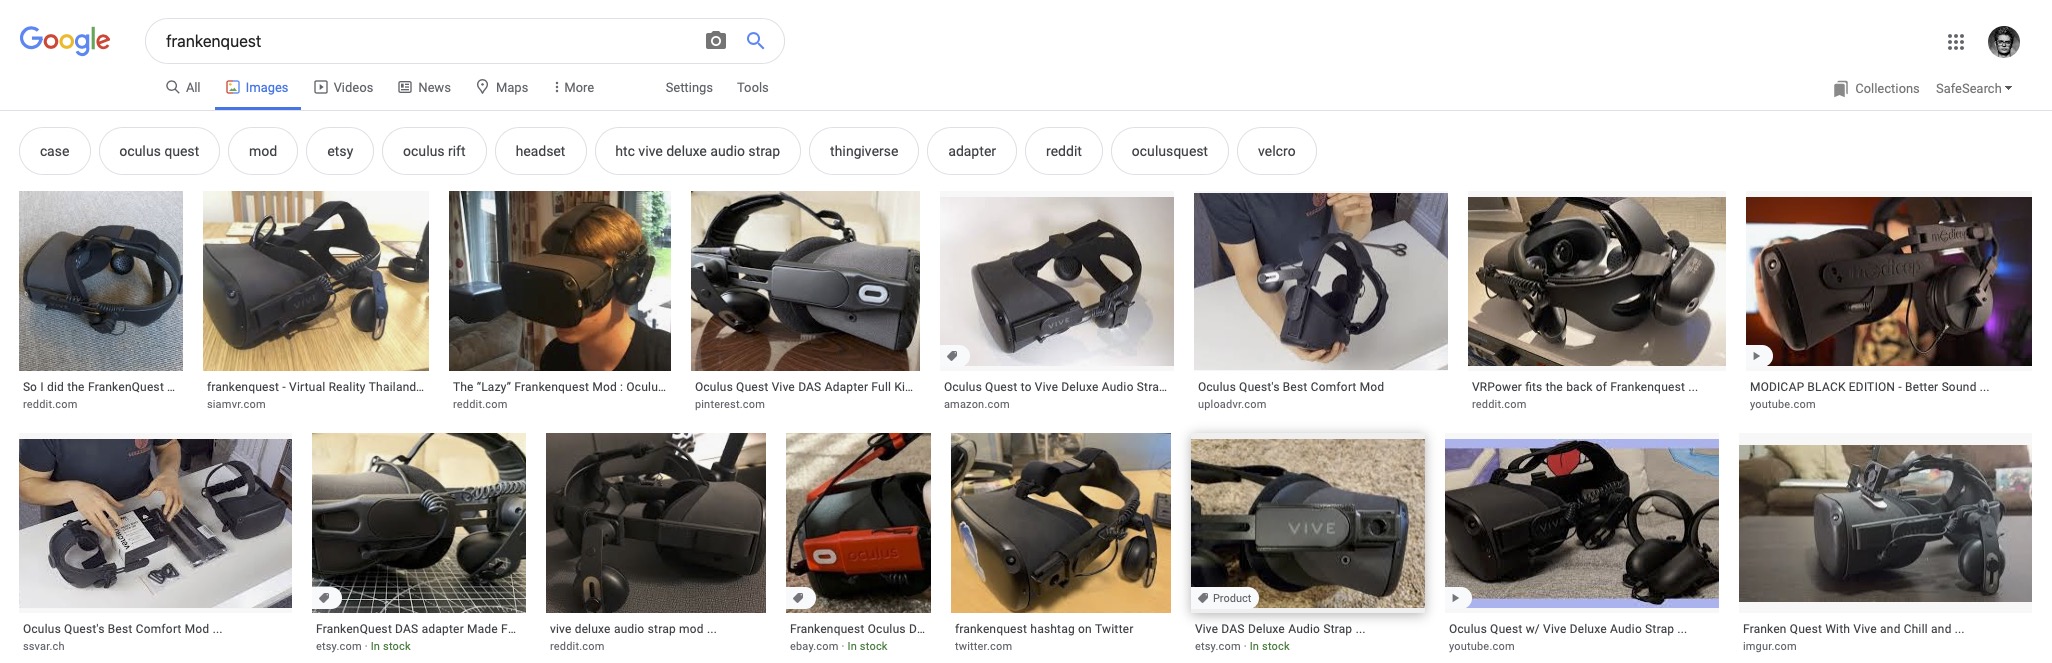
This solution is very comfortable but huge, which severely limits portability. Portability mattered a lot to me: when packing for a trip of several days, I wanted the Quest to take up only a small part of my 13-inch laptop bag, and despite my modifications, it does. With the DAS, I'd probably need a separate suitcase just for it, so I chose different modifications. Still, given the DAS's popularity, I couldn't leave it out.
Unfortunately, production of this accessory was discontinued, so for a long time you couldn't buy a DAS unless you paid several times its original price (it used to cost $70–$100, and later people dreamed of finding a used one for $200). It's by far the most expensive modification, but it replaces three others, so it made financial sense while prices were lower. I saw that the DAS later returned, and now I can no longer keep track of whether it's in production or not…
The next two mods are also very useful for Frankenquest owners.
Facial interface ($3–$20)
The part that rests against the user's face is probably a problem with every VR headset. First, it's hard to keep it hygienic when several people use the headset or when you play games that require serious physical effort. Second, comfort varies. The Quest's stock facial interface is TERRIBLE. It genuinely made my face hurt, and although I know it works for some people, it hurts me just thinking about it.
Replacements are made of synthetic leather or silicone, so they don't absorb sweat—just wipe them clean and you're done. These interfaces come in different thicknesses, and their effect on comfort is ENORMOUS. VR Cover makes the most popular ones. They even offer interfaces that move your eyes closer to the lenses, increasing the field of view, though of course they don't cushion pressure nearly as much (they're still better than the stock solution). That doesn't work for me, and not only because it's less comfortable—the lenses simply get dirty more easily when my eyes are closer than when they're farther away.

I went in the opposite direction and chose maximum comfort with a thick interface, also from VR Cover. AMVR makes very similar ones, but the quality is worse. Other accessories from the company are excellent and I'll discuss them later; its facial interface simply didn't turn out very well. Kiwi, meanwhile, has one that's better ventilated than the others. There are also plenty of very cheap solutions—you can get silicone covers for a few dollars. The cheapest ones stretch over the stock interface and focus more on improving hygiene than comfort. I'm very happy with my thickest VR Cover version. I only used the thin version briefly before returning to the thicker one (both are sold together as a set). I haven't used the ultrathin versions sold separately. VR Cover interfaces can be moved to other headsets if you have an adapter, or if you attach hook-and-loop fastener to the headset, so this should be a purchase that lasts for years. After a year of use, mine is in excellent condition.
Counterweight ($0–$50)
Counterweights are used on many VR headsets, but the Quest needs one especially badly—it's an absolute game changer, and EVERYONE should install one on their Quest, even if they think they don't need it (though I doubt there are many such people). Even though the headset weighs only 500 g, it feels much heavier after a short time because all the weight is at the front. After adding 200–300 g to the back of the strap, the headset stops wearing you out with its weight. The longer you play, the more noticeable the difference. The most popular Quest counterweight is… a power bank.
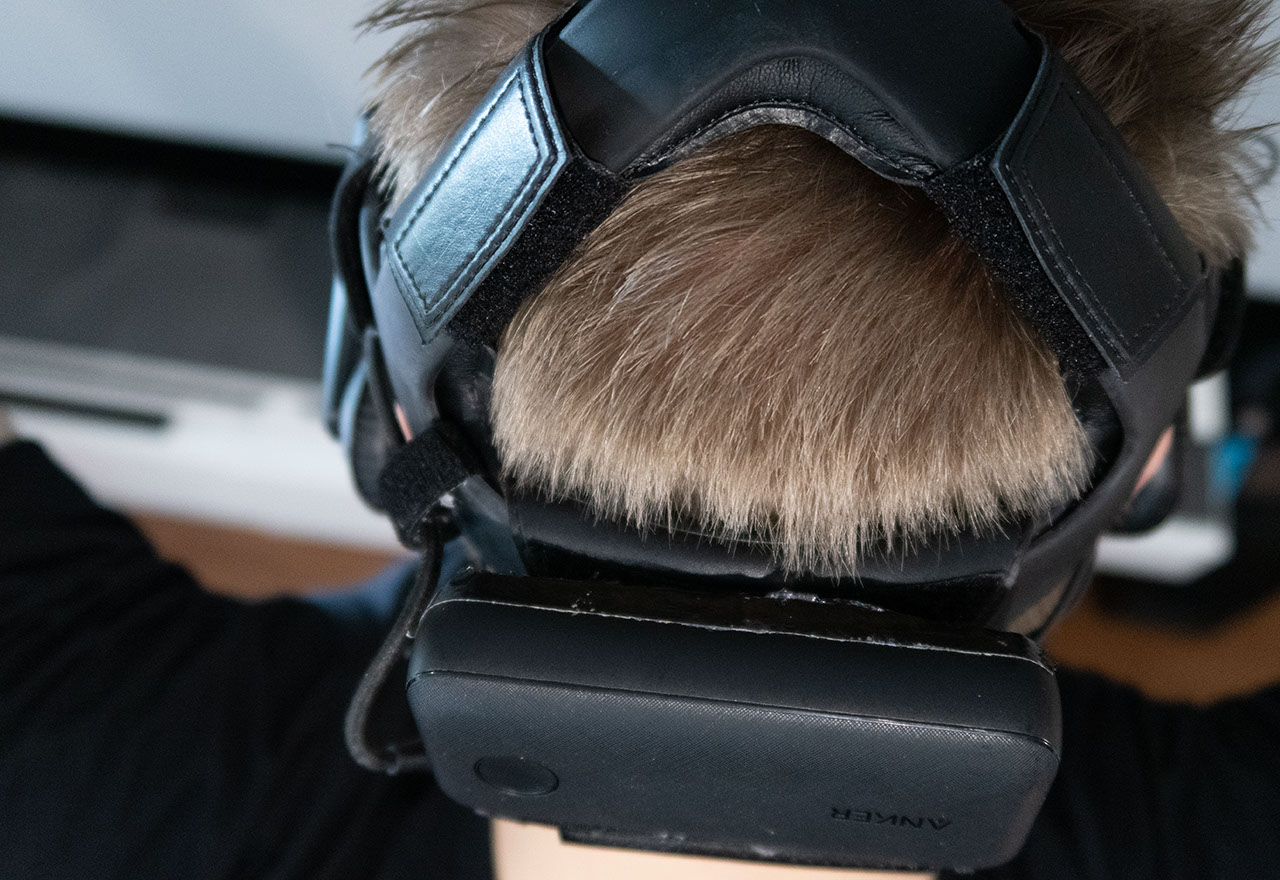
Some people attach it with rubber bands, but hook-and-loop fastener is the most popular option because of its appearance and practicality. That lets you detach it in seconds when playing with your head against a headrest, and so on. I had sew-on rather than adhesive hook-and-loop tape, so I attached it to the power bank with a hot glue gun. Some people 3D-print power bank holders or mount them with magnets, zip ties, tape, and so on. Hook-and-loop fastener still seems like the best option to me. Unfortunately, mine wasn't self-adhesive, so I used a glue gun, which doesn't look beautiful.
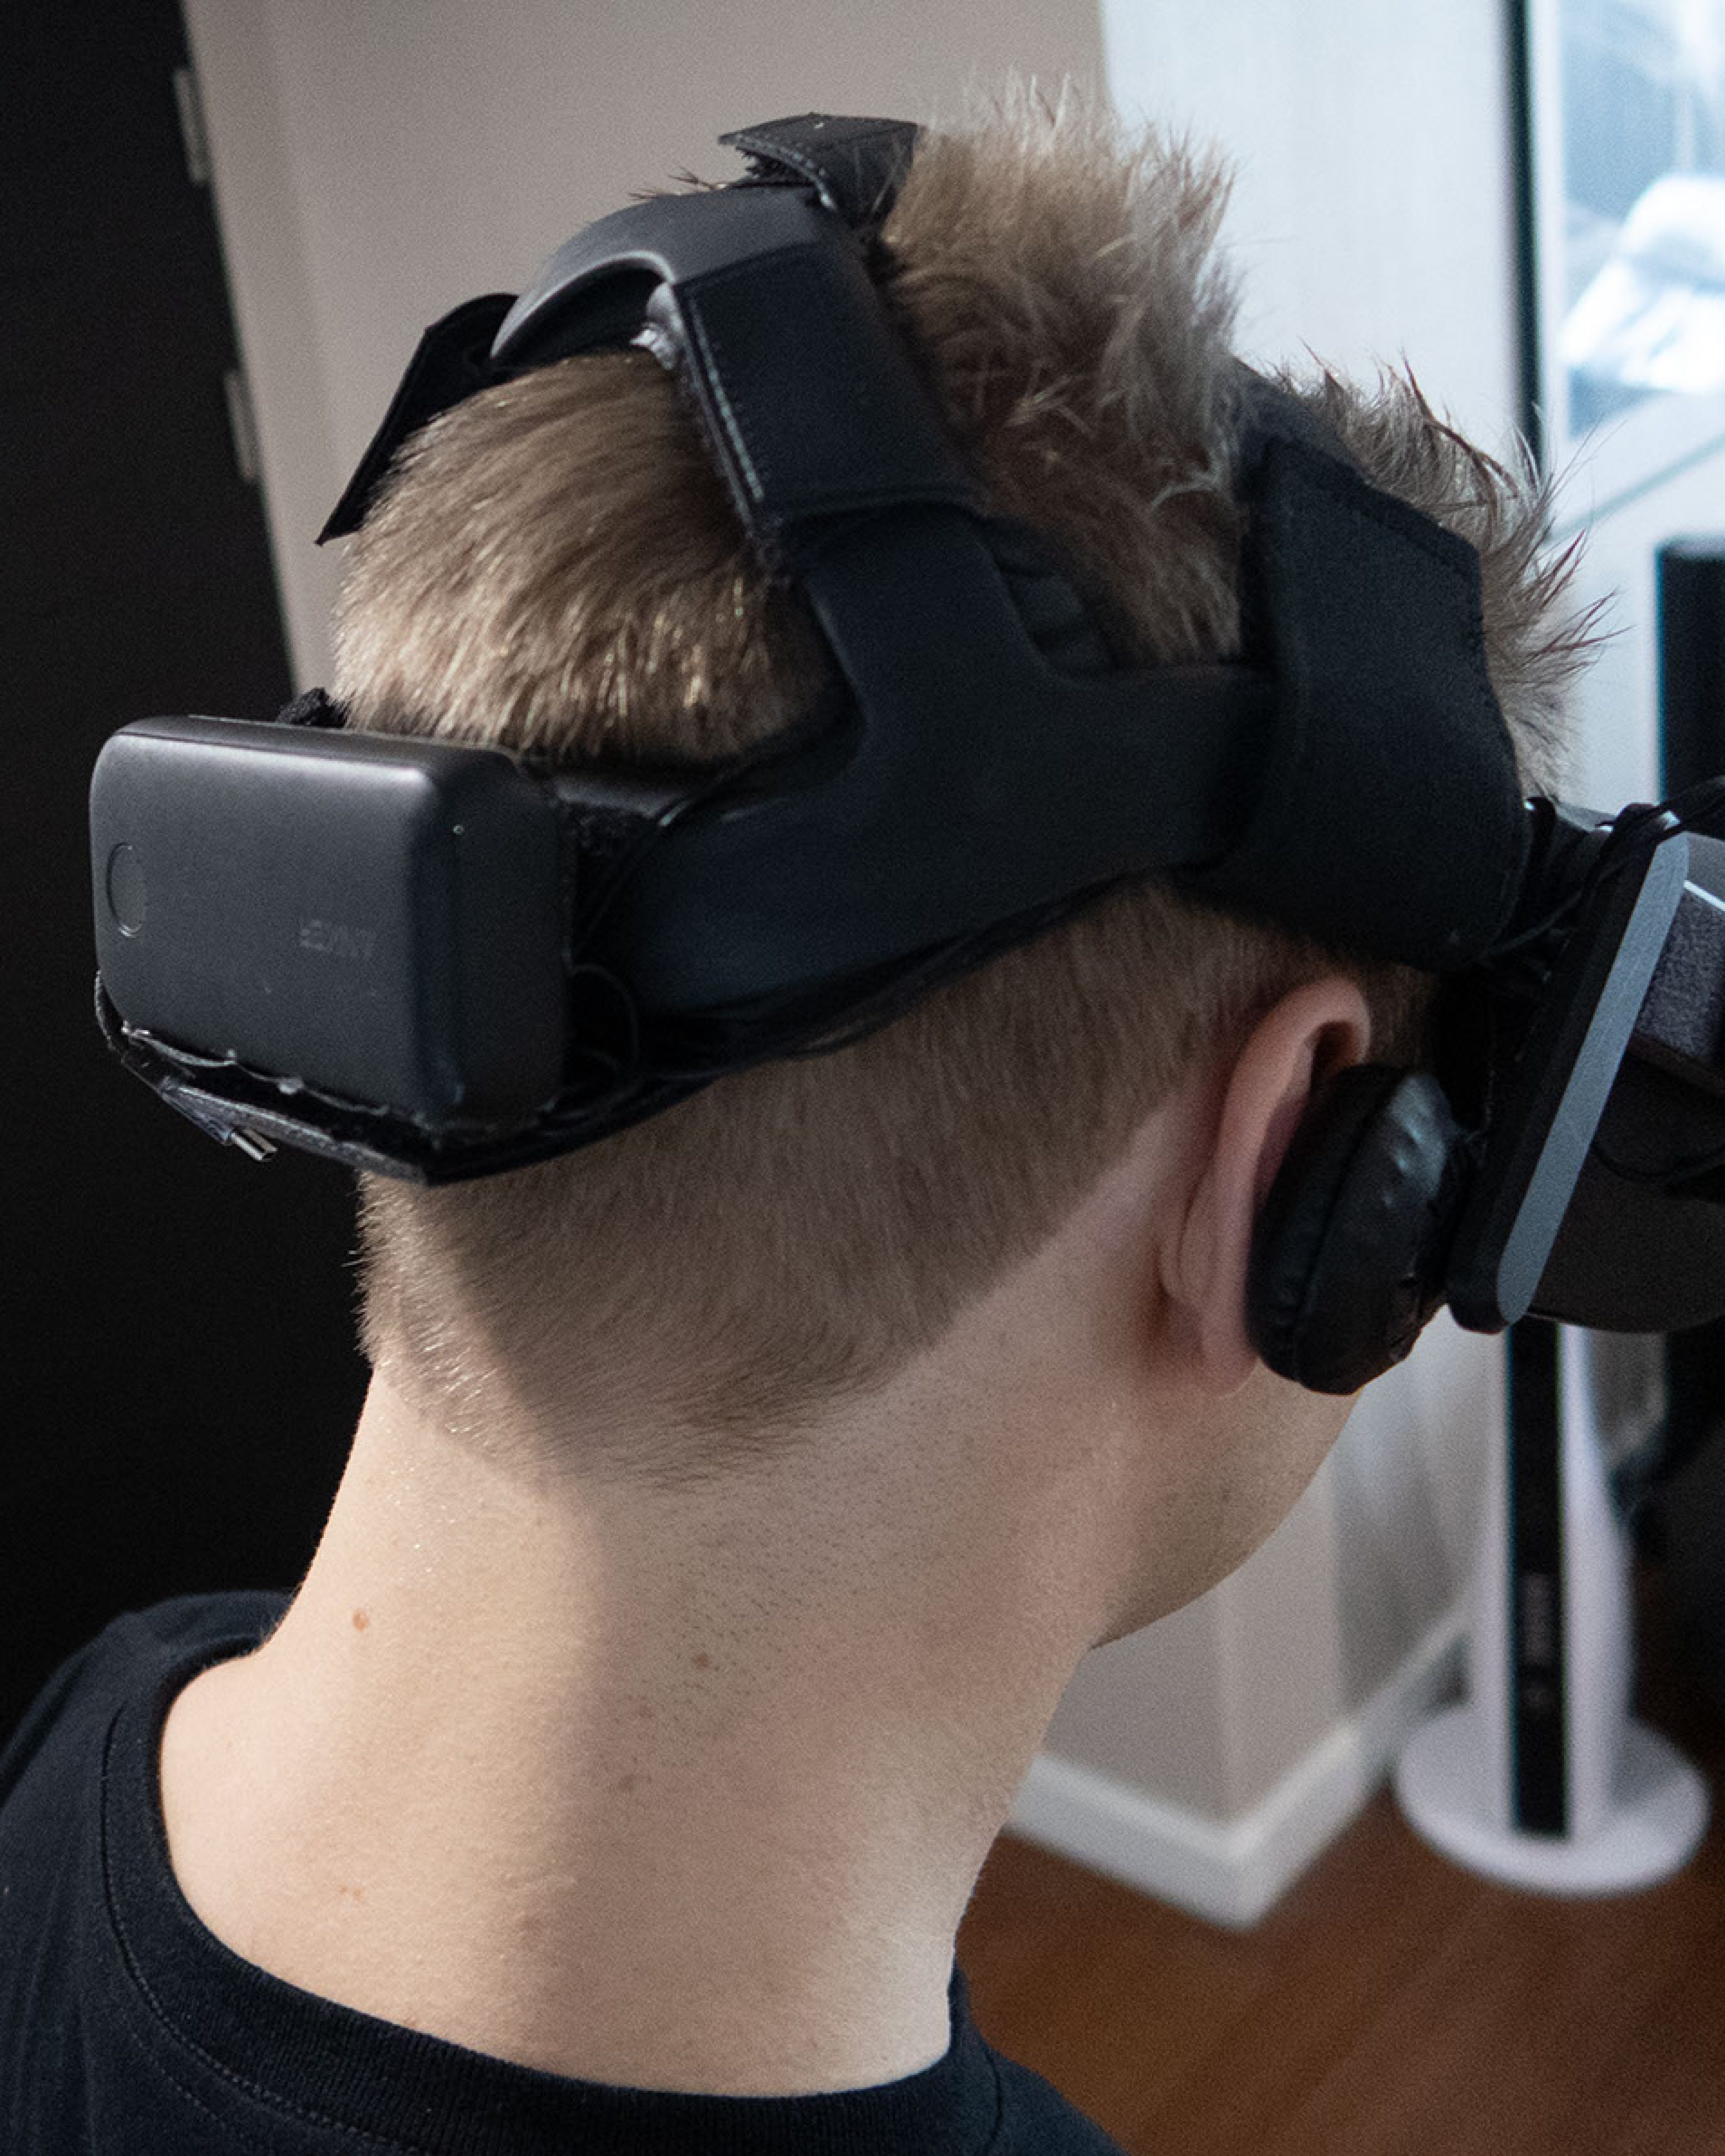
If the hook-and-loop fastener is good quality, there's no chance it'll come loose, even in games that require dynamic movement. The most popular power bank for the Quest is the Anker 10,000 PD because it has the ideal shape—less flat but thicker than almost every other power bank—but any fast model rated at 3 A will do. A 10,000 mAh unit more than doubles the battery life, but I've never managed to drain both the headset and the power bank in one session. A 20,000 mAh unit may already be too heavy, though some people still mount one. There are also power banks designed specifically for the Quest.
You can also use anything else instead of a power bank. At first, I used coins taped together and batteries. I've seen Quests with a retractable tape measure hanging from the back—each one has a clip for attaching it to your pants, so you can simply hang it on the back of the Quest.
Padding for the back of the strap ($1–$19)
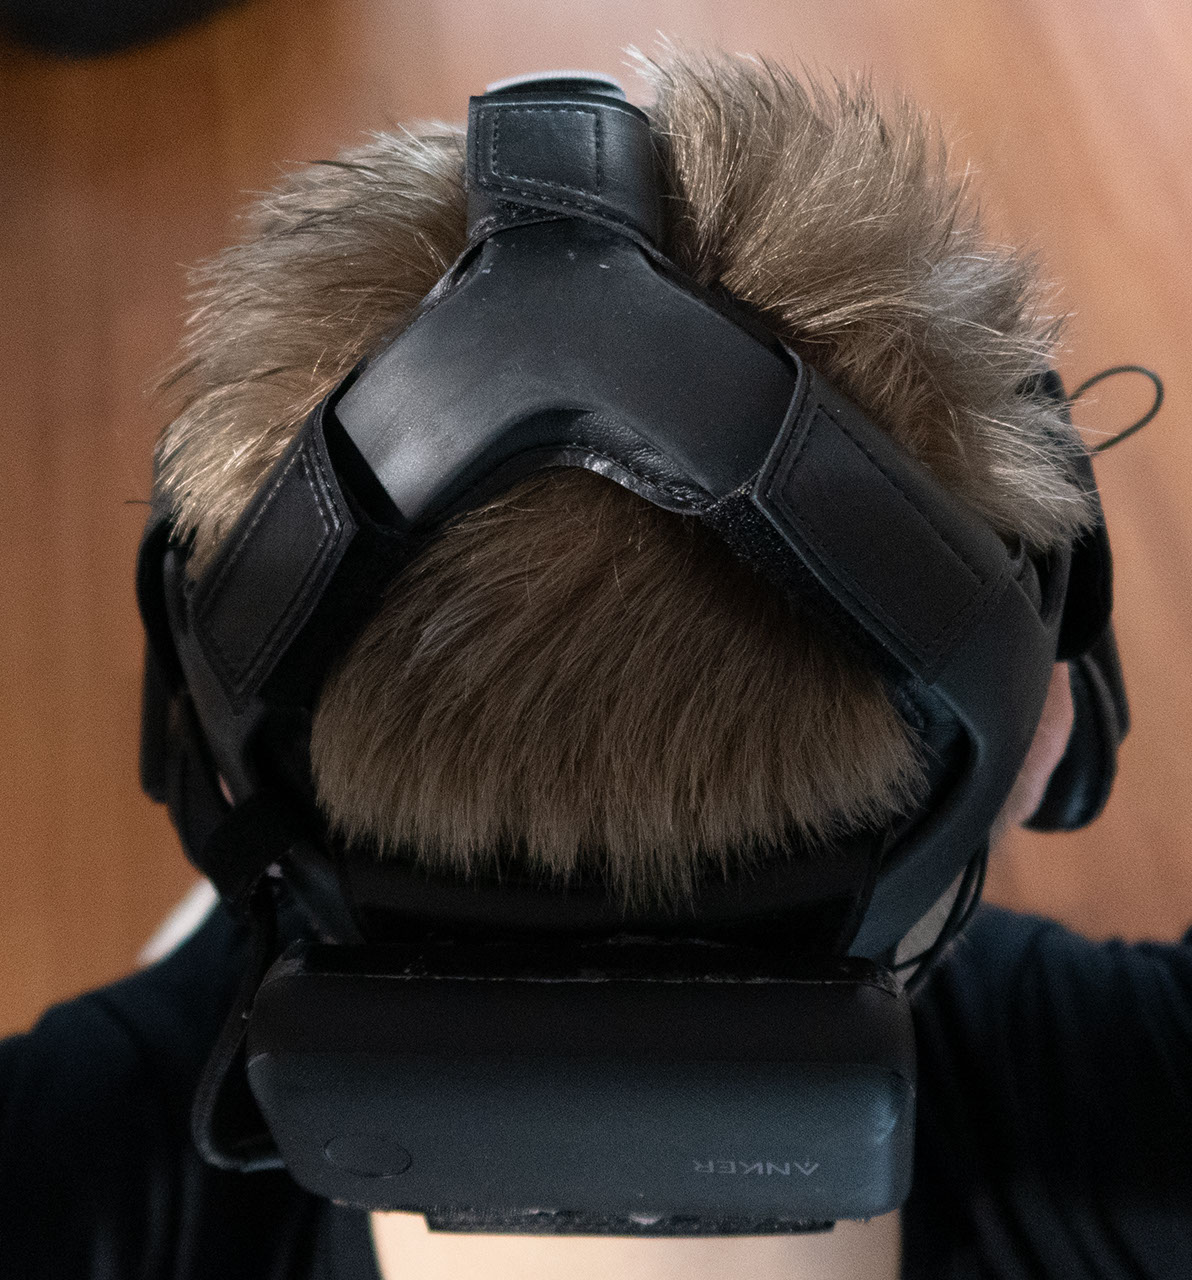
The VR Cover Comfort Strap is a cover for the Quest's stock strap that provides either 10 or 17 mm of additional cushioning, depending on the version. It's a leather-covered foam pad with a hook-and-loop closure. Installation takes only a few seconds. I chose the thicker 17 mm version, and the difference compared with the Quest's stock strap is enormous.
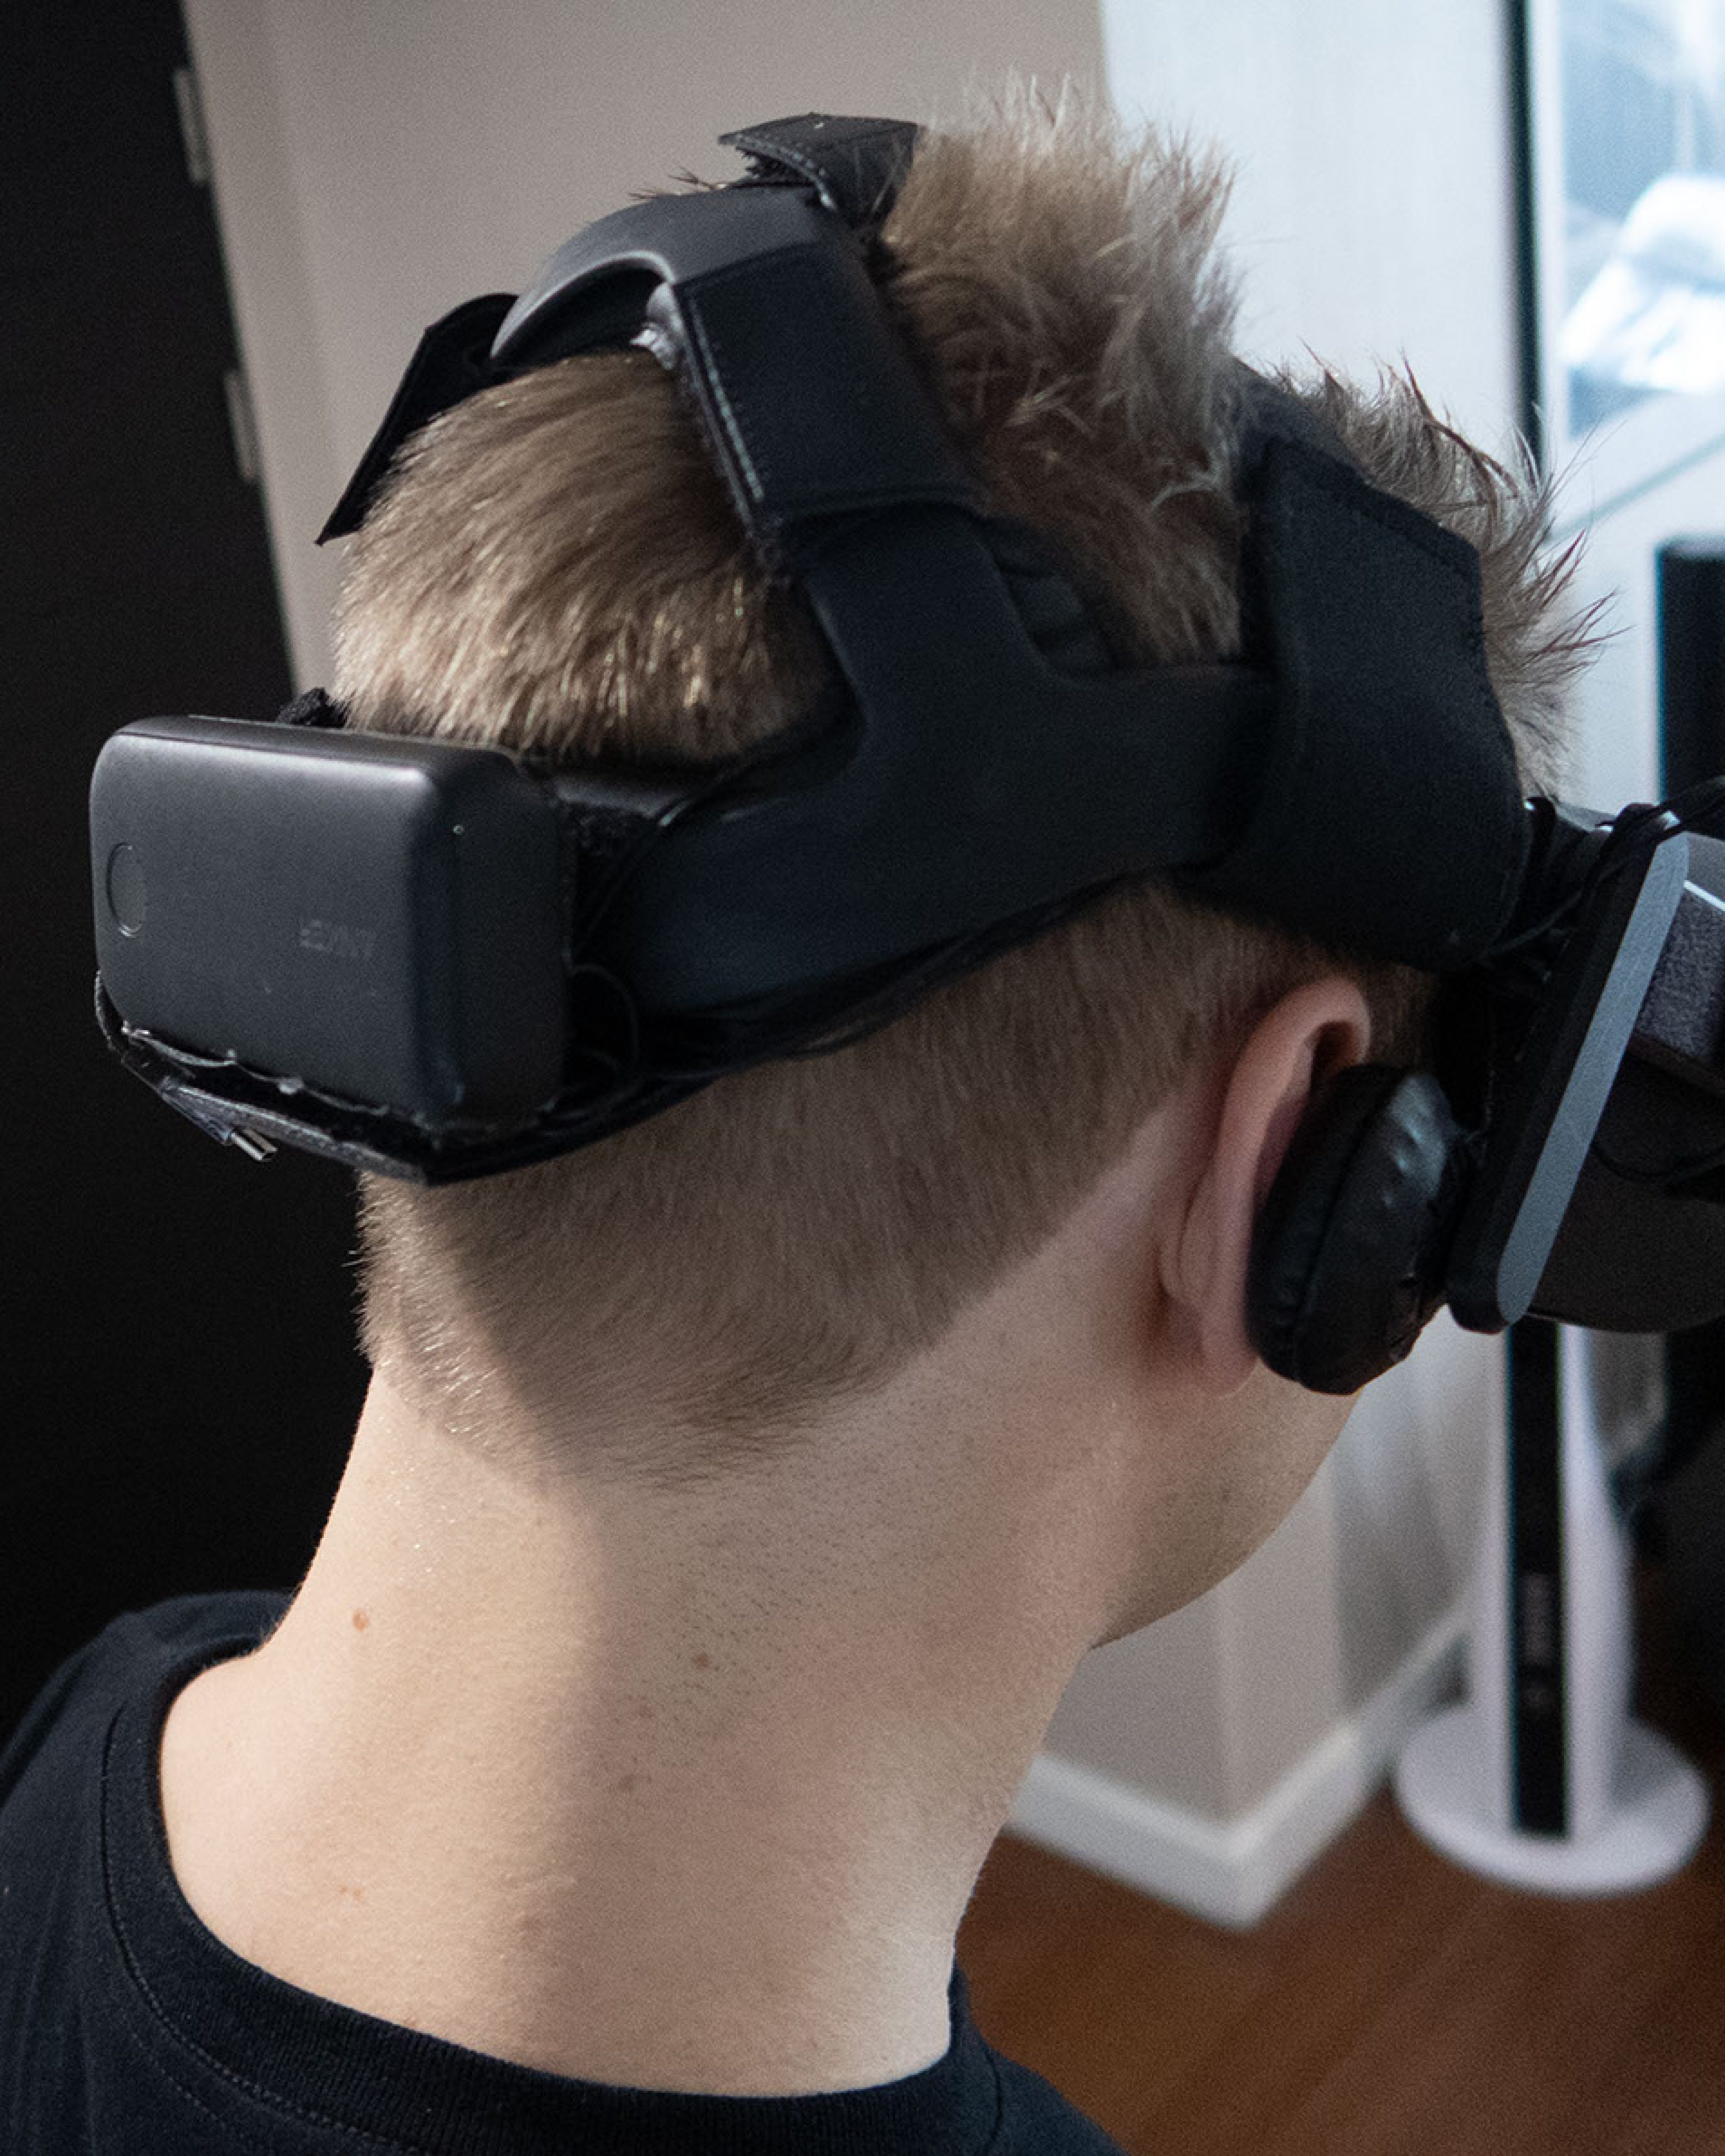
I haven't used the 10 mm version. I only know from reviews that the difference isn't as dramatic, though it's still better than stock. Other pads of this type are available, but the price difference isn't very large, which is why some people make their own mods using… a dish sponge and similar things. Then the whole thing costs literally a few zlotys. There are probably inexpensive alternatives on AliExpress now as well.
Additional top strap ($3–$20)
My next step was adding an extra wide strap over the top of the headset. It means the headset's weight is no longer distributed almost entirely between its front and back, but more evenly across the whole head. Studiofoam Strap started this type of strap, while I bought a similar one on AliExpress for $3.
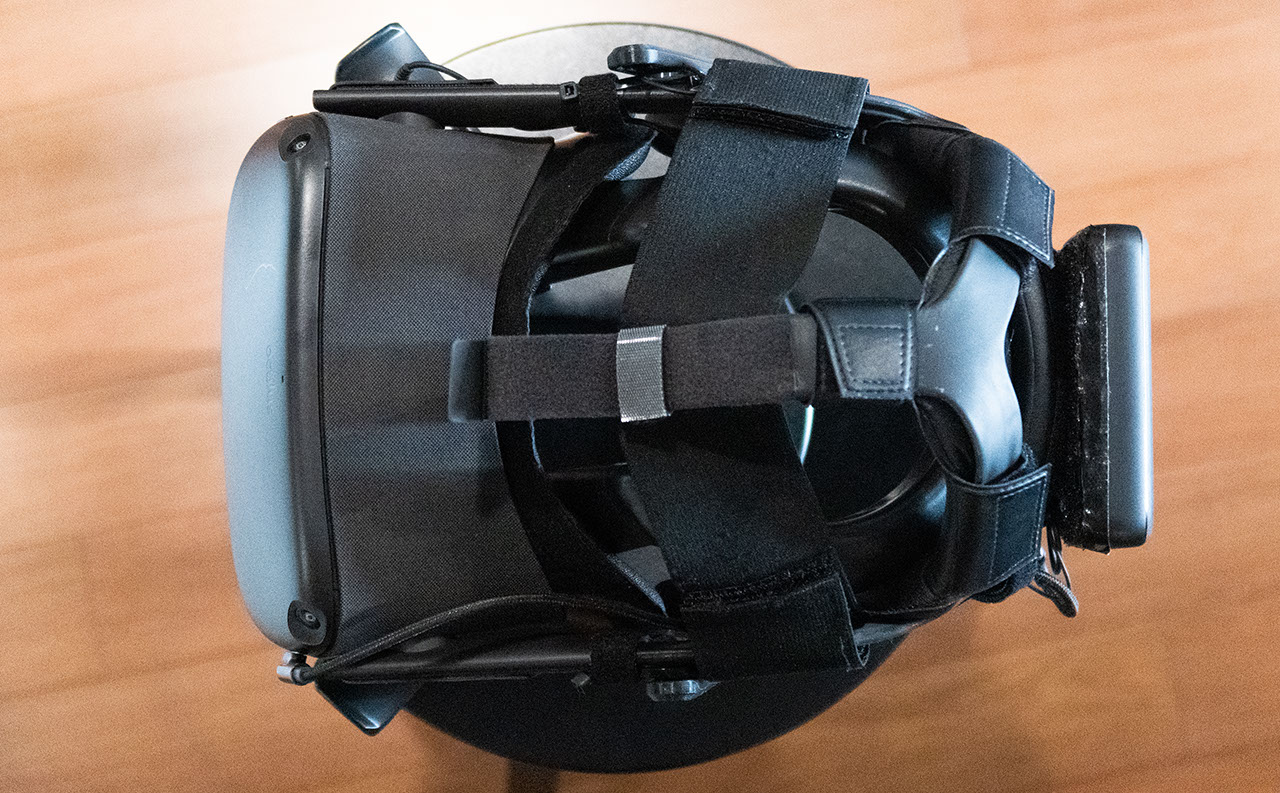
Almost anything elastic can do this job. Seriously—I've seen mods that used… a sock as the strap.
As long as I played games that required lots of fast movement, the VR Cover accessories and counterweight were enough for comfortable play, although those sessions lasted one to two hours and rarely longer. In slow-paced games, however, the headset pressed painfully against the top of my head, and this strap solved the problem completely. I regret not buying it right away because it's very cheap and makes a substantial difference. In fact, I often saw people call it the best Quest purchase after the facial interface.
Other modifications
Audio ($13–$50)
The stock speakers are mediocre, especially when playing Beat Saber, Pistol Whip, and similar games. I used them for a few minutes, then switched to headphones. Eventually I adopted a fairly popular solution: Koss sells the KSC75 headphones (KSC75X in black; the version without the X is silver), which are exceptionally cheap and sound much better than you'd expect at that price. They cost only $13–$20, and when connected to the Quest, they sound better than the Bose QC35 II (though the Bose were simply very quiet for me with the Oculus). The KSC75 supposedly sound better than the headphones on the HTC Vive Deluxe Audio Strap. I've heard that from several people but haven't had a chance to compare them myself. You buy the KSC75(X) and attach them to the Quest either by bending the wires from their original clips or by 3D-printing a dedicated mount. I used the first option for about a month and it worked well, but eventually I switched to printed mounts. You can find them here.
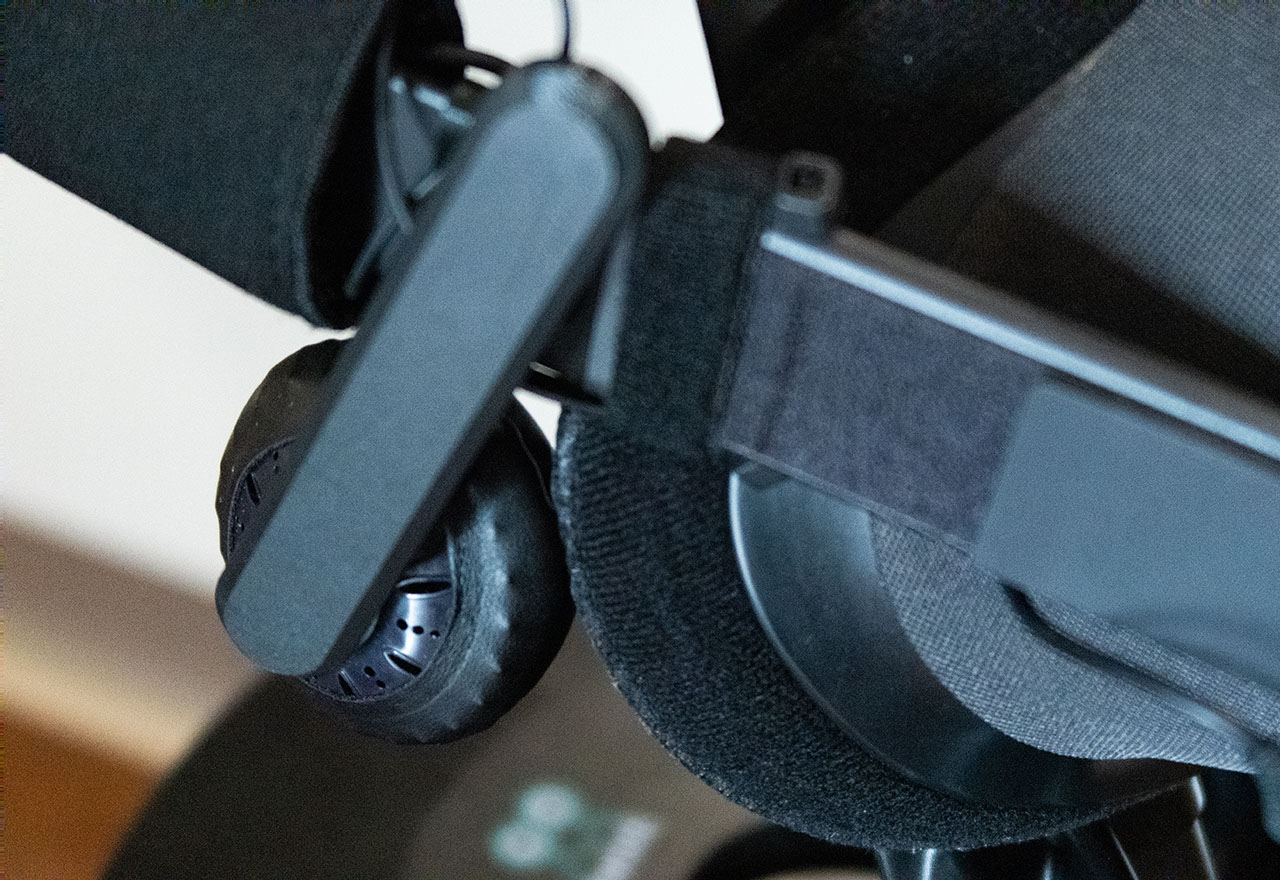
Unlike the stock clips, the printed mount lets you adjust height and tilt, making the headset very easy to put on. When friends use it, everyone can adjust the headphones to fit. I also recommend replacing the earpads with faux-leather ones. The headphones, earpads, and printed mounts cost me about PLN 150 in total because I don't own a 3D printer. The same mounts also fit the iconic Koss Porta Pro. With those, however, you're paying extra for a better headband that won't be used on the Quest, while the headphones themselves aren't better (supposedly the opposite, but I haven't tested them—that's the opinion of Snazzy Labs). In general, finding better headphones wouldn't be much of a challenge—there are thousands, and I have at least a few better models in my apartment—but I use those for other purposes. It's the KSC75's design that works so well for VR.
I previously used in-ear headphones for VR, among other models, but inserting and removing them every time was impractical. That's also why I quickly abandoned the idea of buying Oculus's original headphones, which are in-ear. Over-ear headphones didn't work particularly well for me in a VR headset when playing things that require a lot of rapid movement—and I play plenty of those.
I have no complaints about the Koss KSC75X. They definitely aren't headphones I'd buy for music unless my budget were limited to around $50, but they're good enough for gaming, even music-heavy games such as Beat Saber and Pistol Whip. The volume—the thing I always complain about—is completely sufficient here. I usually set them to around 60–70%, or 80–90% in music-based games. They don't distort at 100%, though in a few situations they can at maximum power while they don't at 90%. They're simply too loud for me at 100% (and this is coming from someone who constantly complains that every pair of headphones is too quiet). It's also popular to mount headphones designed for PSVR on the Quest, but they're much worse than the Koss models mentioned above, even though they come with decent mounts.
Controller grips
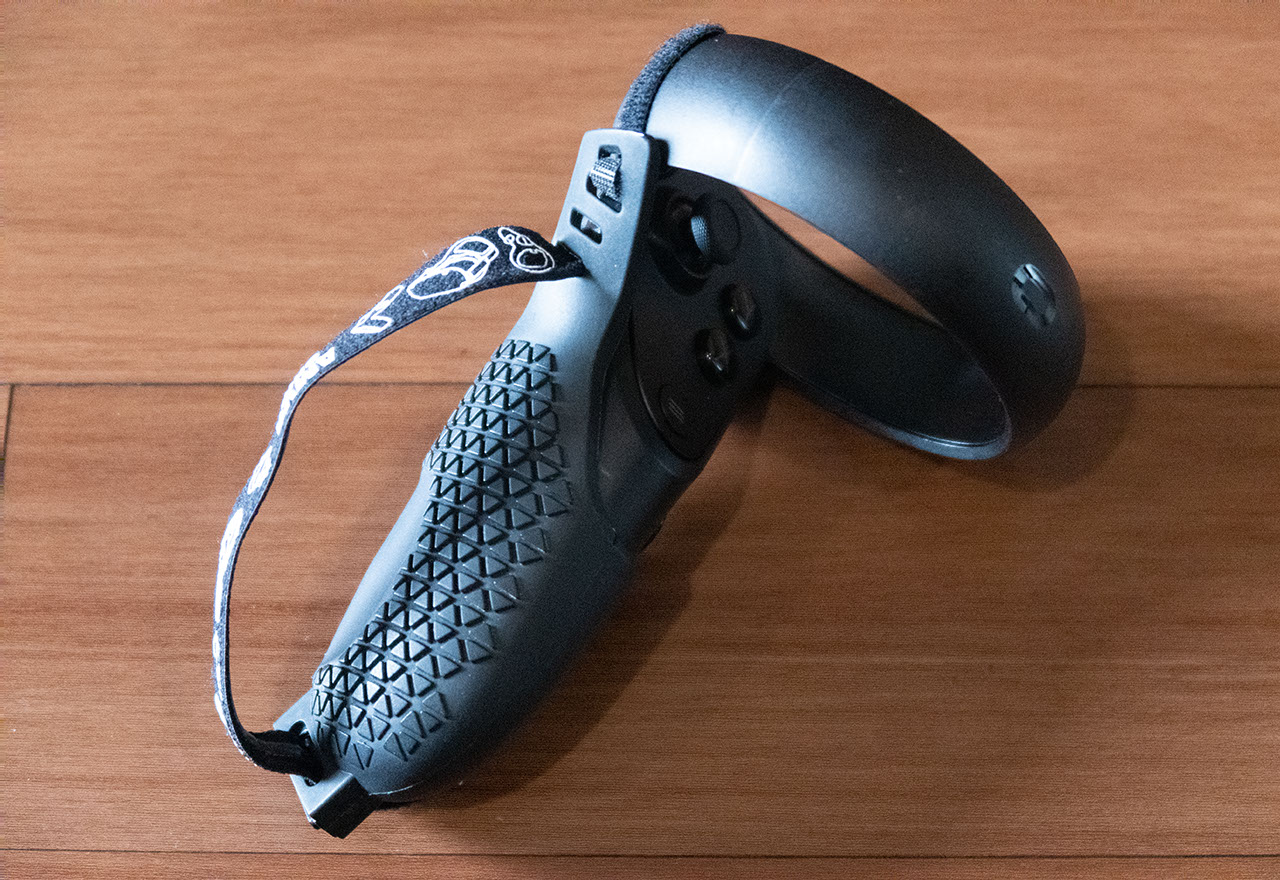
The stock controllers for almost every VR headset have two major problems:
- You have to secure them around your wrists with cords every time if you want to be sure they won't fly out of your hands and into a nearby window or TV.
- Even after tying the controllers to your hands, they'll still fall if you let go. They just won't hit the floor; they'll hang from the straps instead. Over time, this is completely impractical and uncomfortable.
Only the Valve Index controllers avoid these problems out of the box. For the Quest and other headsets, special grips solve them with elastic straps that keep your hands directly against the controllers at all times. Mamut is almost synonymous with this kind of grip, but alternatives are available. I chose AMVR's solution—the same company whose facial interface I advised against.
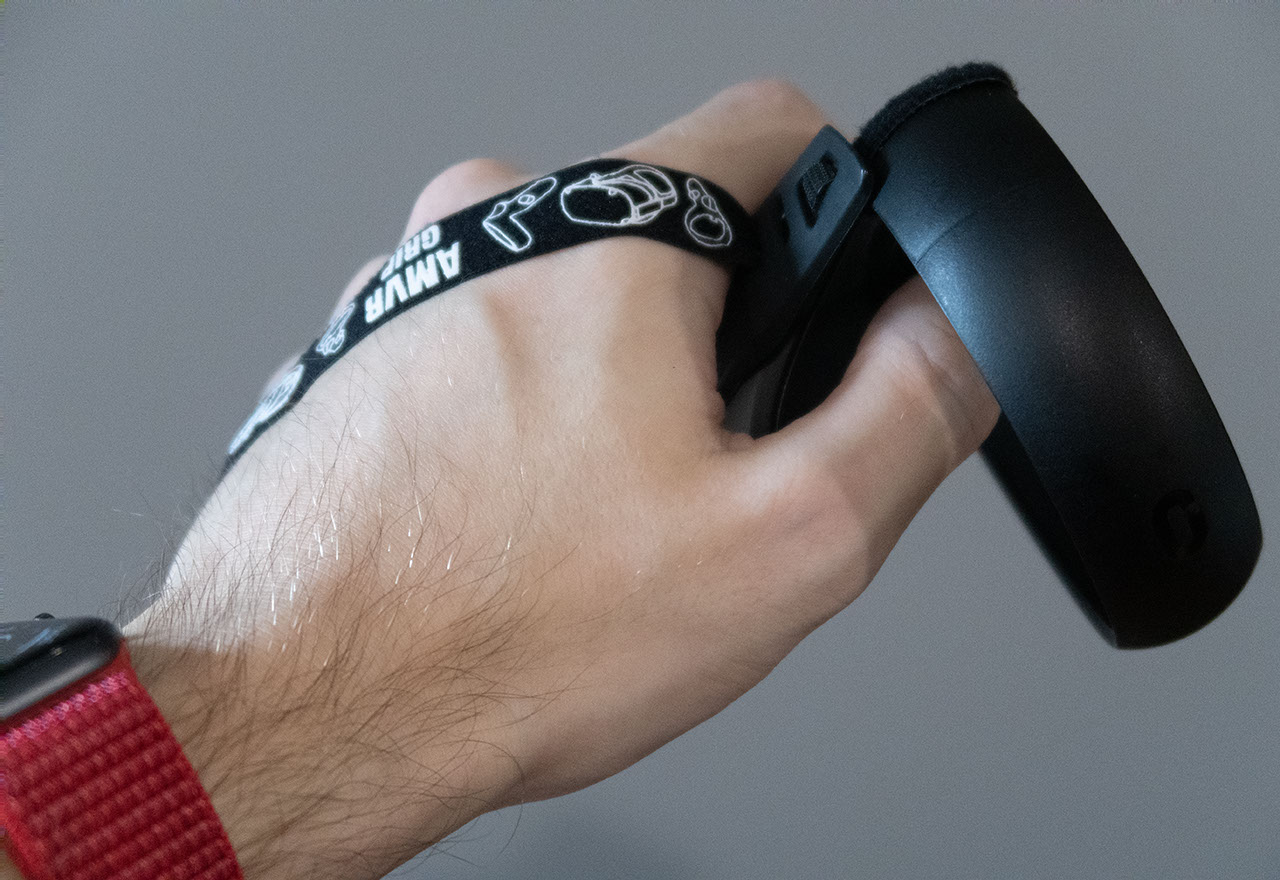
Even cheaper Kiwi grips were also very popular, but they're much worse, not very versatile—only suitable for small hands—and didn't include actual grips, just straps. It's better to pay more and buy something decent once. Though I think Kiwi later released an improved model as well. Beyond practicality and a substantial comfort improvement, grips have another major advantage on the Quest: the battery cover will never “slide off by itself” again during fast lightsaber fights. You can also mount the stock straps so they hold your hands similarly to the elastic bands on grips, but I only recommend that as a temporary solution
Nose light blocker
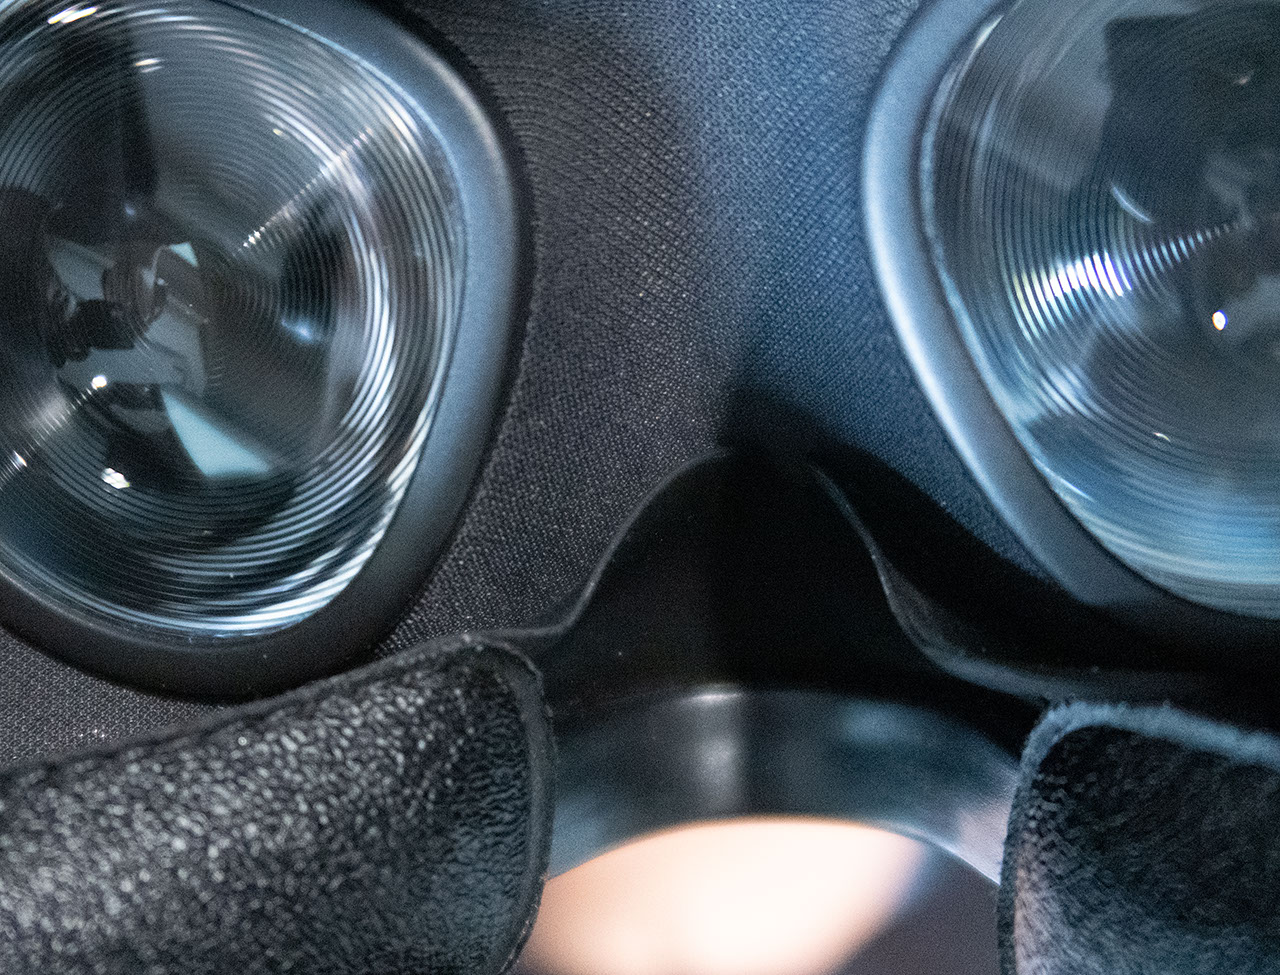
Unless you have a gigantic nose, light will show through the gap between it and the facial interface. It even gets past my large, crooked nose. Some interfaces block light almost completely; others require a blocker. I use AMVR's light blocker, included free with the company's grips described above. Combined with the VR Cover interface, it stops all light leakage. I often leave a tiny gap, though, so I can see a little of the real world when looking down. This lets me start a workout on my watch, for example, without lifting the headset. I can barely see anything, but it's enough to tap the right icon, while external light remains invisible until I look all the way down.
Prescription lenses fitted to the headset
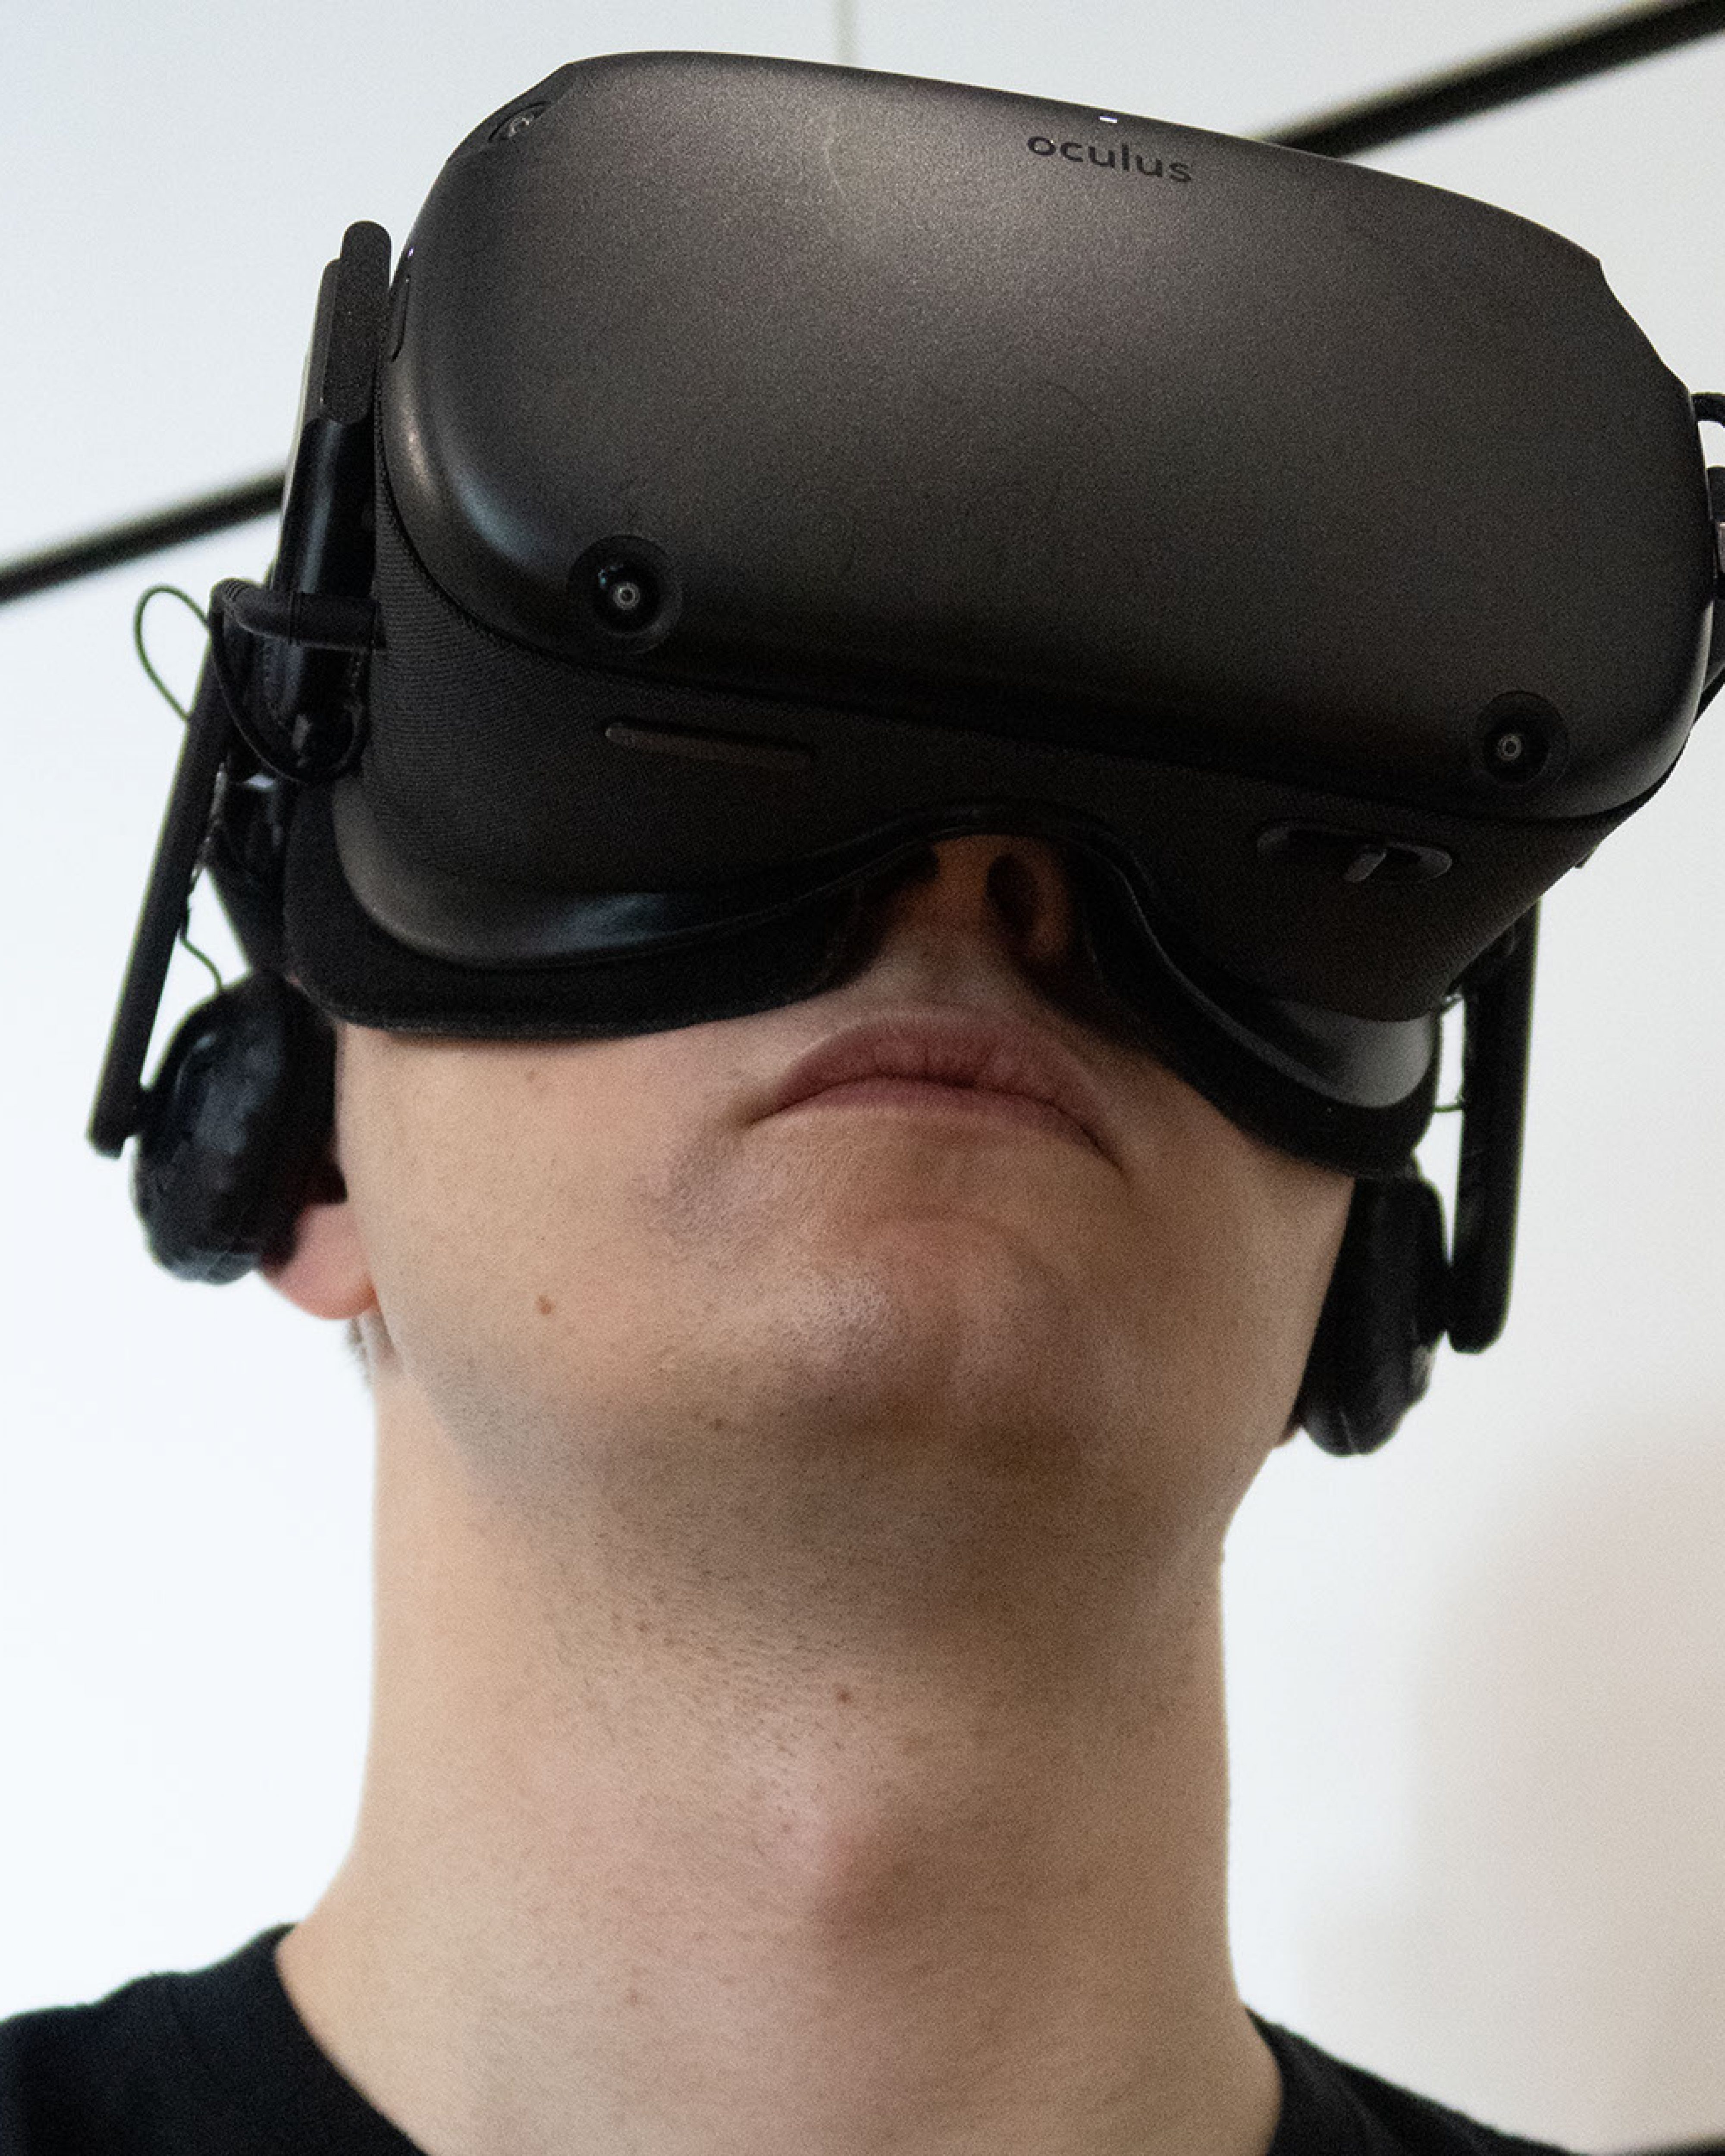
Glasses may be no problem at all, or they may make putting the headset on and taking it off difficult every time, especially with large frames and a comfort-enhancing facial interface. Some people also have trouble with their glasses touching the VR headset's lenses and scratching them.
The solution to every glasses wearer's problem is a set of prescription lenses placed over the VR headset's optics. The Quest, like probably every headset currently in production, is designed to accept them without difficulty. What's more, one of the better-known companies making prescription VR lenses is WidmoVR from… Poland. Regardless of the company, the cost is always similar: around $100 for a pair of lenses, about the same as good-quality eyeglass lenses.
My eyesight doesn't require glasses in VR, at least for now. Once image quality reaches the level of the real world, I'll buy lenses for the headset. But they definitely won't be a blue-light-blocking version, which several companies offer at an extra cost. The Quest can display a warmer, yellow image anyway, so there's no need to do it with lenses, even before bed. At some point I need to write about how monitor manufacturers fool customers by advertising blue-light blocking as a feature. Pro tip: almost every monitor has this function, even models from several decades ago.
AMVR Stand
It's a universal stand for all kinds of VR headsets. Depending on the model you use, you can assemble the stand slightly differently. The manual shows how to do this for all the most popular VR headsets.
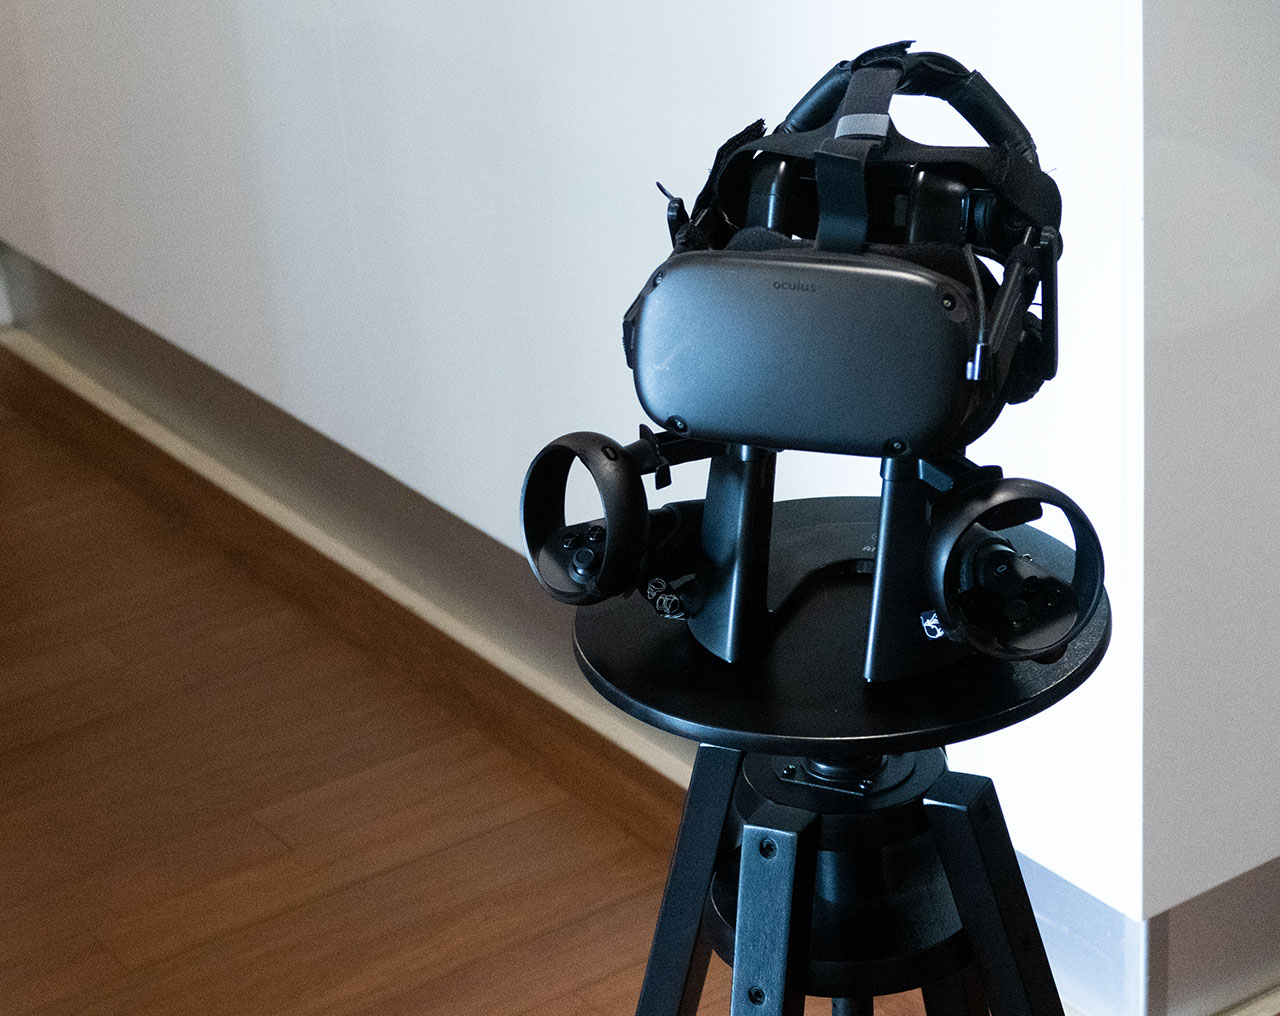
The stand works very well for me, and placing and removing the headset and controllers is effortless. It also doesn't activate the headset's proximity sensor, so you don't have to give up automatic sleep and wake, as you do with many stands. That wasn't an option for me—it's far too convenient a feature to abandon.
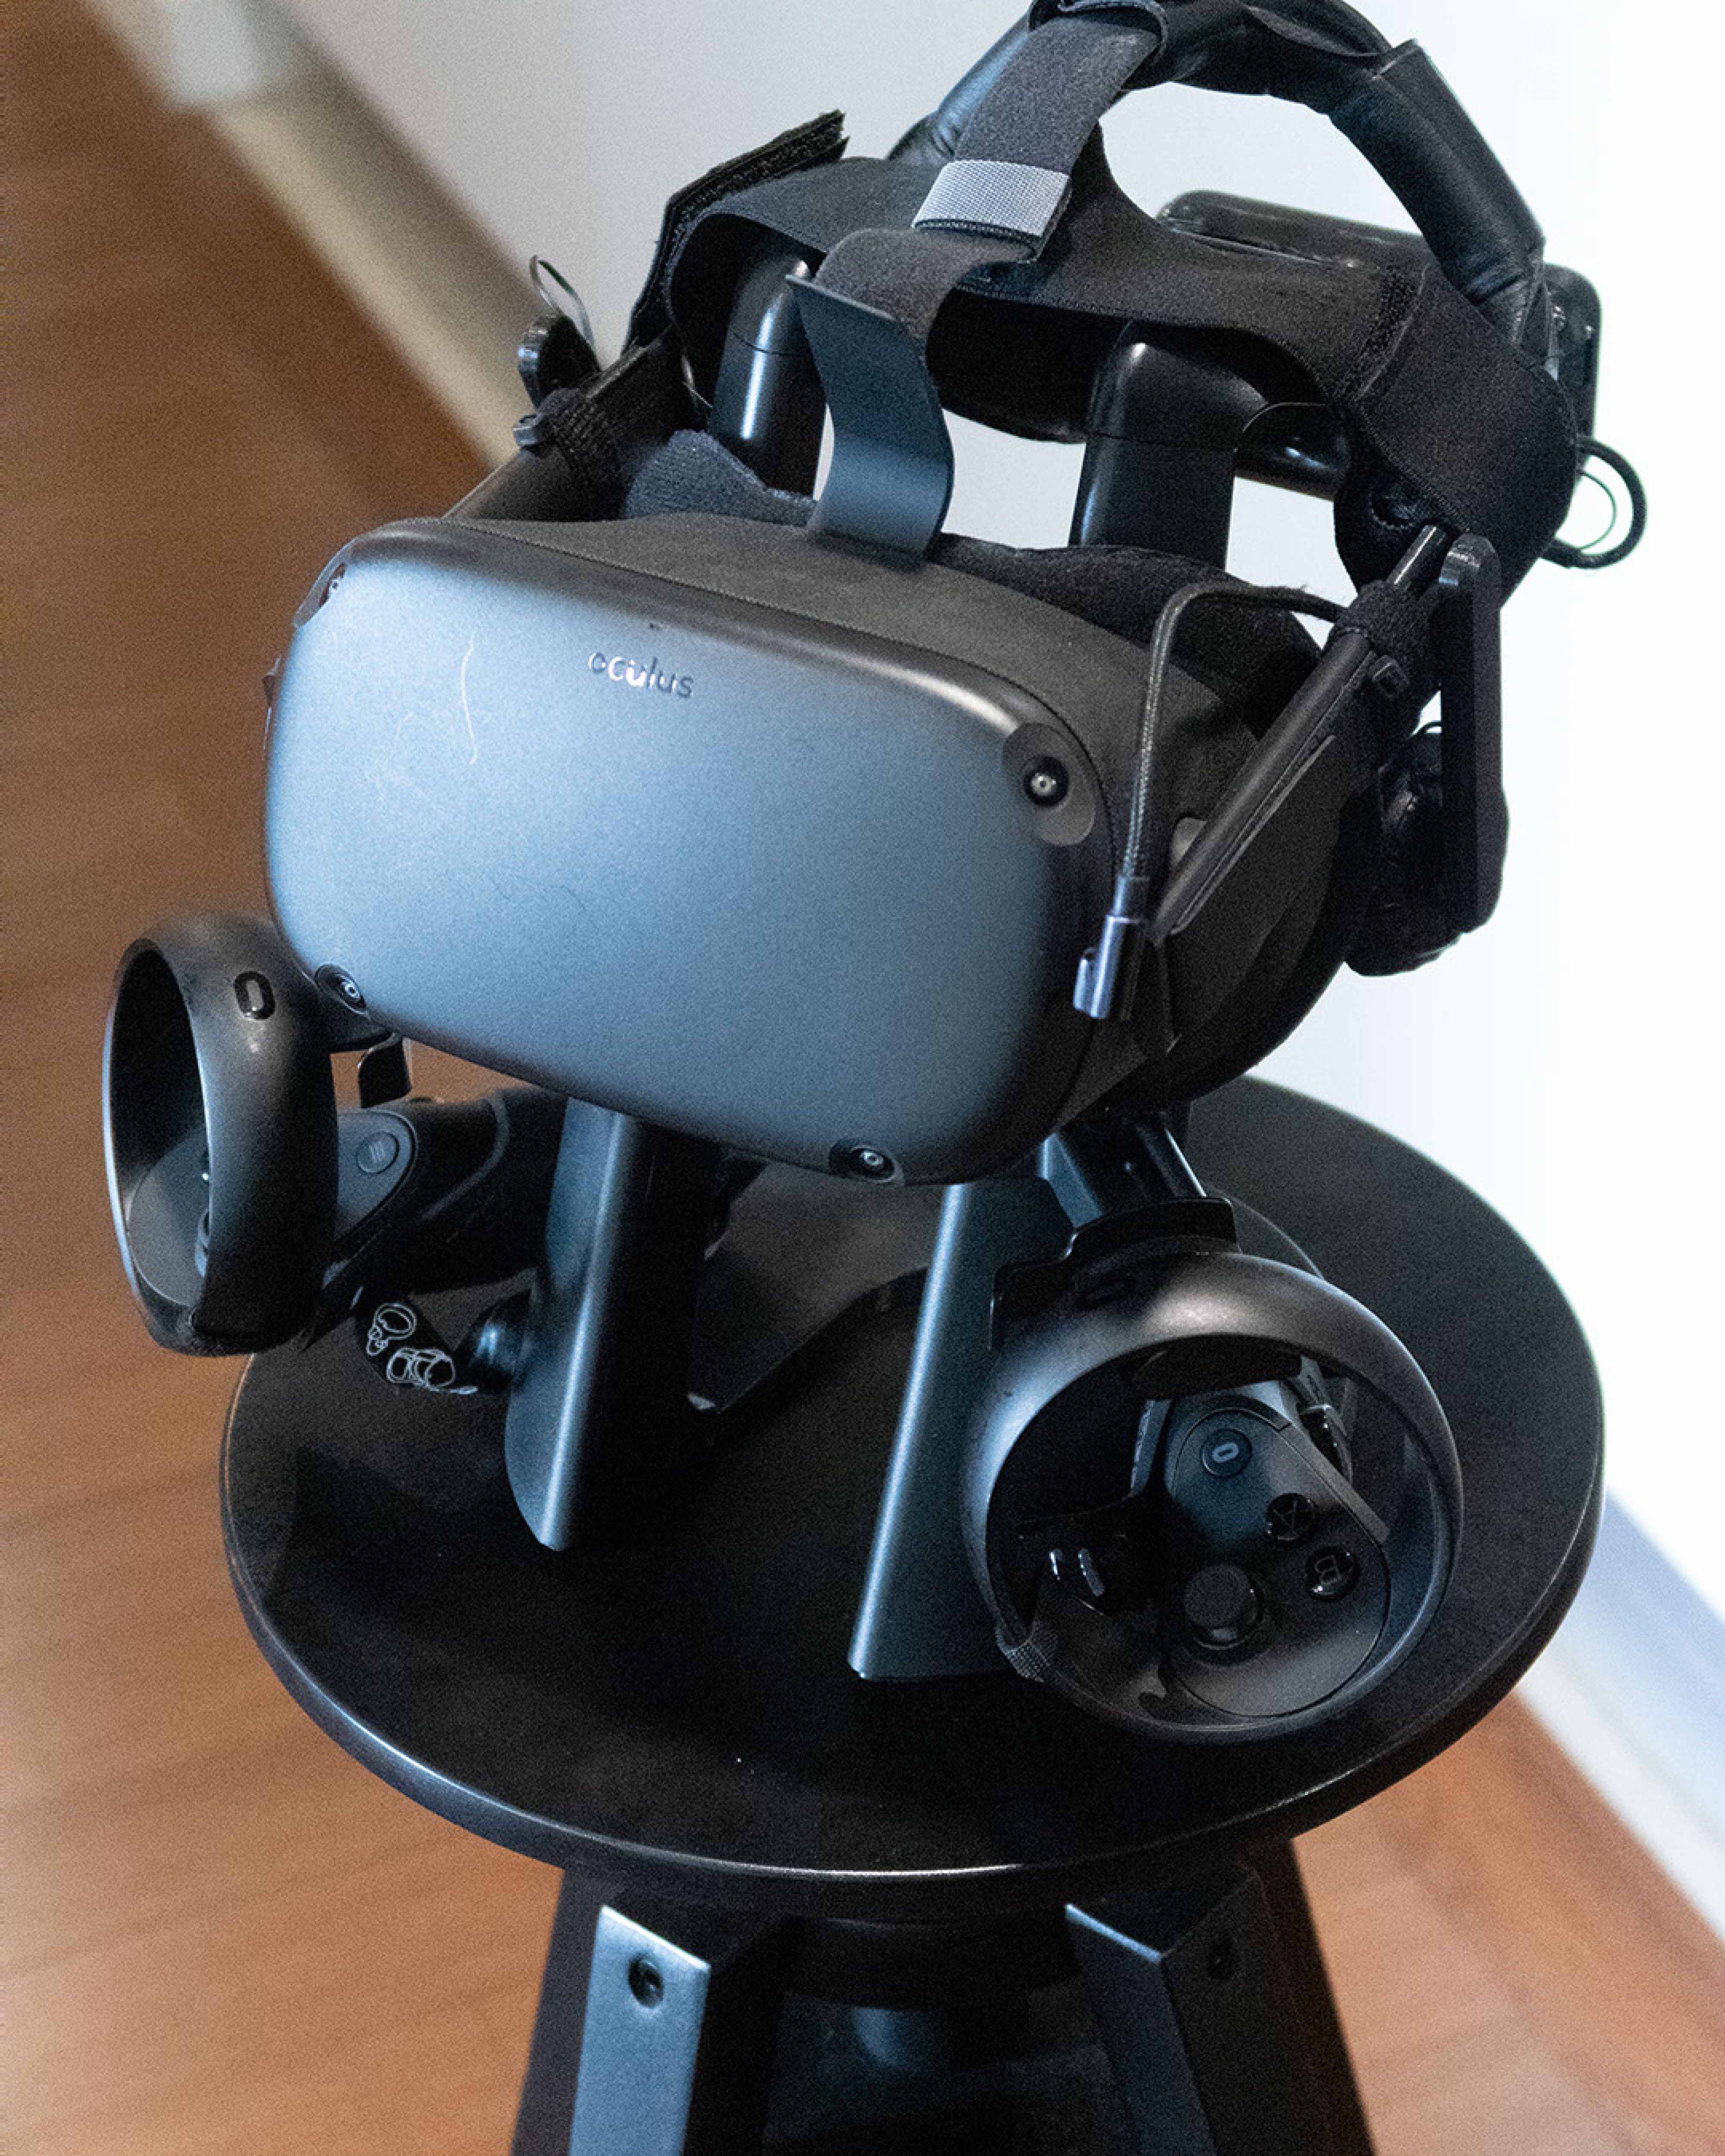
I bought the AMVR Stand only after finishing my Quest mods, and the part that supports the front of the headset is unnecessary in my setup. Because I use the thickest VR Cover parts, the headset doesn't hang as low as it normally would. The whole thing remains stable without that support. The instructions show the controllers mounted with the grips facing outward, but you can face them inward too. That takes up much less space and doesn't look as strange.
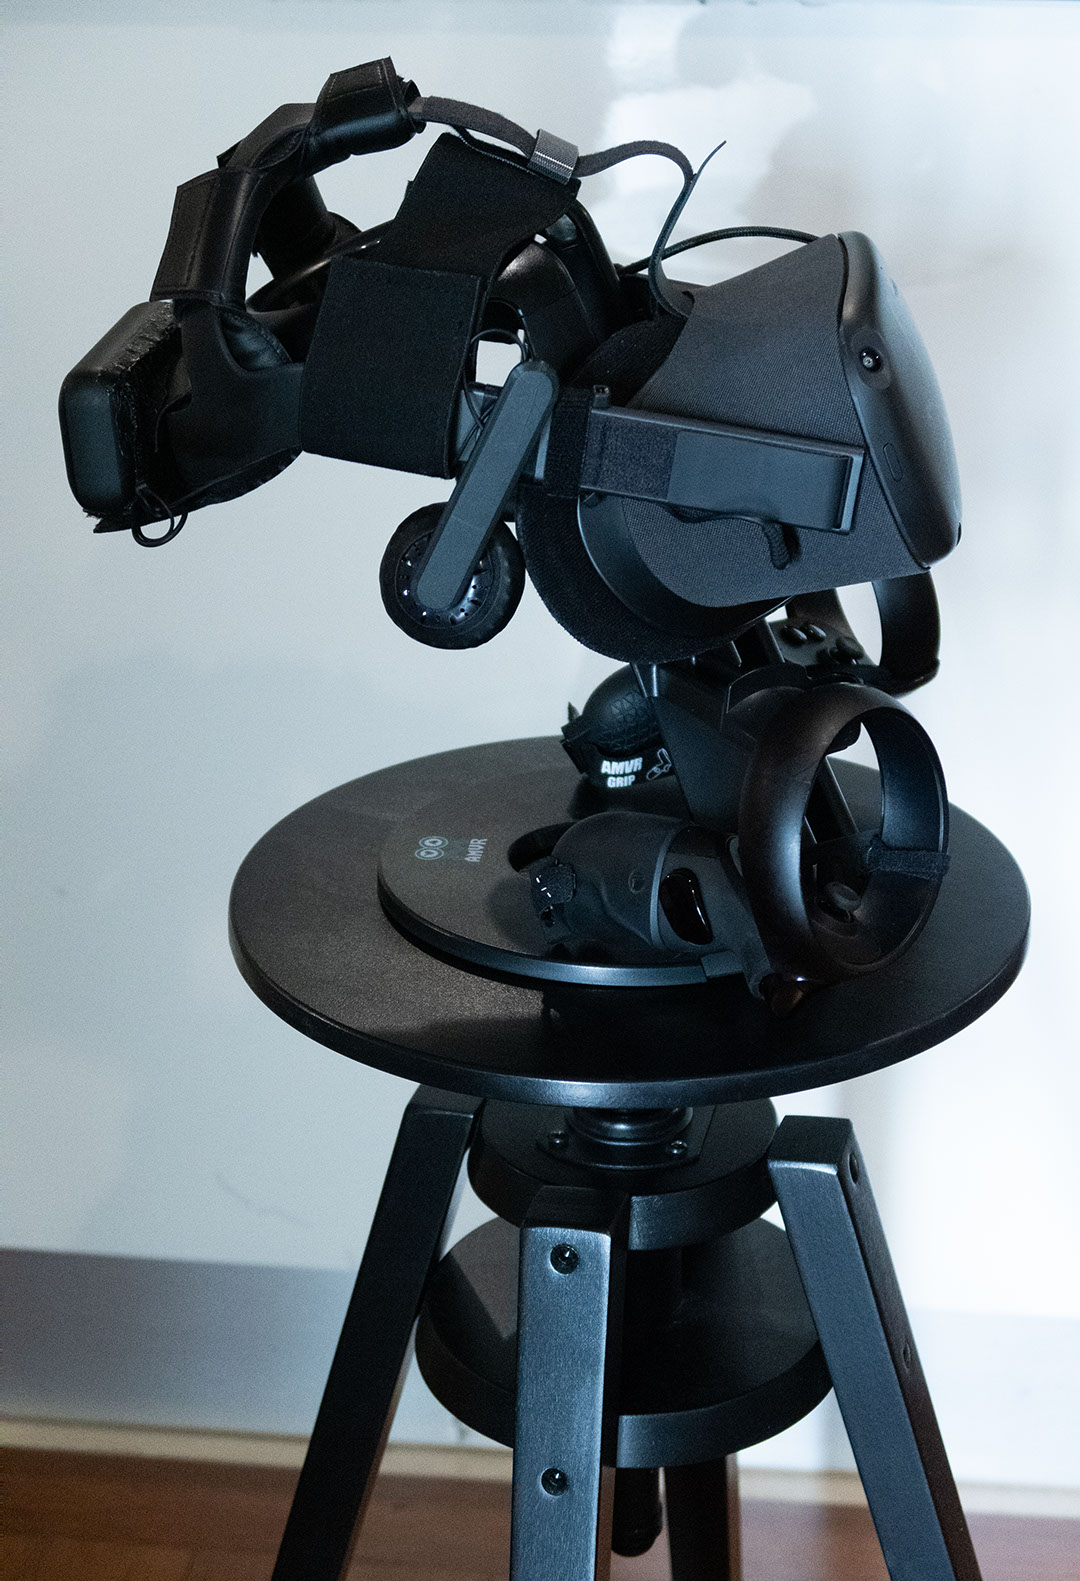
I think this stand is sold under various brands, as often happens with Chinese products, and it's usually available without a brand name. I ordered mine in Thailand for around PLN 40 from a listing with no branding at all, but an AMVR-branded product arrived, complete with the company's packaging, brochure, and logo.
Batteries/rechargeable batteries
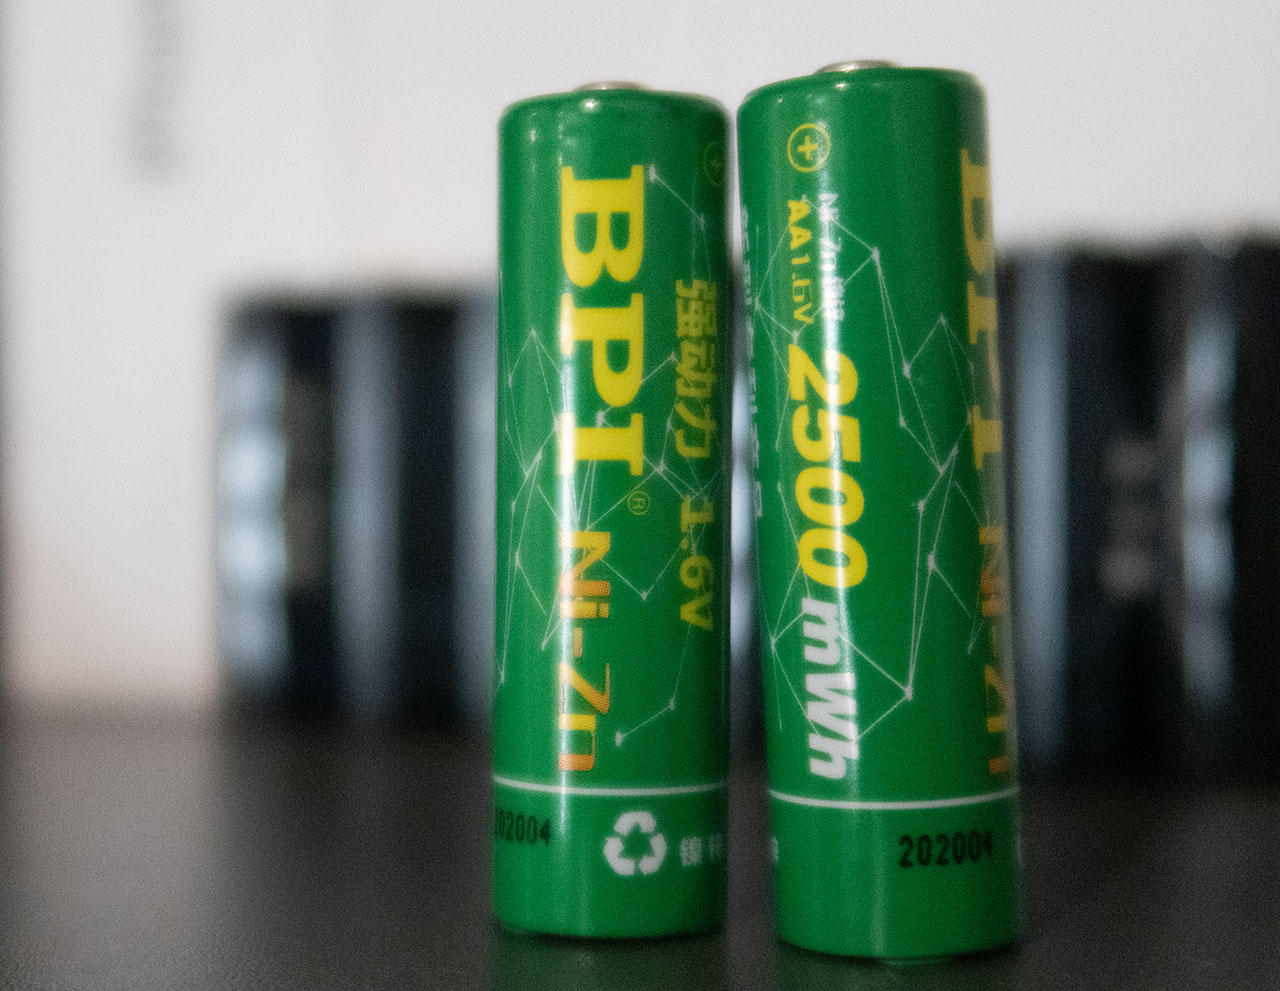
Finally, I'll add that Eneloops are absolutely not the best rechargeable batteries for the Quest controllers. At around half capacity, tracking in Beat Saber becomes noticeably worse, so I was charging them two or three times a week. You probably won't notice a difference below Expert difficulty, but if you get as invested in Beat Saber as I did, you won't be thrilled with Eneloops. In Windows Mixed Reality controllers, Eneloops have a different problem: at the point when tracking quality drops on the Quest, WMR reports them as completely drained even though plenty of charge remains. I eventually bought Ni-Zn rechargeable batteries recommended specifically for controllers like these because their lowest voltage is 1.6 V. Unfortunately, that means the charge level isn't displayed—they always appear full.
That's it
I can use a Quest modified this way for hours, while I'd had enough of the stock version after only a short while. The facial interface dug into my face, the top and back of my head hurt, and the whole thing felt heavy, even though I've spent long hours in motorcycle helmets several times heavier without any discomfort. Not everyone complains this much about the stock Quest's comfort; it fits some people perfectly. Still, it's nowhere near the Valve Index, and these mods made it very comfortable even for me. Fortunately, I'd read plenty about its shortcomings before buying the headset, so I purchased some of the accessories in advance and only struggled with the stock Quest briefly. I recommend that everyone do the same: order a facial interface and top strap right away, attach any counterweight around 200–300 g, and choose the rest according to your own preferences. Extensive modding seems unnecessary if you play for only 30 minutes a day.