

In July 2011, I didn’t do photo shoots very often, and certainly organized them less frequently than I do now. I didn’t do beauty photography at all, except for one exception done as a test (which wasn’t very successful, by the way…). At that time, I realized that to take such photos, I needed a boom stand.
I already knew that beauty and fashion were the direction I had to go in. First, I decided to work on beauty because it’s easier to organize such shoots and… I haven’t found a stylist for fashion yet.
Long, long ago…
Both beauty and fashion require a team, you can’t do it alone. A makeup artist, Karolina Zientek, who you already know, lived a few kilometers away from me and was the one I wanted to work with the most. I had been following her portfolio for a long time, and it was hard for me to imagine a higher level of skill than what she presented (now it’s even harder). When a friend asked me to organize two photo shoots, I gave him a condition that I would do them only if Karolina did the makeup – that’s how I met her.
Six months later, just before midnight, the phone rang. It was Karolina; she said that the next day she would be doing makeup that was going to be featured in the magazine “Make-Up Trendy” – in the afternoon we had to do a beauty shoot and several photos showing the individual stages of the makeup, then edit those photos and… send them to the editorial office the same day, because that’s the deadline :). Just when I thought I had talked her out of it, saying that it couldn’t be done, she talked me into it, saying that it could be done… The next day we did the shoot.
The shoot
Klaudia Danch posed for us. When Karolina started doing her makeup, I set up a makeshift studio in a hair salon that was in the same building. There wasn’t much to set up – at that time, all my equipment fit in one backpack (I miss it more and more over time…). I had one modifier – a transparent umbrella and three or four speedlights worth $45 each (YoungNuo YN-460II). Setting up everything (including covering the mirrors with blinds) took about 3-5 minutes in total. This is the main argument for why I’m increasingly leaning towards returning to a similar setup (just slightly more advanced).
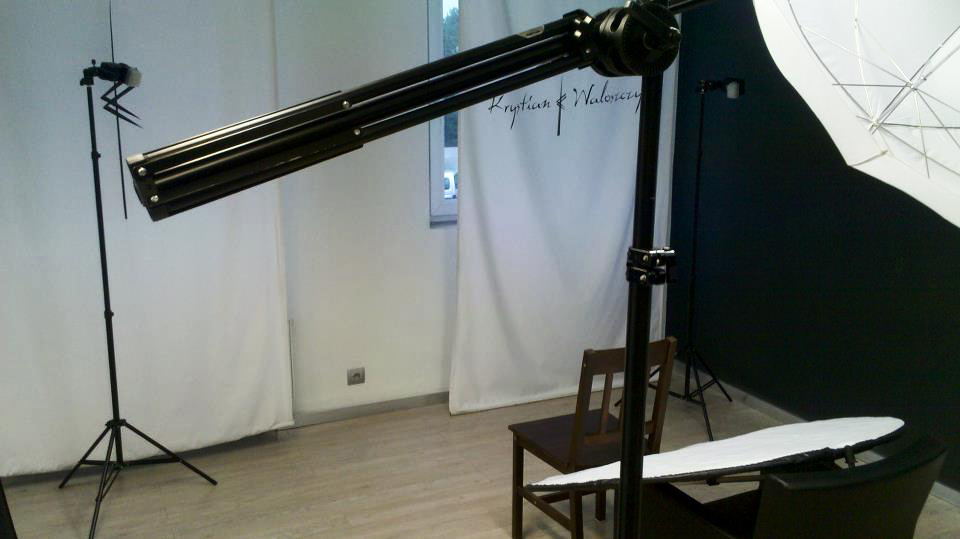
It looked like this:
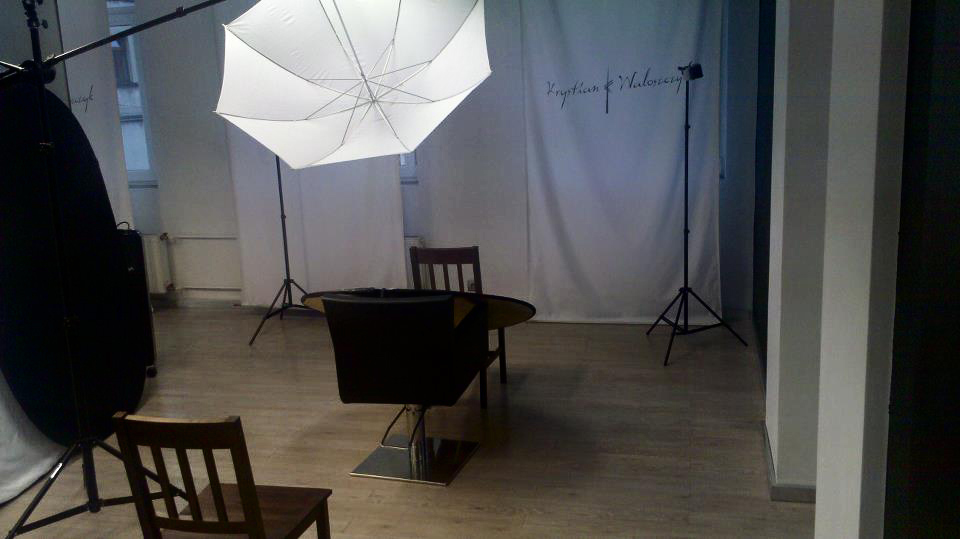
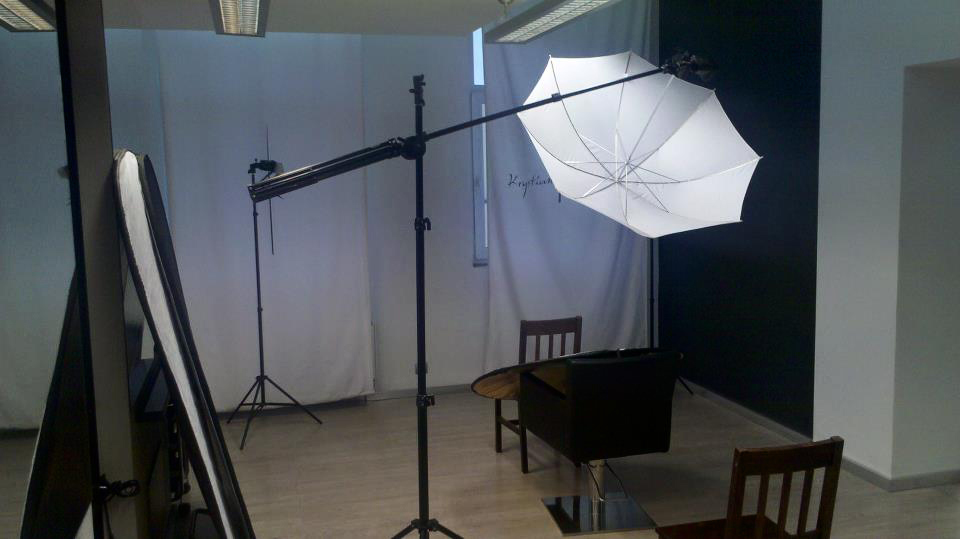
This construction, on which a lamp with an umbrella is mounted, is my first boom stand. I made it from some cheap and unfortunately poor lighting tripod and a second, even cheaper and worse one. I connected them with a plastic holder that was supposed to hold a boom for a sun reflector. A terrible mess. Both the holder and the entire construction.
It worked with the speedlights Later, however, I bought a studio lamp and decided to mount it on this… together with a 70 cm beauty dish. I don’t think I have to say that it wasn’t light. In addition, a counterweight in the form of makeup artist and model bags. You wouldn’t believe how much a woman’s bag can weigh… I still don’t know how it happened that no one was killed under all of this. The tripod that served as a boom arm bent completely, and the one on which everything was attached was sagging under the weight of it all. So I had to tape it every time after setting the appropriate height. I mentioned in earlier posts that duct tape is a basic photographic accessory, didn’t I?
In the end, I replaced it with a normal boom stand (when the mount broke so badly that even tape couldn’t help), but the above one worked great on the photo session I’m describing today. With the speedlights and umbrella, it didn’t cause any problems because it didn’t weigh anything. We didn’t even need to put on counterweights. Besides, it was his first session, so it hadn’t had time to take on the shape of a banana yet.
First, I set up the lighting, then we took some photos of the individual stages of the makeup, and then it was time for the final beauty photo:

Nikon D700 | Nikkor 135mm 2D DC | F/8 | 1/200 | ISO 200
The setup was already shown earlier – the main light was a parasol on a boom. I set up two bare flashes behind the model (they had diffusers on, but they did almost nothing). There was also a white sun reflector filling in the shadows from below. So one of the most popular setups, called clamshell, was created.
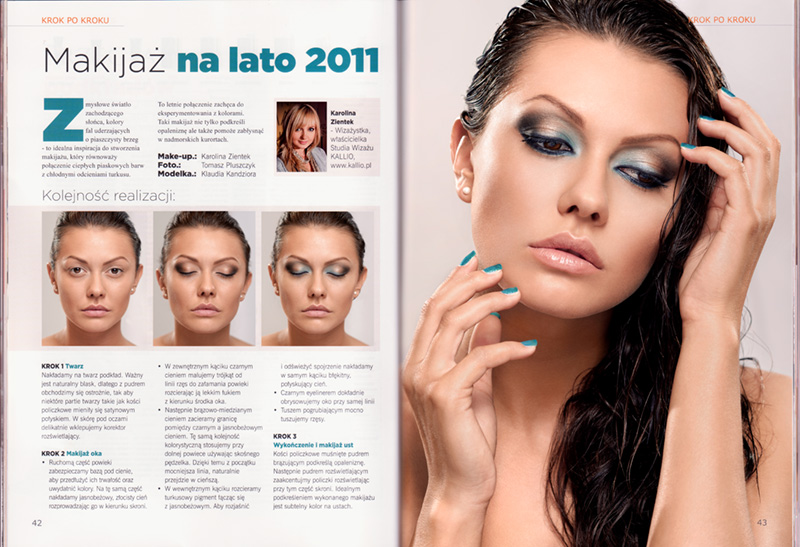
However, a different photo was sent to the magazine, although it was taken with the same arrangement of lights. You’ve probably heard that many photographers only choose photos a few days after the photo shoot. Right after the session, the choice often falls on poor photos. Only a second look allows you to see the details that disqualify certain photos. I had the same problem for a long time. Besides, I still prefer to choose the best shots calmly, even a week after the session. At that time, I still didn’t know what to pay attention to, so I couldn’t choose a good photo… In the end, I gave Karolina the final say to make sure the makeup was clearly visible. We sent the following photo to the magazine:

Nikon D700 | Nikkor 135mm 2D DC | F/8 | 1/200 | ISO 200
Now I definitely wouldn’t choose this photo – I don’t like the bottom part at all.
In the magazine, it looked like this:
Summary
The photos were sent on time, although it wasn’t easy because by the time I sat down in front of the computer, it was already late afternoon. However, I managed to make it. In the end, we were told that the photos could only be sent the next day, so just in case, I didn’t sleep that day doing the final touches :).
I took photos for the next issue with much more experience in beauty photography.